Have you just bought a beautiful Himalayan salt lamp and can’t wait to set it up? Assembling your lamp might seem tricky at first, but it’s easier than you think.
Imagine the warm, soothing glow filling your room, creating a calm and cozy space just for you. In this guide, you’ll discover simple, step-by-step instructions that anyone can follow. By the end, your lamp will be ready to light up your home—and your mood.
Keep reading to learn exactly how to bring your Himalayan salt lamp to life.
Choosing The Right Salt Lamp
Choosing the right Himalayan salt lamp is key to enjoying its beauty and benefits. The right lamp fits your space and meets your needs. Salt lamps come in different types, sizes, and qualities. Knowing these helps you pick one that lasts and looks great.
Types Of Himalayan Salt Lamps
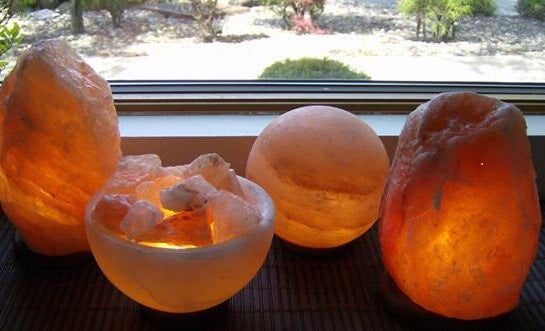
Himalayan salt lamps come in many styles. The classic type is a solid salt rock with a light inside. Some lamps are carved into shapes like spheres, hearts, or animals. Others combine salt crystals with wood or metal bases for a modern look. Each type gives a different glow and ambiance.
Size And Shape Considerations
Size matters for how much light the lamp gives. Small lamps work well for desks or nightstands. Larger lamps suit living rooms or bedrooms. The shape affects how the light spreads. Round lamps give soft, even light. Chunky, irregular shapes create a natural, rustic feel. Choose a size and shape that fits your room and style.
Checking For Quality And Purity
Good salt lamps come from pure Himalayan salt deposits. Look for lamps with a deep pink or orange color. Avoid lamps that look white or too pale. These may be less pure. The lamp should feel solid and not crumble easily. Check that the light bulb and wiring are safe and fit well. Quality lamps last longer and work better.

Credit: www.thesaltlampshop.com.au
Preparing The Workspace
Preparing your workspace is the first step in assembling a Himalayan salt lamp. A clean and organized space makes the process simple and safe. It helps avoid accidents and keeps your lamp in perfect condition.
Take time to gather all needed tools and set up a stable area. This prepares you to focus on the lamp assembly without distractions.
Gathering Necessary Tools
Collect all tools before you start. Typical items include a screwdriver, electrical tape, and a small brush. Have these close to avoid interruptions. Double-check the lamp package for any special parts.
Selecting A Safe Surface
Choose a flat, sturdy surface to work on. Avoid slippery or uneven tables. A solid surface prevents the lamp from tipping over. Cover the area with a soft cloth to catch dust and protect the lamp base.
Cleaning The Lamp Base
Wipe the lamp base with a dry cloth. Remove any dust or dirt that may affect assembly. Clean surfaces help secure parts firmly. Avoid using water or wet cloths to prevent damage.
Assembling The Lamp Components
Assembling the lamp components is the next step after unboxing your Himalayan salt lamp. This process brings the lamp to life and prepares it for use. Proper assembly ensures safety and long-lasting performance. Follow the steps carefully to complete your lamp setup.
Installing The Light Bulb
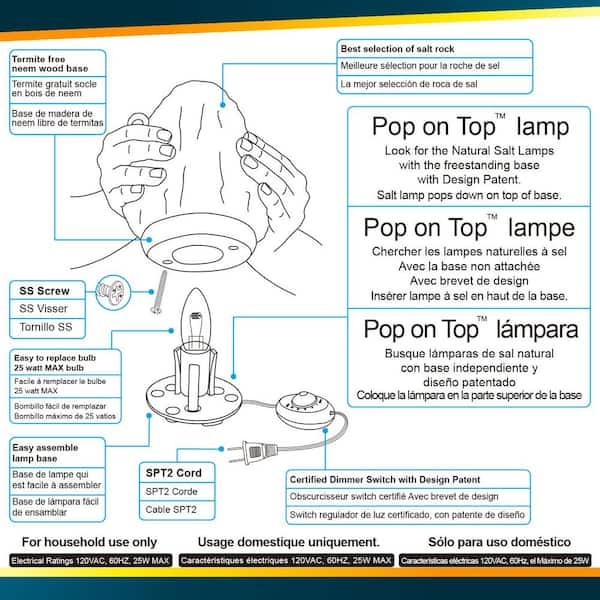
Start by selecting the right bulb for your lamp. Most Himalayan salt lamps use a small incandescent bulb. Carefully screw the bulb into the socket at the lamp base. Make sure it fits snugly but do not force it. A secure bulb provides the warm glow you expect.
Attaching The Electrical Cord
Connect the electrical cord to the lamp base. This cord powers the bulb inside the salt crystal. Align the plug with the socket and press firmly until it clicks. Check that the cord is tight and stable. A loose connection can cause flickering or power loss.
Securing The Salt Crystal
Place the salt crystal over the lamp base carefully. The crystal should sit evenly and cover the bulb completely. Some lamps have screws or clips to hold the crystal in place. Tighten these gently to avoid cracking the salt. A secure crystal keeps the lamp safe and steady.
Credit: www.homedepot.com
Testing The Lamp
Testing the Himalayan salt lamp is an important step after assembly. It ensures the lamp works safely and looks great. This step helps you enjoy the soft, warm light the lamp provides. Follow these simple checks to confirm your lamp is ready to use.
Powering On For The First Time
Plug the lamp into a power outlet carefully. Switch it on and watch the light glow gently. The bulb should shine without flickering or dimming. If the lamp does not light up, check the bulb and wiring. Replace the bulb or adjust the connection if needed.
Checking For Stability And Safety
Place the lamp on a flat, sturdy surface. Make sure it does not wobble or tilt. The base should hold the salt block firmly in place. Check the cord for any damage or loose parts. Ensure the lamp is away from water and flammable objects.
Adjusting For Optimal Glow
Move the lamp closer or farther from walls to see the glow better. You can adjust the bulb wattage for a brighter or softer light. Rotate the salt block slightly to find the best light effect. The goal is a warm, calming glow that fills the room gently.
Maintaining Your Salt Lamp
Maintaining your Himalayan salt lamp ensures it lasts longer and works well. Proper care keeps the lamp glowing and clean. It also protects the salt from damage. Follow simple steps to keep your lamp in top shape.
Cleaning Tips
Unplug the lamp before cleaning. Use a dry or slightly damp cloth. Avoid using water directly on the salt. Wipe gently to remove dust and dirt. Never use harsh chemicals or cleaners. Dry the lamp fully after cleaning.
Preventing Moisture Build-up
Salt lamps can attract moisture from the air. Keep the lamp in a dry place. Avoid placing it near windows or humid areas. Turn the lamp on often to keep it warm. Warmth helps prevent moisture from building up.
Replacing The Bulb
Unplug the lamp before changing the bulb. Remove the base carefully. Use the right bulb type and wattage. Insert the new bulb properly to avoid damage. Test the lamp before replacing the base.
Credit: www.thesaltlampshop.com.au
Frequently Asked Questions
How Do I Assemble A Himalayan Salt Lamp Safely?
To assemble safely, place the salt crystal on the wooden base. Insert the bulb holder carefully. Connect the electrical parts without forcing. Always follow the manufacturer’s instructions to avoid damage or injury.
What Tools Are Needed To Assemble A Salt Lamp?
Most lamps require no special tools. You may need a small screwdriver to secure the bulb holder. Always check your lamp kit for included tools and parts before starting assembly.
How To Replace The Bulb In A Himalayan Salt Lamp?
Unplug the lamp before replacing the bulb. Remove the salt crystal carefully. Unscrew the old bulb and replace it with a compatible one. Reassemble the lamp and test it.
Can I Use Any Bulb For My Salt Lamp?
Use only the recommended wattage and type specified by the manufacturer. Using incorrect bulbs can cause overheating or damage. Always check your lamp’s instructions for the right bulb.
Conclusion
Assembling a Himalayan salt lamp is simple and fun. Follow the steps carefully for the best results. Make sure all parts fit well and the bulb works. A properly assembled lamp adds warmth and calm to any room. Enjoy the soft glow and natural beauty it brings.
Keep the lamp clean and dry for long use. Now, you can create a cozy space with your salt lamp. Small effort, big comfort. Give it a try today!