Are you tired of your artificial Christmas tree looking flat and lifeless? You’re not alone.
Many people struggle with shaping the branches to make their tree look full and natural. The good news is, with a few simple steps, you can transform your tree into a stunning centerpiece that will wow your family and guests.
You’ll discover easy techniques to shape your artificial Christmas tree branches like a pro. Keep reading, and get ready to bring your tree to life!
Choosing The Right Tree
Choosing the right artificial Christmas tree is key to shaping its branches well. The tree’s type and branch quality affect how easy it is to fluff and style. Picking a tree with flexible branches makes decorating smoother and the tree fuller. Consider the tree’s design and branch material before buying.
Types Of Artificial Trees
There are several types of artificial trees available. PVC trees have plastic needles and are budget-friendly. They often have stiff branches that need gentle bending. PE trees use molded plastic tips that look more natural. Their branches are usually thicker but less flexible. Some trees combine PVC and PE for a balanced look and feel. Hinged trees have branches fixed to the trunk, making setup faster. Sprig trees have separate branches to attach, allowing more shaping control.
Branch Flexibility Factors
Branch flexibility depends on the wire inside the branches. Thicker wire means firmer branches that hold shape better but are harder to bend. Thin wire offers more bend but may droop over time. The branch tips also affect flexibility; soft needles move easily, while stiff tips resist shaping. Quality trees use balanced wire thickness for easy fluffing and lasting shape. Check if branches bend smoothly without breaking or feeling too loose. Flexible branches let you create a natural, full tree look.

Credit: www.youtube.com
Preparing Your Workspace
Preparing your workspace is the first step to shaping branches on an artificial Christmas tree. A clean and organized area helps you work faster and safer. It makes the process more enjoyable and less stressful.
Take a little time to set up before you start. This way, you avoid distractions and interruptions. Your workspace should be bright and spacious enough for the tree and your tools.
Clearing Space
Clear the area around your tree completely. Remove any furniture or objects that might block your movement. This gives you room to walk around the tree freely.
Make sure the floor is clean and dry. This prevents slipping or tripping during the shaping process. Good lighting is important too. Natural light is best, but bright lamps work well.
Gathering Tools
Collect all the tools you will need before starting. Common tools include pliers, wire cutters, and gloves. Gloves protect your hands from sharp branch tips.
Keep a small step stool nearby if your tree is tall. Have a trash bag or box ready for old needles or debris. Organize your tools within easy reach to save time.
Initial Branch Arrangement
Shaping branches on your artificial Christmas tree starts with the initial arrangement. This step sets the base for a full and natural look. Proper handling helps branches spread evenly and look lively. Take your time to avoid damage and create a balanced shape.
Each branch needs gentle attention. The goal is to make the tree look as close to a real one as possible. A good start saves effort later and improves the overall appearance.
Unpacking Tips
Open the box carefully to avoid bending branches. Remove the tree slowly, holding the trunk steady. Place the tree in a clear area for easy access. Keep the branches folded during transport to protect them.
Check for any damaged parts before arranging. Keep the instruction manual nearby for guidance. Unpack in a clean space to avoid losing small parts.
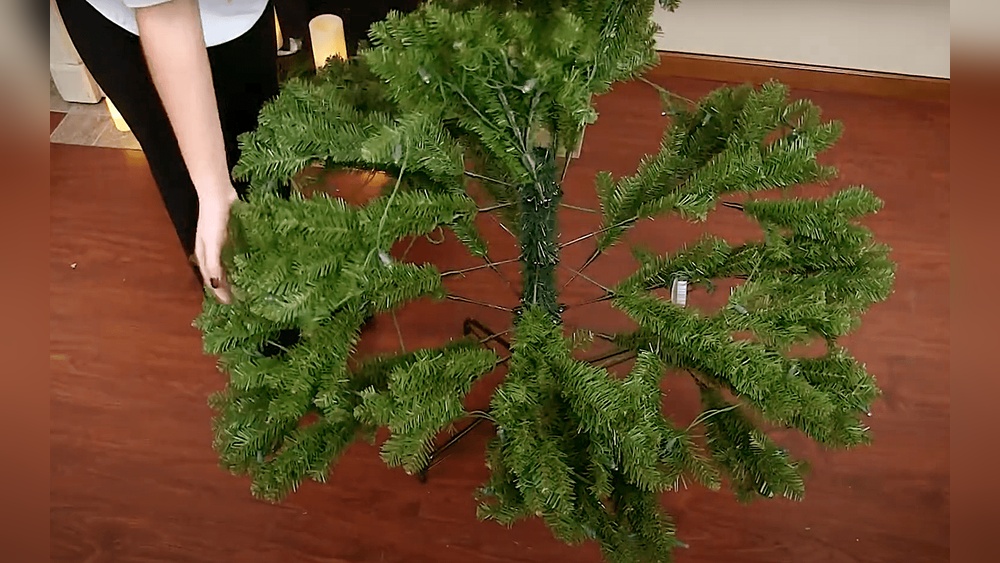
Spreading Out Branches
Begin by loosening the top branches first. Gently pull each branch outward and downward. Avoid pulling too hard to prevent damage. Spread branches evenly around the trunk for a full look.
Work from top to bottom for better control. Adjust the branches to fill empty spots. Fluff each branch by separating needles with your fingers. This creates a natural and lush appearance.
Credit: www.youtube.com
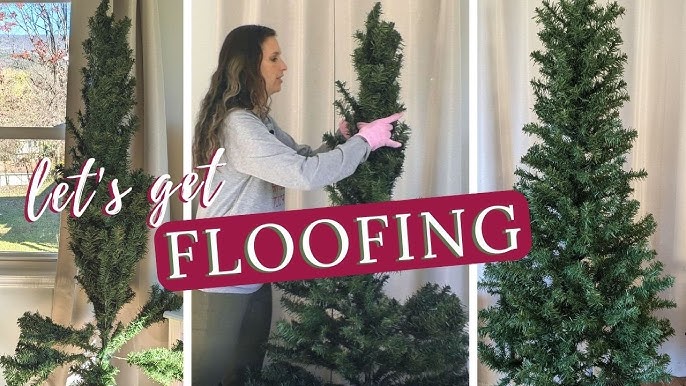
Shaping Techniques
Shaping the branches of an artificial Christmas tree helps it look natural and full. Good shaping brings out the tree’s best form. It also makes decorating easier and more fun. Follow simple shaping techniques for a beautiful holiday centerpiece.
Bending Branches Naturally
Start by gently bending each branch outward. Hold the branch near the base and curve it softly. Avoid sharp bends that can break the branch. Move slowly to create a natural, flowing shape. Work from the bottom up to keep the tree balanced. This method gives the tree a lively and fresh look.
Creating A Full Look
Fluff each branch by spreading the tips apart. Fill empty spots by adjusting inner branches. Push branches up or down to cover gaps. Layer branches carefully to add depth. This technique makes the tree look dense and lush. A full tree holds decorations better and looks more festive.
Avoiding Common Mistakes
Do not force branches into odd angles. Avoid bending branches too far; they may break. Don’t forget to check the tree from all sides. Uneven shaping can make the tree look strange. Handle branches gently to keep them intact. Careful shaping ensures a safe and pretty tree.
Enhancing Tree Appearance
Shaping the branches of an artificial Christmas tree gives it a fresh, full look. A well-shaped tree looks natural and inviting. It creates a perfect base for decorations. Proper shaping helps the tree fill empty spots and look balanced.
Taking time to shape each branch can make a big difference. It brings life and charm to your holiday space. Small steps in fluffing and balancing can transform your tree.
Fluffing Tips
Start by gently pulling apart each branch tip. Spread the needles out to create fullness. Avoid pressing down the branches. This keeps them looking soft and natural. Fluff every branch for even coverage. Use your fingers to shape the tips in different directions. This adds depth and texture to the tree.
Balancing Branch Density
Look at your tree from all sides to check branch fullness. Fill any gaps by bending branches slightly upward or downward. Move branches closer or farther from the center pole. This creates a balanced shape. Avoid pushing branches too close together. Balanced density gives the tree a realistic and neat look. Keep the shape round and even for best results.
Maintaining Shape Over Time
Keeping your artificial Christmas tree branches in good shape takes care and attention. Over time, branches can bend or lose their original form. This affects how your tree looks each holiday season. Maintaining the shape helps your tree stay full and fresh. It also makes decorating easier and more enjoyable.
Storage Tips
Store your tree in a cool, dry place. Avoid damp areas to stop mold and mildew. Use the original box or a special tree storage bag. Wrap branches gently to prevent bending. Lay the tree flat or stand it upright without pressure. Keep heavy items away to avoid crushing branches. Clean the tree before storing to remove dust and dirt. Proper storage keeps branches firm for years.
Touch-up Techniques
Fluff branches before setting up the tree. Separate needles with your fingers to fill gaps. Bend wire branches gently back into shape. Use a hairdryer on low heat to soften stiff branches slightly. Press and mold branches to the desired form. Remove any bent or broken needles carefully. Small fixes keep your tree looking new. Regular touch-ups save time during the busy season.

Credit: www.walmart.com
Frequently Asked Questions
How Do I Shape Branches On An Artificial Christmas Tree?
To shape branches, gently bend them upward or outward. Start from the bottom and work your way up. Adjust each branch for a natural look. Avoid forcing branches to prevent damage.
What Tools Help In Shaping Artificial Tree Branches?
Use your hands primarily for shaping branches. For stubborn branches, soft gloves can protect your hands. Avoid using sharp tools to prevent branch damage.
How Can I Make My Artificial Tree Look Fuller?
Fluff each branch by spreading needles evenly. Bend tips slightly upward for volume. Add extra branches if needed. Proper shaping creates a lush, full appearance.
When Is The Best Time To Shape Christmas Tree Branches?
Shape branches right after unpacking the tree. This allows needles to settle naturally. Early shaping ensures a better overall look before decorating.
Conclusion
Shaping branches on your artificial Christmas tree makes it look full and natural. Take your time and work gently with each branch. Small adjustments create a balanced and festive appearance. This simple step brings life to your holiday decor. Enjoy decorating a tree that feels warm and inviting.
A well-shaped tree brightens any room and mood. Keep your tree neat and beautiful all season long.