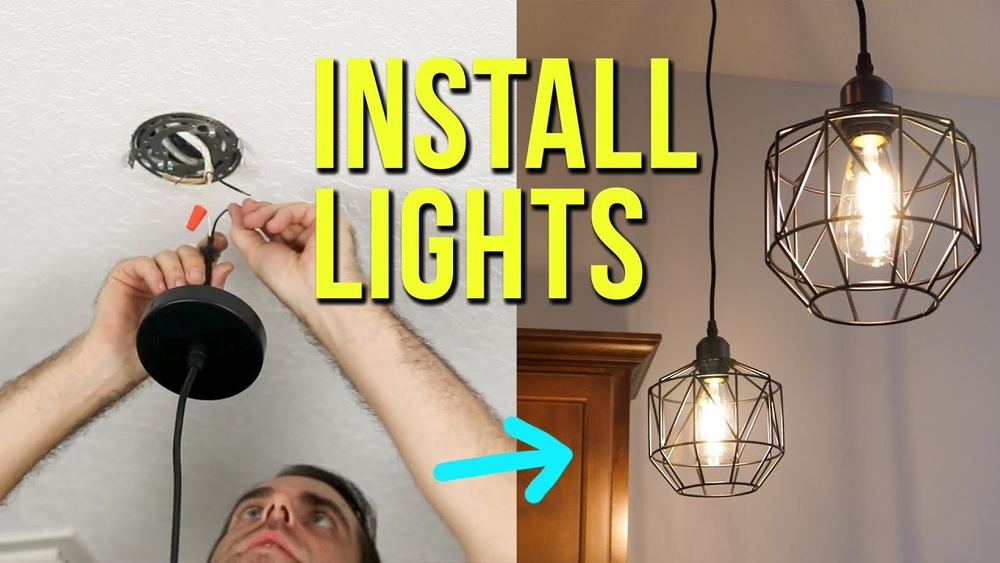
Thinking about updating your space with a new pendant light? Replacing a pendant light might seem tricky, but with the right steps, you can do it yourself quickly and safely.
Imagine transforming the look of your room in just a few simple moves. In this guide, you’ll discover exactly how to remove your old fixture and install a new one without any hassle. Keep reading, and by the end, you’ll feel confident to brighten up your home with a fresh, stylish pendant light.
Tools And Materials Needed
Replacing a pendant light requires some basic tools and the right materials. Having everything ready makes the process smooth and safe. This section covers what you need before starting the job.
Essential Tools
You need a few simple tools. A screwdriver is key, usually a flathead and a Phillips. Wire strippers help prepare the wires for connection. A voltage tester is important to ensure power is off. A ladder or step stool helps reach the ceiling. Pliers can assist in twisting wires together. Keep electrical tape nearby to secure wire nuts.
Choosing The Right Pendant Light
Select a pendant light that fits your space and style. Check the size and length to suit your ceiling height. Pick a fixture with proper wattage for your room. Make sure it comes with mounting hardware. Look for a light with clear installation instructions. Choose a design that matches your home decor.
Safety Precautions
Safety is the first step before replacing a pendant light. Working with electricity can be dangerous. Taking simple precautions protects you from shocks or injury. Follow these steps carefully to stay safe.
Turning Off Power
Find the main electrical panel in your home. Switch off the breaker that controls the light fixture. Double-check that the power is off by trying to turn on the light. Never start work without cutting the power first. This stops any flow of electricity to the pendant light.
Using A Voltage Tester
A voltage tester checks if wires are live. Hold the tester near the wires after turning off the breaker. If the tester lights up or beeps, the wires still have power. Do not touch wires until the tester shows no voltage. This tool ensures no hidden electricity is present.
Removing The Old Pendant Light
Removing the old pendant light is the first step in updating your room’s lighting. It requires care and attention to avoid damage or injury. Follow simple steps to safely detach the fixture and handle the wiring connections.
Detaching The Fixture
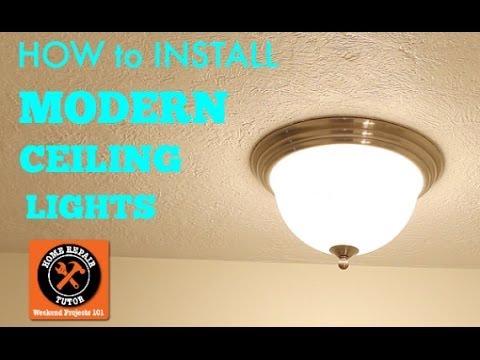
Start by turning off the power at the circuit breaker. This prevents electric shock during removal. Use a ladder or sturdy chair to reach the pendant light. Check how the fixture is attached. Usually, screws or nuts hold it in place. Remove these fasteners carefully. Hold the fixture with one hand to stop it from falling. Gently lower the pendant light and set it aside.
Handling Wiring Connections
Look at the wires connected to the light. They usually have wire nuts or connectors. Unscrew these connectors by twisting them counterclockwise. Separate the wires carefully without pulling. Note the wire colors and positions for the new light. It helps to take a photo for reference. Cap the wires with wire nuts if you stop here. This keeps the wires safe and prevents shorts.
Credit: www.youtube.com
Preparing For Installation
Preparing for the installation of a pendant light sets the stage for a smooth and safe process. Taking the right steps before you start helps avoid problems and ensures the light hangs perfectly. This preparation phase involves checking the electrical box and setting the right height and position for your new fixture.
Inspecting Electrical Box
Begin by examining the electrical box in the ceiling. Make sure it is secure and can support the weight of the pendant light. Look for any signs of damage or loose wires. A strong electrical box prevents accidents and keeps the light stable.
If the box is old or weak, replace it with a new one designed for lighting fixtures. Confirm that the wiring matches your new pendant light’s requirements. This step avoids electrical issues after installation.
Adjusting Height And Position
Decide on the best height for the pendant light. Consider the room’s size and the area where the light will hang. The right height makes the room look balanced and provides good lighting.
Mark the spot on the ceiling where the light will go. Check that the location suits the room’s layout and furniture. Adjust the cord or chain length to match the desired height before installation begins.
Installing The New Pendant Light
Installing a new pendant light brings fresh style to any room. The process is simple with the right steps. Focus on safety and careful handling to avoid problems.
Start by preparing the fixture and tools. Keep everything within reach. Follow the instructions that come with your pendant light for best results.
Connecting Wires Correctly
Turn off the power at the circuit breaker before touching wires. Use a voltage tester to confirm the power is off. Match the wires by color: black to black, white to white, and green or copper to ground.
Twist the wires together tightly and secure with wire nuts. Make sure no bare wire is showing. Wrap electrical tape around the nuts for extra safety. Double-check all connections are firm and neat.
Securing The Fixture
Attach the mounting bracket to the electrical box with screws. Align the fixture base with the bracket holes. Lift the pendant light and fasten it securely with screws or nuts.
Adjust the height of the pendant cord before tightening. Check the fixture is stable and straight. Restore power and test the light switch to ensure it works properly.
:max_bytes(150000):strip_icc()/how-to-replace-ceiling-light-fixture-1824657-02-078c80a354ee404e8ca25455b15fef14.jpg)
Credit: www.thespruce.com
Final Touches
After securing the pendant light in place, the final steps bring the project to completion. These touches ensure the light works well and looks great. Take your time to finish the job right. A well-done final step means safety and style combined.
Installing Bulbs
Select bulbs that fit your pendant light’s specifications. Check the wattage limit on the fixture to avoid damage. Screw the bulbs gently into the sockets. Make sure each bulb is tight but not over-tightened. Using the right bulbs ensures the best light quality and efficiency.
Testing The Light
Turn the power back on at the breaker or fuse box. Use the light switch to check if the pendant lights up. Watch for any flickering or dimness. These signs may indicate wiring issues or loose connections. A properly tested light guarantees safety and function before you finish.
Troubleshooting Common Issues
Troubleshooting common issues is a key step in replacing a pendant light. Problems like flickering bulbs or loose connections can stop your light from working properly. Fixing these issues helps keep your new pendant light safe and functional. This section covers simple ways to solve these problems.
Fixing Flickering Lights
Flickering lights often mean a poor connection or a bad bulb. Start by turning off the power to the light fixture. Check if the bulb is screwed in tightly. Loose bulbs can cause flickering. If the bulb is fine, try replacing it with a new one. Sometimes, flickering happens due to the type of bulb. Use bulbs that fit the fixture’s specifications. If flickering continues, the problem might be in the wiring or switch. In this case, consult an electrician for safety.
Handling Loose Connections
Loose connections can cause the light to turn off unexpectedly. Turn off the power before checking any wires. Remove the light fixture cover to access the wiring. Look for wires that are not connected well or are loose. Tighten all wire nuts and screws securely. If wires look damaged, replace them carefully. Make sure all connections match the fixture’s wiring diagram. After fixing, turn the power back on and test the light. Secure connections ensure the light works safely and steadily.
Tips For A Stunning Upgrade
Upgrading a pendant light is a simple way to change your room’s look. A stunning new light can brighten space and add style. Careful choices make the upgrade stand out. Focus on style and how it fits the room.
Small details make a big difference. Think about the shape, color, and finish of your new pendant light. These elements shape the room’s mood and feel. Choose wisely to create a beautiful, balanced space.
Choosing Style And Finish
Select a style that matches your taste and room purpose. Modern, rustic, or classic designs work well in different spaces. Pick a finish that blends with other fixtures. Matte, shiny, or textured finishes add character. Consider the size and shape to fit the room scale. A well-chosen pendant light stands out without overpowering.
Complementing Room Decor
Match the pendant light with your room’s colors and furniture. Soft tones pair well with simple designs. Bold colors suit more detailed lights. Think about the room’s function and lighting needs. Kitchen lights differ from bedroom lights in style and brightness. A pendant light that fits the decor feels natural and inviting.
Credit: www.artofmanliness.com
Frequently Asked Questions
How Do I Safely Turn Off Power Before Replacing Pendant Light?
Always switch off the circuit breaker controlling the light. Use a voltage tester to confirm no power. This ensures safety and prevents electric shock during replacement.
What Tools Are Needed To Replace A Pendant Light?
You need a screwdriver, wire stripper, voltage tester, and ladder. These tools help remove the old fixture and install the new one safely and efficiently.
How To Remove The Old Pendant Light Fixture?
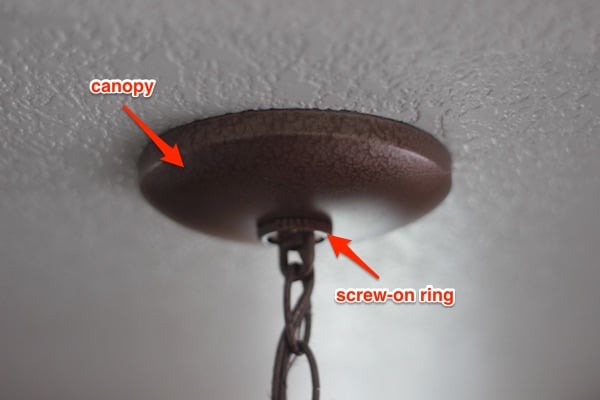
First, turn off power and remove the light bulb. Unscrew the canopy and disconnect wiring carefully. Then, take down the old fixture for replacement.
Can I Replace A Pendant Light Without An Electrician?
Yes, if you follow safety steps and have basic electrical knowledge. Turn off power, use proper tools, and connect wires correctly. Otherwise, hire a professional to avoid risks.
Conclusion
Replacing a pendant light can be simple and quick. Turn off the power first for safety. Remove the old light carefully. Connect the new fixture following the instructions. Check all wires are secure and tight. Restore power and test the new light.
Enjoy the fresh look and improved lighting. Small steps make a big difference in your home. You can handle this task with confidence. A well-lit room feels warm and inviting. Try changing other lights to update your space too.