Your artificial Christmas tree is more than just a decoration—it’s the heart of your holiday spirit. But if it looks flat or uneven, it can take away from that warm, festive feeling.
How do you fix that? By learning how to shape your artificial Christmas tree the right way. In this guide, you’ll discover simple tips and tricks that make your tree look full, natural, and ready to shine. Keep reading to transform your tree into the stunning centerpiece your home deserves this holiday season.
Choosing The Right Tree
Choosing the right artificial Christmas tree is important for shaping it well. The tree you pick affects how easy it is to shape and decorate. Consider the style and size before buying. This helps create a beautiful and full-looking tree. Understanding your options makes the process smoother and more fun.
Types Of Artificial Trees
There are many types of artificial trees. Some have plastic needles, others have PVC or PE tips. PE tips look more real but cost more. Plastic trees are lighter and easier to shape. Some trees come pre-shaped, while others have loose branches to adjust. Pick a type that matches your style and budget.
Size And Shape Considerations
Choose a tree size that fits your room space. Too big makes a room crowded. Too small can look plain. Think about the shape too. Some trees are full and wide. Others are slim and tall. The shape affects how you shape the branches. Match the tree shape to your decorating style.
Preparing Your Tree For Shaping
Preparing your artificial Christmas tree for shaping is the first step to a beautiful holiday display. This process helps your tree look full and natural. Taking time now saves effort later. Follow simple steps to get your tree ready.
Unpacking And Initial Setup
Start by carefully unpacking the tree from its box. Place it on a clean, flat surface. Remove any plastic or packaging materials. Spread out the branches gently. This prevents damage and makes shaping easier later.
Next, assemble the tree according to the instructions. Connect the sections securely. Make sure the tree stands straight and stable. This provides a good base for shaping the branches.
Checking For Damages
Inspect the tree for any broken or bent branches. Look closely at the tips and joints. Fix small bends by gently bending branches back into place. Replace any missing or damaged parts if possible.
Damaged branches can affect the tree’s overall look. Fixing issues now ensures a fuller, more natural appearance. Take your time. A well-prepared tree is easier to shape.
Step-by-step Shaping Process
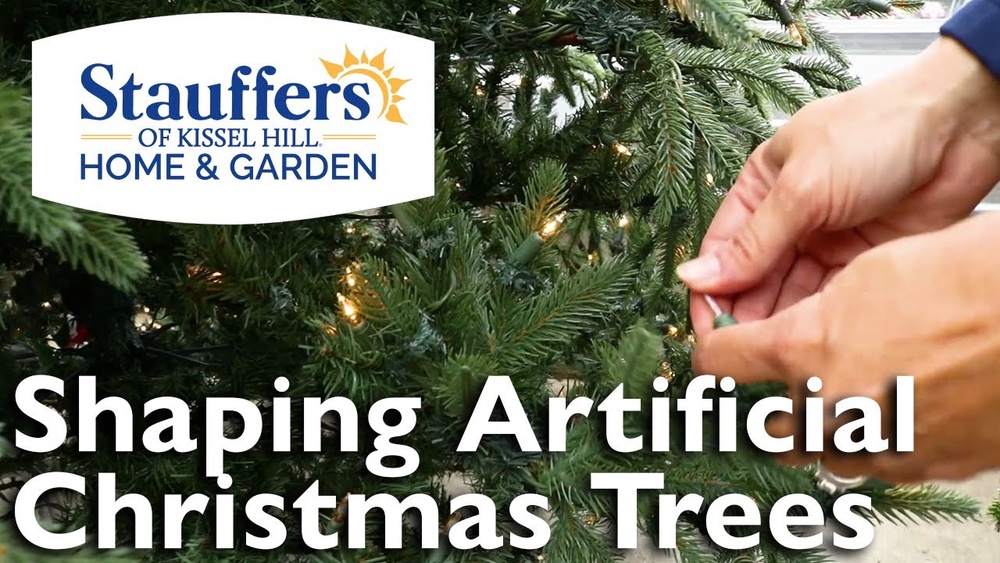
Shaping an artificial Christmas tree makes it look full and natural. Follow these simple steps to create a beautiful tree. Each step helps the tree look more inviting and festive. Take your time and enjoy the process.
Fluffing Branches
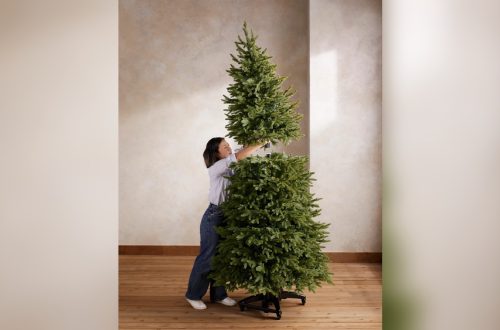
Start by gently pulling apart each branch tip. Fluff every needle to add volume. This makes the tree look thick and lush. Be careful not to tear or bend the needles. Fluffing creates a soft, full appearance.
Adjusting Branch Angles
Next, bend the branches slightly downward. This mimics a real tree’s natural shape. Spread the branches evenly around the trunk. Avoid sharp angles to keep a smooth look. Adjust each branch to fill the tree’s outline.
Filling Gaps
Look for empty spaces between branches. Pull out smaller branch tips to cover these gaps. Move branches closer to each other if needed. Filling gaps stops the tree from looking thin. A well-filled tree looks rich and balanced.
Shaping The Tree Top
Focus on the tree’s tip last. Bend the top branch gently upward or straight. Make sure it looks pointed and neat. Avoid making the top too flat or wide. The tip finishes the tree’s natural, classic shape.

Credit: www.reddit.com
Tips For Realistic Appearance
Making your artificial Christmas tree look real adds charm to your home. Small shaping tricks create a natural, full look. Focus on how branches sit and catch light for the best effect.
These tips help you shape your tree to feel like a fresh one. Easy steps bring warmth and style to your holiday space.
Layering Branches
Start by spreading branches in layers. Place outer branches wider than inner ones. This adds depth and fullness. Avoid flattening branches against the trunk. Let them curve naturally outward for a soft, real look.
Varying Branch Directions
Move branches in different directions. Some point up, some down, and some sideways. This stops the tree from looking too uniform. Slight twists make it seem like a tree grown outdoors. Keep the changes small but noticeable.
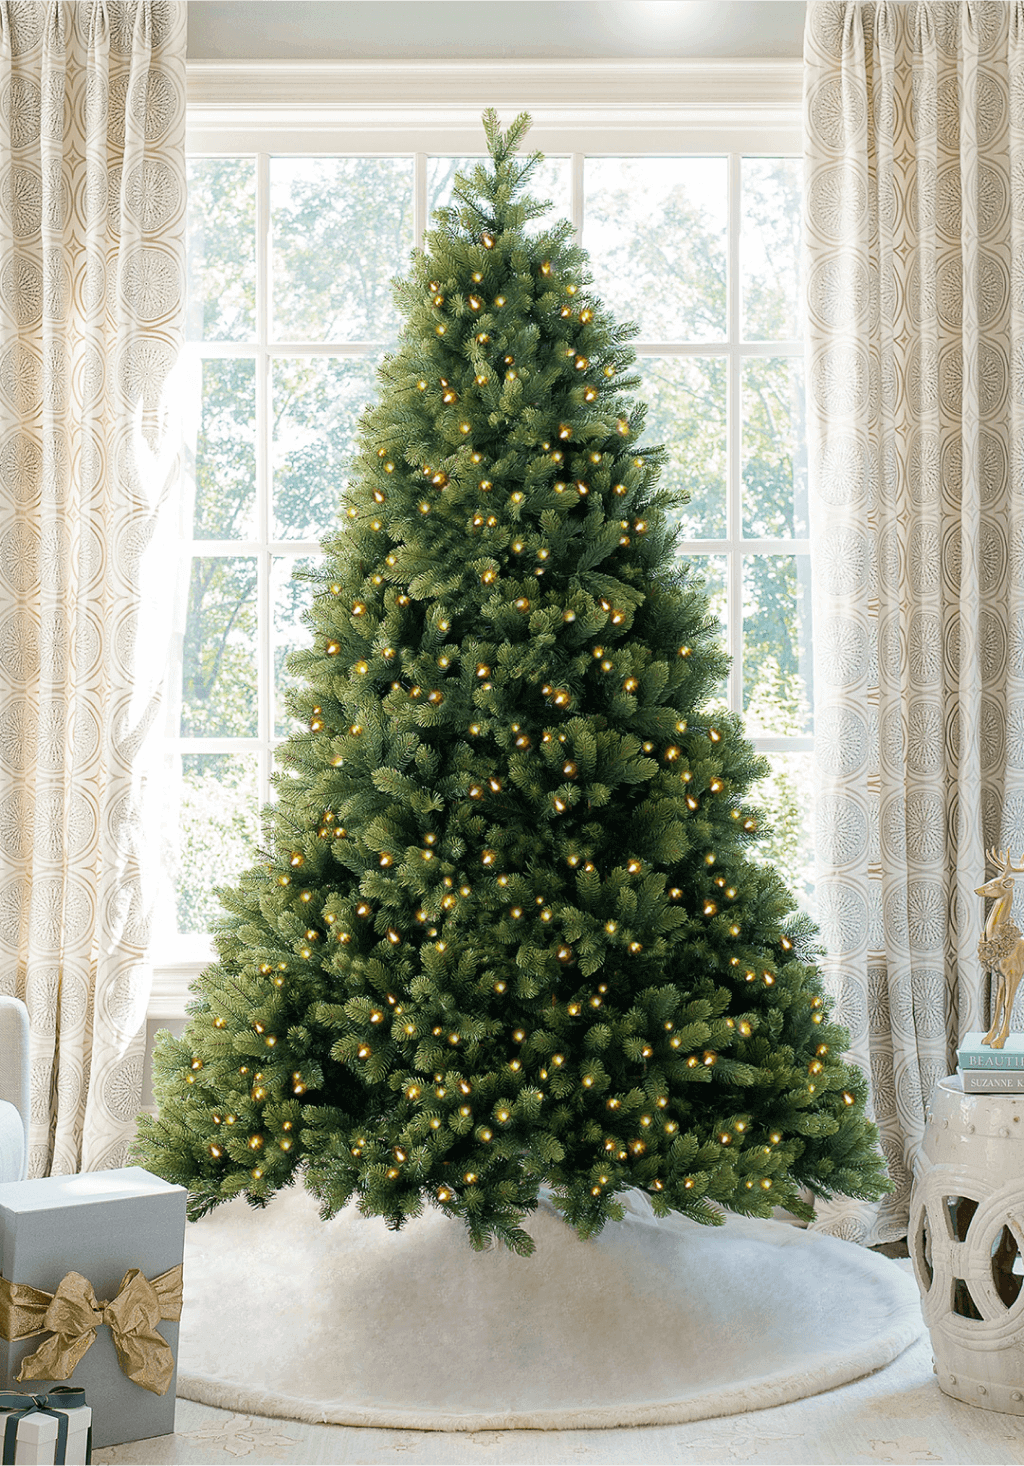
Using Lighting To Enhance Shape
Lights add more than glow. Wrap lights around branches to highlight tree shape. Use warm white bulbs for a cozy feel. Lights in different layers create shadows and depth. This makes the tree look lively and bright.
Maintaining Your Tree’s Shape
Maintaining your artificial Christmas tree’s shape keeps it looking fresh year after year. Proper care helps the branches stay full and even. Small daily habits prevent the tree from looking flat or messy. Follow simple steps to keep your tree beautiful and natural.
Storage Tips
Store your tree in a cool, dry place. Avoid damp areas that can cause damage. Use a sturdy tree bag or box for protection. Keep branches separated to stop them from bending. Store the tree upside down to keep its shape better. Proper storage saves time during setup next year.
Regular Fluffing
Fluff the branches each time you set up the tree. Pull each branch gently outward and upward. This opens the branches and fills gaps. Take time to shape the top and bottom evenly. Fluffing makes the tree look natural and full. Regular attention keeps the tree ready for decorations.
Credit: www.kingofchristmas.com
Common Mistakes To Avoid
Shaping an artificial Christmas tree can be fun but tricky. Many people make simple mistakes that affect the tree’s look. Avoiding these errors helps your tree look full and natural. Here are common mistakes to watch out for.
Over-fluffing
Over-fluffing means opening the branches too much. This can make the tree look too large and messy. It also breaks the natural shape of the tree. Gently pull out each branch just enough to fill empty spots. Stop when the tree looks balanced and full.
Ignoring Branch Symmetry
Branch symmetry means keeping the tree even on all sides. Ignoring this makes your tree look lopsided or uneven. Take time to shape branches on all sides equally. Step back often to check the tree’s shape from every angle. Symmetry gives the tree a neat and polished look.

Credit: www.christmascentral.com
Frequently Asked Questions
How Do I Fluff Artificial Christmas Tree Branches?
Start at the tree’s base and work upwards. Gently separate and bend each branch tip outward. Fluff inner branches for fullness and shape. This creates a natural, full appearance. Be patient for best results.
Can I Reshape Artificial Christmas Trees Yearly?
Yes, reshaping artificial trees yearly is recommended. It maintains a fresh, natural look. Fluff and adjust branches before decorating. Proper shaping prolongs tree lifespan and enhances display.
What Tools Help Shape Artificial Christmas Trees?
No special tools are needed. Use your hands to bend and spread branches. For stubborn spots, use needle-nose pliers gently. Gloves protect hands from sharp tips. Simple tools ensure easy shaping.
How Long Does Shaping An Artificial Tree Take?
Shaping takes about 30 to 60 minutes. Time depends on tree size and branch density. Take breaks to avoid fatigue. Proper shaping results in a beautiful, well-balanced tree.
Conclusion
Shaping an artificial Christmas tree takes time and care. Start by spreading out the branches one by one. Fluff each branch to make the tree look full. Pay attention to gaps and uneven spots. Take breaks to see the tree from a distance.
This helps spot areas that need adjusting. A well-shaped tree brings holiday cheer to any room. Enjoy the process and have fun decorating afterward. Your effort will make the tree look natural and beautiful. Celebrate the season with a tree that feels just right.