Are you ready to transform your space with a unique lighting touch that stands out? Making your own LED floor contour lamps is easier than you think, and it gives you full control over the design and mood of your room.
Imagine a lamp that not only lights up your floor but also adds style and personality to your home. In this guide, you’ll discover simple steps to create stunning LED contour lamps that fit your taste and space perfectly. Keep reading, and you’ll soon have a glowing masterpiece that draws attention and sparks conversation.
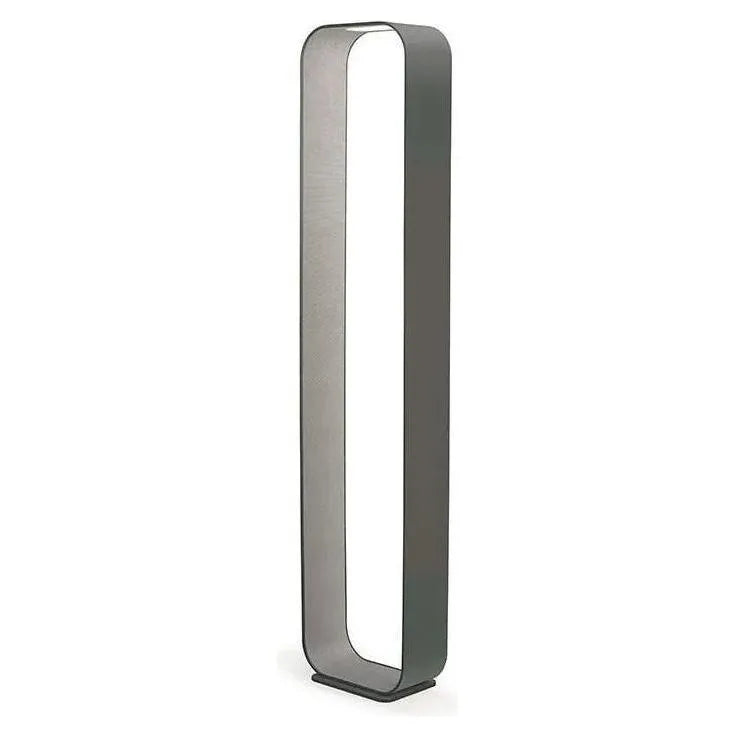
Credit: www.montreallighting.com
Materials Needed
To create an LED floor contour lamp, gathering the right materials is essential. This step ensures your project is smooth and your lamp works perfectly. Choose items that fit your design and budget. Here is a list of what you will need for a successful build.
Choosing Led Lights
Select LED lights that are bright and energy-efficient. Look for strips or bulbs that match your lamp size. Pick LED colors that fit your room’s mood. Warm white offers a cozy feel, while cool white gives a modern look. Check the voltage and power needs to match your power source.
Selecting Floor Lamp Base
The lamp base must be sturdy to hold the structure. Wood, metal, or plastic can work well. Choose a base with a shape that supports your lamp’s contour design. Consider weight for stability and safety. The base should have a place to hide wires neatly.
Additional Tools And Supplies
You need basic tools like a screwdriver, wire cutters, and glue gun. Electrical tape and connectors help secure wires safely. Sandpaper or a file smooths rough edges on the base. A drill may be required to make holes for wiring. Measuring tape ensures correct placement of parts.

Credit: www.fiveelementsfurniture.com
Preparing The Lamp Base
Preparing the lamp base is an important step in making LED floor contour lamps. A clean and smooth base helps the lamp look neat and work well. It also makes the light shine evenly along the contours. This step ensures the lamp’s shape is clear and attractive.
Take your time with the base. Small details here will affect the final lamp. Follow these simple steps to prepare the base for your LED floor contour lamp.
Cleaning And Sanding
Start by cleaning the lamp base thoroughly. Use a soft cloth to remove dust and dirt. Dirt can stop the paint or LED strips from sticking well.
Next, sand the surface gently with fine sandpaper. Sanding makes the base smooth and ready for the next steps. Avoid rough sanding to keep the surface even. Clean off dust after sanding with a dry cloth.
Marking Contour Lines
Use a pencil to draw the contour lines on the base. These lines guide where to place the LED strips. Draw clear and smooth lines for better results.
Check the lines twice before moving forward. Correct lines help the lamp look professional and neat. Use a ruler or stencil for straight or curved lines.
Wiring The Leds
Wiring the LEDs is a key step in making an LED floor contour lamp. It connects the light strips to power and control parts. This step needs focus to get the lamp working right and safely. Clear wiring helps the lamp shine evenly and last longer.
Connecting Led Strips
Start by cutting the LED strips to the correct length. Use scissors on the marked lines only. Then, join the strips using connectors or by soldering wires. Make sure the positive and negative ends match. Test the connection with a small power source. Secure the wires neatly to avoid breaks or shorts.
Ensuring Safe Electrical Setup
Use a power supply that fits the voltage and current needs of the LEDs. Check all connections twice before powering on. Use insulated wires and avoid loose contacts. Add a fuse or circuit breaker for extra safety. Keep wires away from heat or sharp edges. Safety protects you and your lamp from damage.
Attaching Leds To The Base
Attaching LEDs to the base is a key step in making an LED floor contour lamp. This step shapes how the light follows the lamp’s design. Proper attachment ensures the lamp looks neat and the lights stay in place over time.
Careful placement and secure fixing help the LEDs show the lamp’s contours clearly. This makes the lamp both beautiful and functional.
Aligning Lights Along Contours
Start by placing the LEDs along the base’s edges or curves. Follow the shape of the lamp closely. Keep the LEDs evenly spaced for smooth light flow. Use a pencil or light marker to outline where each LED should go. This helps avoid mistakes and keeps the layout clean.
Securing With Adhesives Or Clips
Choose a strong adhesive that works with your base material. Apply small dots of glue to each LED spot. Press the LEDs gently but firmly onto the glue. Let the adhesive dry completely before moving the lamp.
If you prefer, use small clips or brackets to hold the LEDs. Clips allow easy removal or adjustment later. Make sure clips fit tightly to avoid any loose lights. Secure the clips with screws or double-sided tape based on your base type.
Testing The Lamp
Testing the LED floor contour lamp is an important step. It ensures the lamp works correctly and is safe to use. You will check the wiring, brightness, and overall function. This step helps catch any problems early. It also confirms the lamp lights up as planned.
Powering Up Safely
First, connect the lamp to a power source with care. Use a low voltage supply if possible. Avoid touching wires during this step. Make sure your hands are dry. Turn on the power switch slowly. Watch the lamp for any flickering or unusual heat. If the lamp stays steady, it is working well.
Troubleshooting Common Issues
If the lamp does not light, check your connections. Loose wires often cause the problem. Look for any broken or damaged parts. Replace faulty components before trying again. Dim light may mean the power is too low. Increase the voltage slightly but stay within safe limits. Flickering light can mean a bad LED or loose contact.
Finishing Touches
Finishing touches give your LED floor contour lamps a polished look. These steps improve both style and function. Small details can make a big difference in the final result.
Painting And Decorating
Choose paint colors that match your room’s style. Use spray paint for smooth, even coverage. Let the paint dry completely before adding more coats.
Decorate with patterns or stencils for a unique design. Stick to simple shapes to keep the look clean. Use painter’s tape to create sharp edges and lines.
Adding Diffusers Or Covers
Diffusers soften the light and reduce glare. Cut plastic or acrylic sheets to fit over the LED strips. Attach covers with clips or glue for a secure hold.
Choose frosted or white diffusers for a gentle glow. Clear covers work well if you want brighter light. Test the lamp after adding covers to check the brightness.
Creative Variations
Creative variations make LED floor contour lamps exciting and unique. They allow you to customize the lamp to fit your style and space. Experimenting with different features can turn a simple lamp into a statement piece. Explore ideas that match your mood and home decor.
Color Changing Leds
Color changing LEDs bring life to your floor lamp. You can choose colors that suit your mood or the room’s theme. Some lamps use remote controls or apps for easy color switching. This feature adds fun and flexibility to your lighting. It also allows you to create soft or vibrant light effects.
Smart Home Integration
Smart home integration lets you control your lamp with voice or phone. Connect the lamp to devices like Alexa or Google Home. This setup makes turning the lamp on and off simple. You can also set schedules or adjust brightness remotely. Smart control adds convenience and modern style to your lamp.

Credit: www.youtube.com
Frequently Asked Questions
What Materials Are Needed For Led Floor Contour Lamps?
You need LED strips, a power supply, acrylic sheets, aluminum profiles, wiring, and connectors. Basic tools include a soldering iron, drill, and measuring tape. These materials ensure durability, brightness, and precise contour lighting for your LED floor lamps.
How Do I Design The Contour For Led Floor Lamps?
Start by measuring the floor area and sketching the desired lamp shape. Use software or hand-drawn templates for accuracy. Design contours should complement room aesthetics and ensure even LED light distribution for a professional finish.
What Is The Best Led Type For Floor Contour Lamps?
Choose high-brightness, flexible LED strips with a color temperature between 2700K and 4000K. These LEDs offer energy efficiency and excellent illumination. Opt for waterproof strips if the lamps are near moisture-prone areas.
How To Install Led Strips On Floor Contour Lamps Safely?
Clean the surface before applying LED strips for strong adhesion. Secure wiring properly to avoid damage or tripping hazards. Use insulated connectors and ensure the power supply matches LED requirements to prevent electrical issues.
Conclusion
Creating LED floor contour lamps adds style and light to any room. The steps are simple and clear to follow. Choose the right materials and take your time. Bright, warm lighting makes spaces feel cozy and modern. Enjoy your new lamp’s glow and unique shape.
Try different designs to fit your taste and space. Handmade lamps bring charm and personality to your home. Keep experimenting and have fun with your lighting projects.