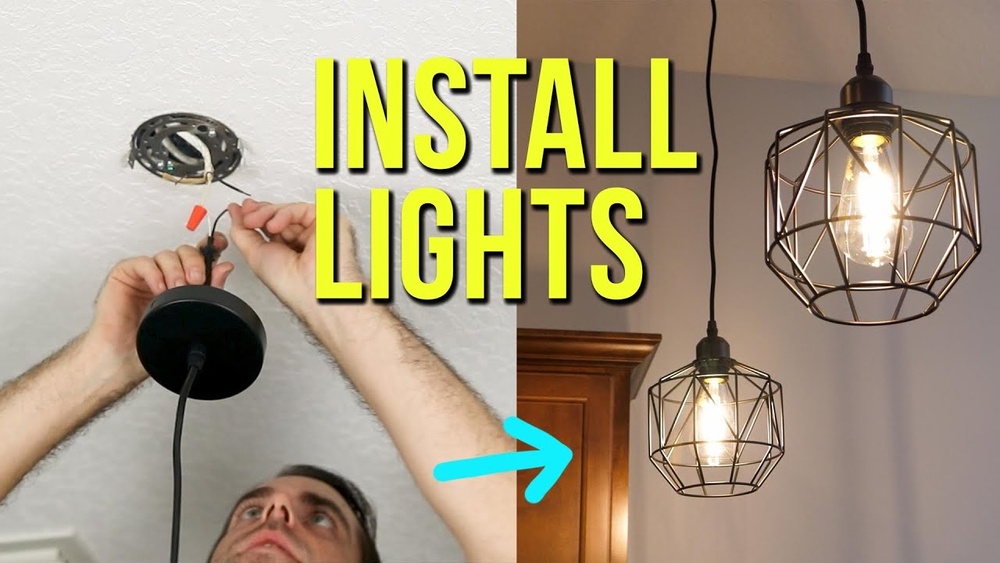
Are you ready to transform your space with a stylish pendant light but unsure where to start? Installing a pendant light might seem tricky, but with the right steps, you can do it yourself and give your room an instant upgrade.
This guide breaks down the process into simple, clear instructions that anyone can follow. By the end, you’ll have the confidence and know-how to brighten your home exactly the way you want. Keep reading to discover how easy it is to install a pendant light and make your space shine.
Choosing The Right Pendant Light
Choosing the right pendant light is key to brightening your space well. The perfect light can change a room’s look and feel. It must fit the room size, style, and lighting needs. This guide helps you pick the best pendant light.
Assessing Room Size And Ceiling Height
Measure the room size before choosing a pendant light. Large rooms need bigger or multiple lights to fill the space. Small rooms look better with smaller lights. Check the ceiling height too. Low ceilings need compact pendants. High ceilings allow longer hangers. Balance size and height to avoid crowding or lost light.
Selecting Style And Finish
Choose a style that matches your room’s decor. Modern, rustic, or classic styles suit different rooms. The finish matters too. Metal, glass, or wood finishes change the look. Pick a finish that blends with furniture and colors. The right style and finish make the pendant a room highlight.
Considering Light Bulb Types
Pick bulb types based on brightness and energy use. LED bulbs save energy and last longer. Incandescent bulbs give warm light but use more power. Think about the light color too. Cool white bulbs suit work areas. Warm white bulbs create cozy moods. Check if the pendant fits your bulb choice.
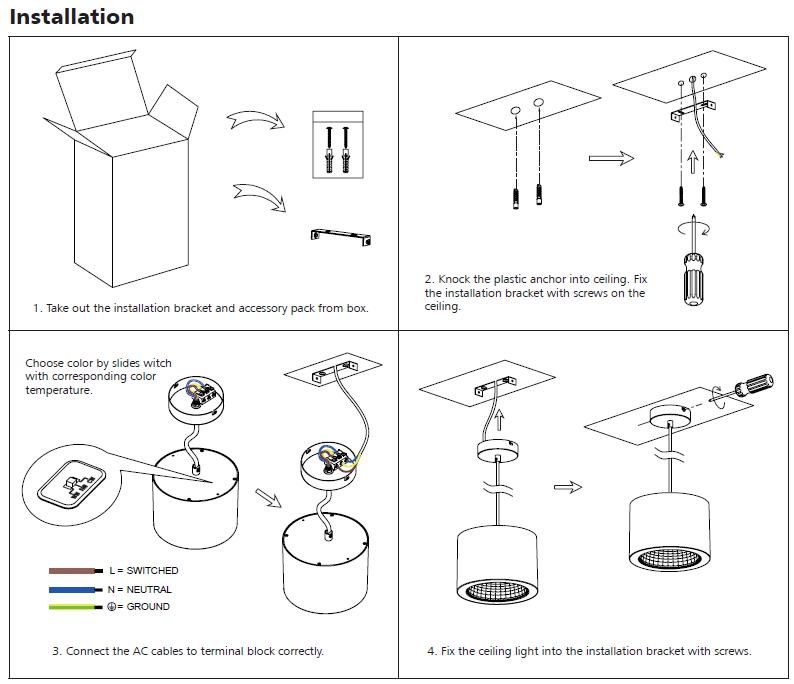
Credit: www.upshine.com
Gathering Essential Tools And Materials
Before installing a pendant light, gather all the tools and materials needed. This step saves time and helps the process go smoothly. Having everything ready makes the job easier and safer.
Tools Needed For Installation
Get the right tools before starting the installation. You will need a screwdriver to open the light fixture and secure screws. A wire stripper helps remove insulation from wires. A voltage tester checks if the power is off. A drill may be needed to make holes for mounting. Pliers help twist wires together. Tape measures ensure proper placement. Having these tools at hand speeds up the work.
Safety Gear And Precautions
Wear safety gear to protect yourself. Safety glasses guard your eyes from dust and debris. Gloves protect your hands from sharp edges and electrical wires. Turn off the power at the breaker box to avoid shocks. Use a voltage tester to confirm no electricity flows. Work on a stable ladder or step stool. Follow these safety steps to prevent accidents and injuries.
Preparing The Installation Site
Preparing the installation site is an important first step before you install a pendant light. It ensures safety and makes the process easier. You need to get the area ready by following key steps. This helps avoid problems during the installation. Let’s explore what to do before hanging your new light fixture.
Turning Off Power Supply
Start by turning off the power supply to the room. Find the circuit breaker and switch off the correct breaker. This stops electricity from flowing to the light fixture area. Use a voltage tester to double-check the power is off. Safety is the top priority. Never work on electrical wiring with power on.
Removing Existing Fixtures
Next, remove the old light fixture if there is one. Unscrew the fixture carefully and lower it from the ceiling. Disconnect the wires by loosening wire nuts. Keep the wires separated and safe. Handle the fixture gently to avoid damage to the wiring or ceiling.
Checking Electrical Box Compatibility
Check if the electrical box can support your new pendant light. It must be strong enough to hold the fixture’s weight. Also, ensure the box is properly installed in the ceiling. Look for any damage or loose parts. Replace the box if it is not secure or too small for your pendant light.
Wiring The Pendant Light
Wiring the pendant light is a key step in the installation process. It connects the light fixture to your home’s electrical system. Proper wiring ensures the light works safely and correctly. Follow each step carefully to avoid electrical problems.
Identifying Wires And Connections
Start by turning off the power at the breaker. Check the wires in your ceiling box. Usually, you will find a black (hot) wire, a white (neutral) wire, and a green or bare copper (ground) wire. The pendant light will have similar wires. Match each wire from the fixture to the corresponding wire in the ceiling box.
Connecting Wires Safely
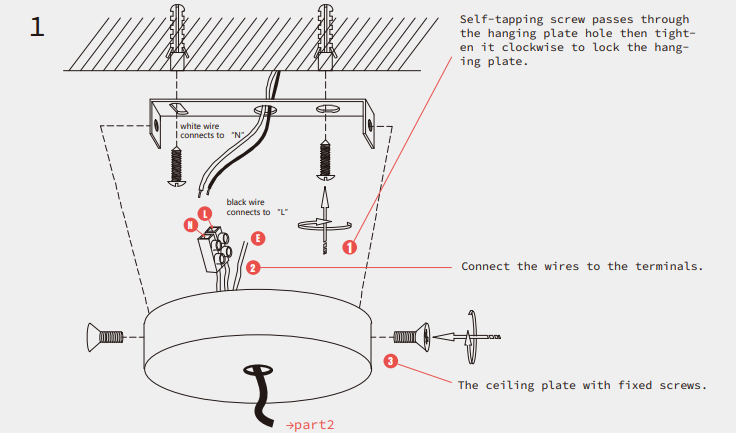
Hold the black wire from the pendant light and connect it to the black wire in the ceiling. Twist the exposed copper ends together clockwise. Do the same with the white wires. Connect the ground wire from the fixture to the ground wire in the ceiling box or to a grounding screw.
Securing Wire Nuts And Insulation
After twisting the wires together, screw on a wire nut. Make sure it is tight and secure. Give a gentle tug to check the connection. Wrap electrical tape around the wire nuts for extra safety. Push the wires neatly into the ceiling box. This prevents damage and keeps the installation tidy.
Mounting The Pendant Light
Mounting the pendant light is a key step in your installation process. It secures the fixture to the ceiling and ensures safety. This step requires careful handling and attention to detail.
Start by preparing the ceiling and tools. Follow each step for a smooth installation.
Attaching Mounting Bracket
First, find the electrical box in the ceiling. Align the mounting bracket with the box. Use screws to fix the bracket tightly. Make sure it does not move. The bracket must hold the fixture’s weight.
Hanging The Fixture
Next, connect the wires from the pendant to the ceiling wires. Match the colors: black to black, white to white, and green or copper to ground. Twist wire connectors to secure connections. Carefully tuck wires into the electrical box. Hang the fixture on the mounting bracket hook or screws. Check that it holds firmly.
Adjusting Height And Position
Finally, adjust the length of the pendant cord or chain. Set it to the desired height for your room. Make sure the light hangs straight and even. Tighten any screws or locks to keep it in place. Test the fixture to confirm stability before finishing.
Testing And Troubleshooting
After installing a pendant light, testing and troubleshooting ensure it works safely. This step checks all wiring and connections. It helps find small problems early. Fixing these issues stops bigger problems later. Follow clear steps to test and fix your new light fixture.
Restoring Power And Testing Light
Turn the main power back on at the circuit breaker. Use the light switch to turn on the pendant light. Watch carefully for any flickering or dim light. If the light stays steady and bright, the installation is good. Use a voltage tester to check the wires if the light does not turn on. Make sure the bulb is screwed in tightly. Replace the bulb if it is faulty.
Fixing Common Issues
Loose wires often cause the light not to work. Turn off the power before touching wires. Tighten all wire nuts and connections. Check the ground wire is properly attached. If the light flickers, check for a poor connection. Replace the switch if it feels loose or broken. Sometimes the circuit breaker trips; reset it carefully. If problems continue, consult a licensed electrician for safety.
Enhancing Pendant Light Impact
Pendant lights add style and focus to any room. Their impact depends on how you use them. Enhancing their effect means thinking about light control and room design. Both can change the mood and highlight the pendant’s beauty.
Adding Dimmers And Controls
Dimmers help adjust the light’s brightness. You can create soft lighting or bright light as needed. This flexibility suits different activities and times of day. Simple controls make it easy to change settings. Some dimmers work with smart home systems too. They improve energy use and extend bulb life.
Complementing With Decor
The right decor makes pendant lights stand out. Choose colors and materials that match or contrast nicely. A clean, simple background highlights the pendant’s shape. Textures like wood or metal add warmth and interest. Keep the area around the pendant uncluttered. This draws the eye to the light fixture itself.

Credit: www.wikihow.com
Credit: www.homdiyhardware.com
Frequently Asked Questions
How Do You Safely Install A Pendant Light?
Turn off the power at the circuit breaker first. Use a voltage tester to confirm no electricity flows. Securely mount the bracket and connect wires correctly. Follow manufacturer instructions for a safe, stable installation.
What Tools Are Needed To Install Pendant Lights?
You will need a screwdriver, wire strippers, voltage tester, and pliers. A ladder is helpful for ceiling access. Having electrical tape and wire nuts ensures secure wiring connections.
Can I Install A Pendant Light Myself?
Yes, if you follow safety guidelines and have basic electrical knowledge. Turn off power, carefully connect wires, and mount the fixture securely. If unsure, consult a professional electrician.
How High Should Pendant Lights Be Hung?
Pendant lights should hang 28 to 34 inches above a table or countertop. This height provides optimal lighting and prevents glare. Adjust height based on ceiling height and room size.
Conclusion
Installing a pendant light can brighten any room with style. Follow safety steps carefully to avoid risks. Take your time to connect wires correctly. Use the right tools for a smooth process. Check your work before turning the power back on.
A well-installed pendant light adds charm and light. Enjoy the new look and feel of your space. Simple steps lead to great results. You can do it yourself with patience and care.