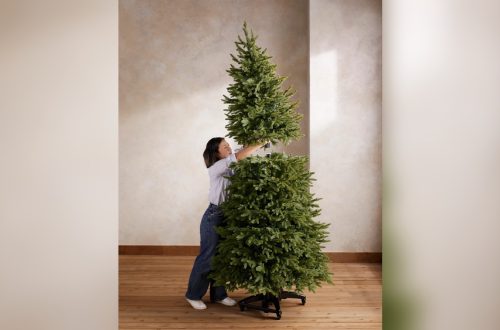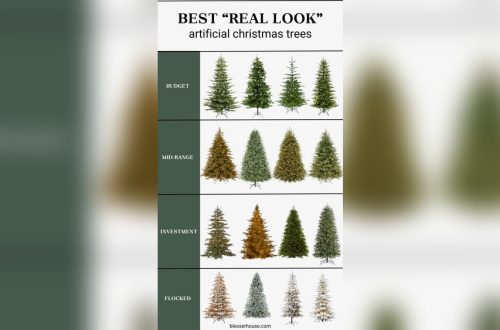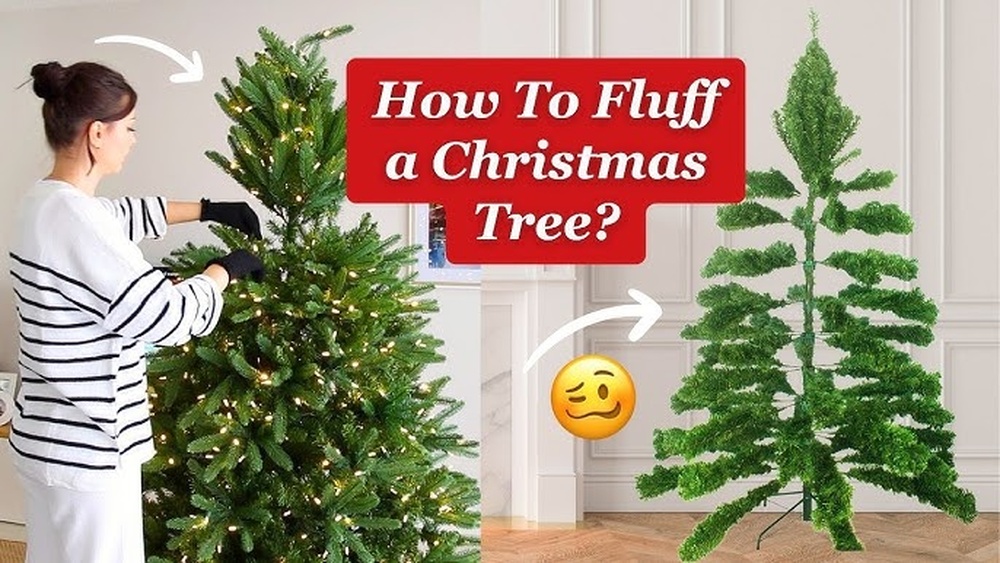
You’ve just unpacked your artificial Christmas tree, and it looks flat and lifeless. Don’t worry—fluffing your tree can completely transform its appearance, making it look full, lush, and ready for decorations.
If you’re new to this, you might wonder where to start or how to make your tree look natural. This guide will walk you through simple, step-by-step tips to help you fluff your artificial Christmas tree like a pro. By the end, your tree will be the centerpiece of your holiday décor, shining bright and inviting everyone to feel the festive spirit.
Let’s get started!
Choosing The Right Tree
Choosing the right artificial Christmas tree sets the base for a beautiful holiday display. Picking a tree that fits your space and style makes fluffing easier and more fun. Knowing your options helps you find a tree that looks full and natural. This section guides beginners through the basics of selecting the perfect tree.
Types Of Artificial Trees
Artificial trees come in many styles. Some have thin branches, while others are very full. Pine, fir, and spruce are common types. Each type has a different look and texture. Some trees use PVC needles, which shine more. Others use PE needles, which feel more real. Some combine both for a balanced look. Choose a style that matches your holiday vibe.
Size And Shape Considerations
Measure your space before buying a tree. Tall ceilings need taller trees. Small rooms fit better with shorter trees. Think about width too. A skinny tree saves space but looks less full. Full trees take more room but look lush. Shapes include slim, full, and pencil styles. Pick a shape that fits your room and style. This makes decorating and fluffing easier later.
Preparing Your Workspace
Preparing your workspace is the first step to fluffing an artificial Christmas tree. A clean, organized area helps you work quickly and safely. It also prevents damage to your tree or decorations. Taking time to prepare makes the fluffing process easier and more fun.
Clearing Space
Choose a spot with enough room for your tree to stand fully. Remove furniture and items that block your work area. Clear the floor so you can move around freely. A tidy space reduces accidents and gives you a better view. Make sure you have good lighting to see every branch clearly.
Gathering Tools And Accessories
Collect everything you need before you start fluffing. A pair of gloves protects your hands from sharp tips. Use a step stool for taller trees to reach all branches. Have soft cloths or brushes ready to clean dust off branches. Keep decorations nearby for easy access after fluffing. Organizing tools saves time and keeps you focused on the task.
Unpacking The Tree
Unpacking an artificial Christmas tree is the first step to a beautiful holiday display. Take your time opening the box. This careful start helps keep the tree’s shape and quality intact. Prepare a clean space on the floor. This space will protect branches and make fluffing easier.
Handling Branches Carefully
Remove the tree sections gently from the box. Hold each branch by the base. Avoid pulling on the tips or needles. This prevents damage and keeps branches full. Lay each part flat before standing it up. This method protects the shape and makes fluffing simpler.
Avoiding Common Mistakes
Do not rush the unpacking process. Unfold branches slowly to avoid breaking needles. Keep the tree parts separated until fully fluffed. Do not use sharp tools to open the box. Use scissors carefully to avoid cutting branches. Always check for loose parts before assembly.
Credit: www.hykolity.com
Fluffing Branches Step-by-step
Fluffing the branches of an artificial Christmas tree can make it look full and natural. This step-by-step guide helps beginners shape the tree with ease. Taking your time and working carefully will give the best results.
Starting From The Bottom
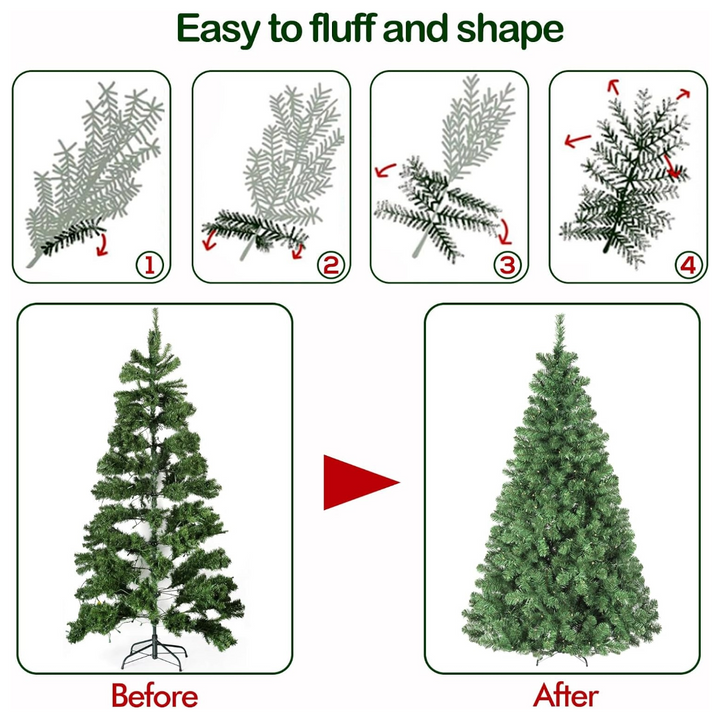
Begin fluffing at the lowest branches. Pull each branch gently away from the tree’s center. Spread out the needles evenly on both sides. This creates a solid base for the tree. Work around the trunk to cover all gaps.
Shaping Each Branch
Move up to the middle branches next. Bend each branch tip slightly upward or outward. Separate the needles carefully to avoid clumping. Adjust branches in different directions for a natural look. Take small steps and check the shape often.
Creating Fullness And Volume
Focus on the top branches last. Open each branch fully to fill empty spaces. Fluff needles with your fingers to add volume. Step back regularly to see the overall shape. This gives the tree a balanced and lush appearance.
Arranging The Tree Top
The top of your artificial Christmas tree is very important. It is the final touch that completes the tree’s look. Taking time to arrange the top branches carefully makes your tree appear full and natural.
Start by spreading out the top branches gently. This helps create a balanced shape. The goal is to avoid a flat or bare tip. A well-fluffed top blends smoothly with the rest of the tree.
Securing The Top Branches
Begin by bending the top branches slightly outward. This gives the tip more volume and shape. Use your fingers to separate each branch from the others.
Check for empty spaces. Fill gaps by adjusting smaller branches near the top. Make sure branches point in different directions. This adds depth and fullness.
Press branches firmly but gently. This helps them stay in place. Avoid pushing too hard to prevent damage.
Adding A Tree Topper
Choose a tree topper that fits your tree’s size. Large trees need bigger toppers. Small trees look best with smaller ones.
Place the topper carefully on the highest point. Secure it tightly so it won’t fall. Use twist ties or clips if needed.
Adjust the surrounding branches to support the topper. Arrange them so the topper looks balanced. This makes the tree look complete and festive.

Credit: www.youtube.com
Lighting The Tree
Lighting an artificial Christmas tree brings warmth and magic to your holiday decor. Good lighting highlights the tree’s shape and makes ornaments shine. Proper lighting also creates a cozy and festive atmosphere in any room. For beginners, choosing the right lights and wrapping them well makes a big difference.
Choosing Lights
Pick lights that match your style and space. Warm white lights offer a classic, soft glow. Colorful lights add fun and energy. LED lights save energy and stay cool. Check the length to cover your tree fully without extra cords. Look for lights with a steady or twinkling option to set your mood.
Wrapping Techniques
Start at the bottom and work upwards. Wrap lights around each branch, not just the trunk. This spreads light evenly and adds depth. Push lights slightly into the branches for a natural look. Avoid bunching or tangling the strands. Finish by plugging in and adjusting for the best glow.
Adding Decorations
Adding decorations makes your artificial Christmas tree look lively and bright. It brings out the festive spirit and completes the tree’s appearance. Careful placement of ornaments and garlands can create a balanced and beautiful display. Here are simple tips to decorate your tree like a pro.
Balancing Ornaments
Start with larger ornaments. Spread them out evenly on the tree branches. Avoid clustering many heavy decorations in one area. Mix different shapes and colors for visual interest. Hang some ornaments close to the trunk for depth. Place others near the tips for sparkle. Step back often to check the overall look.
Using Garlands And Tinsel
Choose garlands that match your tree’s theme. Drape them loosely around the tree in a spiral shape. Space the garlands evenly from top to bottom. Avoid pulling them too tight to keep a natural look. Add tinsel sparingly for extra shine. Let tinsel hang freely to catch the light. This simple step adds charm and texture.
Maintaining Your Tree
Maintaining your artificial Christmas tree is key to keeping it beautiful year after year. Proper care helps preserve its shape and color. It also makes your tree look fresh and full every holiday season.
Storage Tips
Store your tree in a cool, dry place to avoid damage. Use the original box or a special tree storage bag. Keep the branches loosely packed to prevent bending. Avoid placing heavy items on top of the storage container. Label the box for easy identification next year.
Cleaning And Care
Dust your tree regularly to keep it looking clean. Use a soft cloth or a gentle brush to remove dirt. Avoid using water or harsh chemicals on the branches. For stubborn dirt, use a damp cloth and dry immediately. Check lights and decorations for damage before reuse.

Credit: www.reddit.com
Frequently Asked Questions
How Do I Start Fluffing An Artificial Christmas Tree?
Begin by spreading out the branches from the trunk evenly. Work from bottom to top to achieve a natural look. Gently separate each branch tip to add fullness. This method helps create a dense, well-shaped tree.
How Long Does It Take To Fluff An Artificial Tree?
Fluffing usually takes 20 to 45 minutes depending on the tree size. Smaller trees take less time, while larger ones need more detailed work. Taking your time ensures a fuller, more natural appearance.
Can I Fluff The Tree Before Assembling It?
It’s best to fluff branches after the tree is fully assembled. This allows better access to all branches for even fluffing. Fluffing too early may cause damage or uneven distribution.
What Tools Help Fluff An Artificial Christmas Tree?
No special tools are required; your hands work best. Use your fingers to gently separate and shape branches. For stubborn areas, a soft brush can help distribute branch tips evenly.
Conclusion
Fluffing an artificial Christmas tree makes it look full and festive. Take your time and spread the branches evenly. Start from the bottom and work your way up. Gently separate the needles to add volume. This simple step brings your tree to life.
A well-fluffed tree creates a warm holiday feeling. Enjoy decorating it with your favorite ornaments. Your efforts will shine through in the final look. A beautiful tree means a joyful holiday season. Now, your tree is ready to brighten any room.