Are you ready to give your room a fresh, stylish look? Installing a pendant light fixture can instantly brighten up your space and add a modern touch.
But if you’re worried it might be too complicated or risky, don’t be. This step-by-step guide will walk you through the process in a simple and safe way. By the end, you’ll have the confidence to install your new pendant light all by yourself—and enjoy the warm glow it brings to your home.
Keep reading, and let’s get started!
Tools And Materials Needed
Installing a pendant light fixture needs the right tools and materials. Having these ready makes the process smooth and safe. This section lists all essentials you need to start your project.
Essential Tools
Gather basic tools before starting. You will need a screwdriver, wire strippers, and a voltage tester. A drill helps with mounting the fixture. Pliers and a ladder are also useful. These tools ensure you can handle every step carefully.
Choosing The Right Fixture
Select a fixture that fits your room’s style and size. Check the light’s weight and mounting type. Make sure it matches your ceiling’s electrical box. Pick a bulb type that suits your lighting needs. This choice affects the look and function of your space.
Safety Gear
Safety is key during installation. Use gloves to protect your hands from sharp edges. Safety glasses shield your eyes from dust and debris. Turn off power at the breaker to avoid shocks. Proper gear helps prevent accidents and keeps you safe.

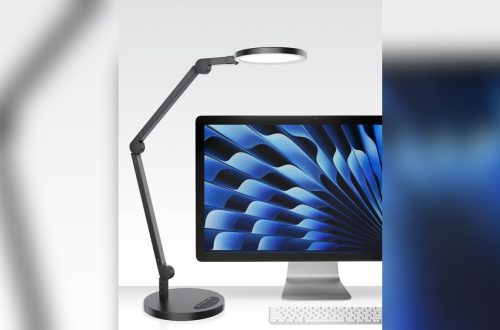
Credit: www.hunterfan.com
Preparing The Installation Site
Preparing the installation site is the first step to install a pendant light fixture. It ensures safety and makes the process smoother. Proper preparation helps avoid mistakes and saves time.
Turning Off Power
Safety starts with turning off the power. Find the circuit breaker that controls the light fixture. Switch it off to cut electricity to the area. Use a voltage tester to check if the power is off. Never skip this step to prevent electric shock.
Removing Old Fixture
Remove the old light fixture carefully. Unscrew the canopy or base that holds the fixture. Gently pull it away from the ceiling. Disconnect the wires by loosening the wire nuts. Keep the wires separated to avoid accidental contact.
Checking Electrical Box
Inspect the electrical box for damage or looseness. It should be securely attached to the ceiling joist. The box must support the new pendant light’s weight. Replace the box if it is cracked or loose. A strong box ensures safe installation and long-term stability.
Wiring The Pendant Light
Wiring the pendant light is a key step in the installation process. It connects the light fixture to your home’s electrical system. Proper wiring ensures the light works safely and correctly. Following clear steps helps avoid mistakes and hazards.
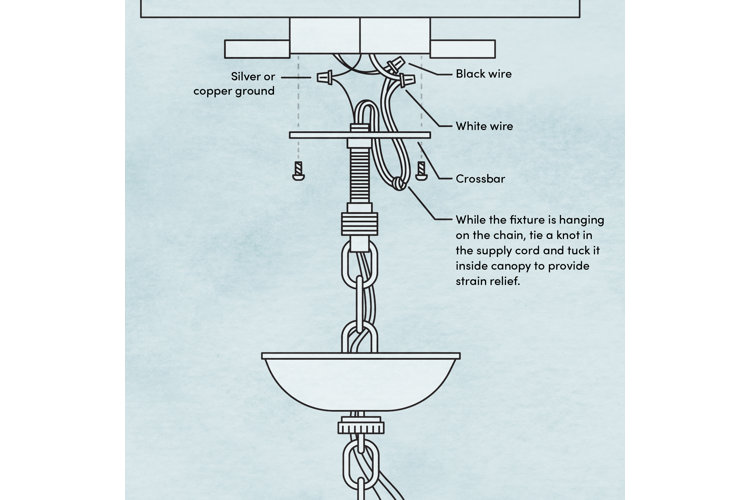
Identifying Wires
Start by turning off the power from the circuit breaker. Identify the wires coming from the ceiling. Usually, you will see three wires: black, white, and green or bare copper. The black wire is the hot wire. The white wire is the neutral wire. The green or bare copper wire is the ground wire. Check your fixture wires, which match these colors.
Connecting Wires Safely
Match the wires by color to connect them. Connect the black wire from the ceiling to the black wire of the fixture. Connect the white wire from the ceiling to the white wire of the fixture. Connect the green or bare copper wire to the fixture’s ground wire or grounding screw. Hold wires firmly together to ensure a strong connection. Do not mix wire colors or skip the ground wire.
Securing Wire Nuts
Use wire nuts to cover and protect the wire connections. Twist the wire nut clockwise onto the wires until tight. Give a gentle tug to check the connection is secure. Wrap electrical tape around the base of the wire nut for extra safety. Tuck the wires neatly into the electrical box to avoid damage. Properly secured wire nuts prevent loose connections and electrical hazards.

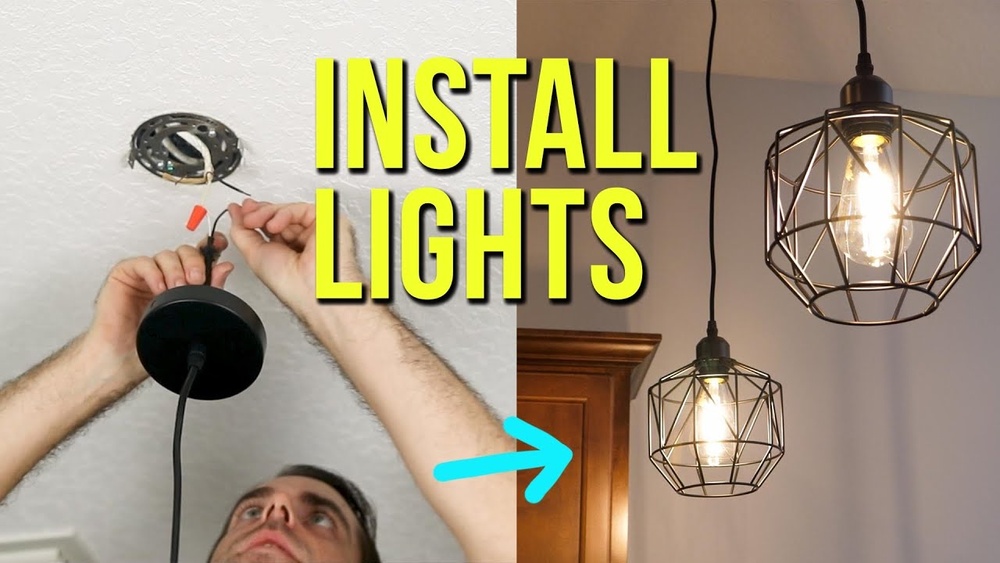
Credit: www.youtube.com
Mounting The Fixture
Mounting the fixture is an important step in installing a pendant light. It ensures the light is secure and looks great. Follow simple steps to attach, hang, and adjust your new fixture easily.
Attaching The Mounting Bracket
First, find the electrical box in your ceiling. The mounting bracket fits over this box. Use screws to secure the bracket tightly. The bracket holds the pendant light firmly in place. Check that it does not move before continuing.
Hanging The Pendant Light
Next, connect the wires from the light to the ceiling wires. Match the colors carefully: black to black, white to white, and ground wires together. Use wire nuts to secure connections. Then, hang the pendant light on the mounting bracket hook or screws. Make sure it is steady and balanced.
Adjusting Height
Adjust the length of the pendant cord or chain to fit your space. Shorten it for lower ceilings or longer for higher ceilings. Make small adjustments to get the perfect look. Tighten all screws and clips to keep the height fixed.
Testing And Final Touches
Testing and final touches are the last steps in installing your pendant light fixture. These steps ensure the light works safely and looks great. Take time to check everything carefully before finishing.
Restoring Power
Turn the power back on at the circuit breaker. Make sure the switch for the light is off first. This prevents any sparks or shocks. After switching on, be ready to test the light.
Checking Light Operation
Flip the light switch to see if the pendant light turns on. Watch for any flickering or dim spots. If the light does not turn on, switch off the power and check your wiring again. A steady light means the wiring is secure and correct.
Adding Bulbs And Shades
Choose bulbs that fit the fixture and your room’s style. Screw them in gently to avoid damage. Attach any shades or covers that came with your pendant light. Clean the shades to remove dust before final installation. These steps complete your pendant light setup.
Common Mistakes To Avoid
Installing a pendant light fixture can change the look of any room. Avoiding common mistakes makes the process safer and easier. These errors often cause problems like flickering lights or even accidents. Pay close attention to these points for a smooth installation.
Loose Connections
Loose connections cause flickering and can create fire hazards. Always tighten wires securely. Use wire nuts that fit well. Double-check each connection before finishing the installation. A solid connection keeps your light working safely.
Ignoring Weight Limits
Each fixture has a weight limit. Ignoring it can damage your ceiling or wiring. Check the weight of your pendant light. Ensure the mounting box can hold the fixture’s weight. Support heavy fixtures with proper anchors or braces.
Skipping Safety Checks
Safety checks prevent accidents and damage. Turn off power at the breaker before starting. Test wires with a voltage tester to confirm no electricity flows. Use a sturdy ladder and wear protective gear. These steps protect you and your home.
Tips For Stylish Placement
Placing a pendant light fixture properly changes a room’s mood and style. Good placement makes the light look natural and beautiful. It also helps the light work well for daily tasks. Use these tips to place your pendant light with style and care.
Choosing The Right Height
Hang the pendant light at the right height for the space. For dining tables, keep the bottom 30 to 36 inches above the surface. In living rooms or hallways, a height of 7 feet from the floor works well. This keeps the light clear of heads and gives a balanced look.
Complementing Room Decor
Match the pendant style to the room’s design. Choose colors and shapes that fit the furniture and walls. A modern light suits a simple room. For classic rooms, pick a fixture with warm tones or vintage details. The light should add to the room’s feel, not clash with it.
Balancing Light Distribution
Place the pendant where it spreads light evenly. Avoid spots where it casts harsh shadows or leaves dark corners. Use more than one pendant in large rooms for better light balance. The goal is a soft, even glow that fills the space nicely.
Credit: www.wayfair.com
Frequently Asked Questions
How Do I Safely Install A Pendant Light Fixture?
Turn off the power at the circuit breaker before installation. Use a voltage tester to ensure no electricity flows. Follow the manufacturer’s instructions carefully. Securely mount the fixture to a ceiling box rated for light fixtures. Connect wires using wire nuts and restore power to test.
What Tools Are Needed To Install A Pendant Light?
You will need a screwdriver, wire stripper, voltage tester, pliers, and a ladder. A drill may be necessary for mounting. Having electrical tape and wire nuts is also essential. These tools help ensure a safe and efficient installation process.
Can I Install A Pendant Light Myself?
Yes, if you have basic electrical knowledge and follow safety precautions. Always turn off power before starting. Read the fixture’s instructions thoroughly. If unsure, consult a licensed electrician to avoid hazards. DIY installation can save money but requires caution.
How High Should A Pendant Light Hang?
Hang the pendant light 28 to 34 inches above the countertop or table surface. For general room lighting, maintain 7 feet from the floor. Adjust height based on room size and fixture design to ensure optimal illumination and style.
Conclusion
Installing a pendant light fixture can brighten any room. Follow each step carefully for safe results. Turn off the power before starting the work. Use the right tools to make the job easier. Take your time and double-check your connections.
Enjoy the new look and feel of your space. A well-installed light adds style and function. Ready to light up your home?