Are you tired of paying high electricity bills just to keep your string lights glowing? Imagine turning your favorite lights into a bright, eco-friendly setup that charges itself using the sun.
You don’t need to buy a whole new system or spend hours figuring it out. This guide will show you step-by-step how to convert your string lights to solar power easily and affordably. By the end, you’ll enjoy beautiful, hassle-free lighting that saves money and helps the environment.
Ready to make the switch? Let’s dive in!
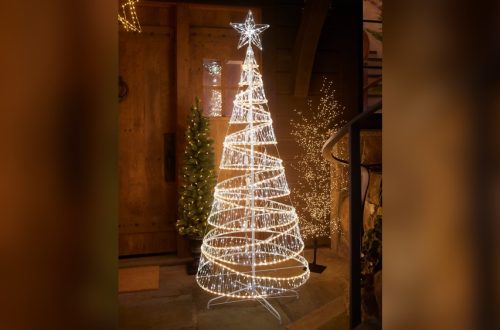
Benefits Of Solar String Lights
Solar string lights offer many benefits for outdoor lighting. They use sunlight to power the bulbs. This makes them a smart choice for gardens, patios, and walkways. Solar lights save money, help the environment, and are easy to set up. These advantages make them popular for many homeowners.
Cost Savings Over Time
Solar string lights do not use electricity from the grid. This reduces your monthly power bills. After the initial purchase, there are no ongoing costs. The sun provides free energy every day. Over time, this saves a significant amount of money. No need to replace batteries frequently either.
Environmental Impact
Solar lights reduce carbon emissions by using clean energy. They do not burn fossil fuels or produce pollution. This helps lower your carbon footprint. Using solar power supports a healthier planet. It promotes the use of renewable energy sources. A simple step toward protecting nature.
Ease Of Installation
Solar string lights do not require wiring or outlets. You can place them anywhere with sunlight. No need for electricians or complicated tools. Most models come with stakes or hooks for easy setup. Move them around easily to find the best spot. Perfect for renters or outdoor events.
Choosing The Right Solar Kit
Choosing the right solar kit is important for converting string lights to solar power. The right kit ensures your lights work well and last long. It also helps save energy and money. You need to understand solar panels, batteries, and compatibility with your lights. These factors affect how well your setup works.
Types Of Solar Panels
Solar panels come in three main types: monocrystalline, polycrystalline, and thin-film. Monocrystalline panels are efficient and last longer. Polycrystalline panels cost less but have lower efficiency. Thin-film panels are flexible but less durable. Choose a panel based on your budget and space.
Battery Options
Batteries store the energy collected by solar panels. Common battery types include lithium-ion, lead-acid, and nickel-metal hydride. Lithium-ion batteries last longer and charge faster. Lead-acid batteries are cheaper but heavier. Pick a battery that fits your usage and budget.
Compatibility With String Lights
Check if the solar kit matches your string lights’ voltage and power needs. Some kits work only with specific light types. Ensure the battery capacity supports your light usage time. A compatible kit avoids flickering and power loss. Test before final installation for best results.
Tools And Materials Needed
Converting string lights to solar power needs specific tools and materials. Having the right items makes the process smooth and safe. Gather everything before starting your project.
Basic Tools
You need a few basic tools to begin. A screwdriver helps open the light casing. Wire cutters trim and strip wires. A multimeter checks voltage and connections. Small pliers assist in bending wires and holding parts. These tools keep the work neat and easy.
Solar Components
Solar conversion requires key parts. A solar panel collects sunlight and turns it into power. A rechargeable battery stores the energy for night use. A charge controller protects the battery from overcharging. Wires connect the solar parts to the string lights. Choose parts that match your lights’ voltage and power needs.
Safety Gear
Safety is crucial during any electrical work. Wear insulated gloves to avoid shocks. Safety glasses protect your eyes from sparks and debris. Work in a dry area to prevent accidents. Keep a fire extinguisher nearby, just in case. These safety steps protect you throughout the project.
Preparing Your String Lights
Preparing your string lights for solar conversion is a key first step. It ensures the lights work well and fit the new power source. This part involves checking the lights, understanding their power needs, and cleaning up unnecessary parts. Proper preparation makes the switch smoother and safer.
Testing Existing Lights
Test your string lights before any changes. Plug them in and see if they light up. Check for any bulbs that do not work. Replace or remove broken bulbs to avoid problems later. Testing saves time and effort during the conversion.
Identifying Power Sources
Look at how your string lights get power now. Most use electricity from an outlet or batteries. Find the plug or battery pack and note how it connects. Knowing this helps you plan the switch to solar power. Solar lights need a different setup.
Removing Unnecessary Wires
Cut off wires that are not needed for solar use. Extra cables can cause confusion or damage. Keep only the wires that connect the bulbs. Removing clutter makes the setup cleaner and easier to manage. It also reduces the risk of short circuits.
Installing The Solar Panel
Installing the solar panel is a key step in converting string lights to solar power. The panel collects sunlight and changes it into energy. Proper installation helps the panel work well and keeps your lights shining bright. Follow these steps to set up the solar panel correctly for the best results.
Choosing The Best Location
Select a spot with plenty of direct sunlight. Avoid shaded areas from trees or buildings. The panel should face south in the northern hemisphere. This position captures maximum sunlight throughout the day. Check the location at different times for consistent sun exposure.
Mounting Techniques
Use mounting brackets or stands designed for solar panels. These tools keep the panel stable and at the right angle. Angle the panel between 30 to 45 degrees for optimal sun capture. Make sure the mounting surface is sturdy and flat to prevent damage.
Securing The Panel
Fasten the panel firmly to avoid movement during wind or storms. Use screws, bolts, or strong ties depending on the mounting type. Double-check the panel is tight but avoid over-tightening. Secure wiring carefully to prevent wear and maintain safety.
Connecting Solar Power To Lights
Connecting solar power to your string lights turns your outdoor space into an energy-saving wonder. This process involves a few key steps to ensure your lights work smoothly with solar energy. Understanding basic wiring, using a charge controller, and matching voltage are essential. These steps help protect your lights and make your solar setup efficient.
Wiring Basics
Start by identifying the positive and negative wires on your string lights. Connect the positive wire to the positive terminal on the solar panel or battery. Do the same with the negative wires. Use waterproof connectors to keep connections safe from rain. Avoid loose connections to prevent flickering lights or power loss.
Using A Charge Controller
A charge controller regulates power from the solar panel to the battery. It stops overcharging, which can damage your battery and lights. Connect the solar panel to the controller first, then connect the controller to the battery. This device helps your system last longer and work more reliably.
Ensuring Proper Voltage
Check the voltage requirements of your string lights before connecting them. Match the solar panel and battery voltage to the lights’ needs. Using the wrong voltage can burn out your lights or cause them not to work. Use a multimeter to measure voltage and confirm compatibility.
Testing And Troubleshooting
Testing and troubleshooting are key steps when converting string lights to solar power. These steps ensure your lights work properly and last long. Checking early avoids damage and saves time. This guide helps you find problems fast and fix them easily.
Initial Power-on Check
Start by connecting the solar panel to the string lights. Place the panel under direct sunlight. Wait a few minutes for the battery to charge. Turn on the lights using the switch or sensor. Notice if all bulbs light up. Check for flickering or dim spots. Confirm the solar panel is clean and free of shade.
Common Issues
Lights not turning on is a usual problem. Sometimes bulbs may flicker or glow weakly. The solar panel may not charge in low sunlight. Loose connections can cause power loss. Batteries may drain quickly if old or damaged. Dirt or debris on the panel reduces efficiency.
Solutions And Tips
Clean the solar panel with a soft cloth regularly. Tighten all wiring connections securely. Replace old or weak batteries with new ones. Move the solar panel to a sunnier location. Test bulbs individually for damage and swap if needed. Use weatherproof connectors to protect from moisture. Check the switch and sensor for proper function.
Maintenance For Longevity
Proper maintenance helps your solar string lights last longer and work better. Small efforts keep the system efficient and bright. Focus on simple care steps to protect your investment and enjoy steady light every night.
Cleaning Solar Panels
Dust, dirt, and leaves block sunlight from reaching the panels. Clean panels regularly with a soft cloth or sponge. Use water only, no harsh chemicals. Avoid scratching the surface. Clean panels capture more sun and charge faster.
Battery Care
Check the battery for damage or leaks. Replace old batteries every one to two years. Store batteries in a dry place during winter. Keep battery contacts clean and free of rust. Good battery care ensures steady power and longer life.
Seasonal Adjustments
Change the panel angle to catch more sun in different seasons. Remove snow and ice during winter to avoid damage. Bring lights indoors during storms or heavy rain. Adjusting the setup helps maintain strong charging all year.
Frequently Asked Questions
How Do I Convert String Lights To Solar Power?
To convert string lights to solar, replace the plug-in power source with a compatible solar panel. Connect the solar panel’s output to the string lights using a voltage regulator if needed. Ensure the solar panel receives enough sunlight for efficient charging.
What Tools Are Needed For Solar String Light Conversion?
You need a solar panel, voltage regulator, wire connectors, and basic tools like wire strippers and electrical tape. These tools help safely connect the solar power source to your string lights and ensure proper functionality.
Can Any String Lights Be Converted To Solar?
Most low-voltage LED string lights can be converted to solar. High-voltage or indoor-only lights may not be compatible. Check your lights’ voltage and power requirements before attempting conversion for safety and effectiveness.
How Long Do Solar String Lights Last After Conversion?
Solar string lights typically run 6 to 10 hours per full charge. The battery life depends on the solar panel size, battery capacity, and sunlight availability. Proper installation maximizes runtime and efficiency.
Conclusion
Converting string lights to solar saves energy and money. It is a simple process anyone can do at home. Solar lights work well outdoors and charge during the day. You get bright lights without extra electricity costs. This change helps the environment by using clean energy.
Try it yourself and enjoy a cozy, eco-friendly space. Solar string lights bring charm and savings together. A smart choice for your garden or patio lighting.