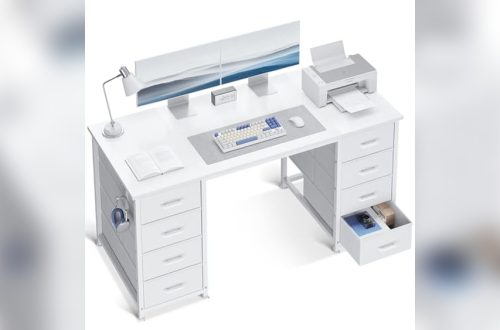
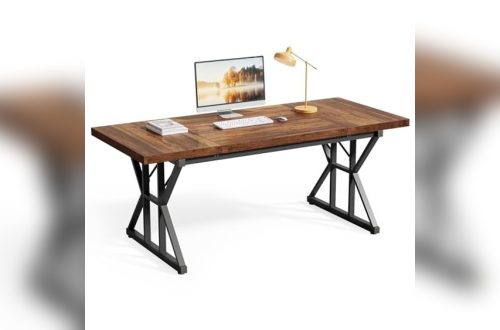
Looking to transform your home office into a powerhouse of productivity and style? A U-shaped desk might be exactly what you need.
Imagine having all your work essentials within arm’s reach, with plenty of space to spread out and stay organized. Creating your own U-shaped desk gives you the freedom to customize it perfectly for your space and workflow. In this guide, you’ll discover simple steps and practical tips to build a U-shaped desk that fits your home office needs and boosts your efficiency.
Ready to design a workspace that works as hard as you do? Let’s dive in!
Benefits Of A U-shaped Desk
A U-shaped desk offers several practical benefits for an in-home office. It provides ample space, better organization, and comfort. This desk style helps create a focused and efficient work environment.
Many people find that a U-shaped desk improves their daily work routine. It supports multiple tasks and devices without clutter. The design also encourages better posture and reduces fatigue.
Maximizing Workspace
A U-shaped desk gives you a large surface area to spread out. It allows easy access to all your tools and documents. You can place your computer, printer, and files within arm’s reach. This setup reduces the need to get up often. It creates a seamless workflow and saves time.
Enhancing Productivity
The shape of the desk helps you focus by keeping everything nearby. You can switch tasks quickly without distraction. This layout also minimizes clutter, which helps clear your mind. Having a dedicated spot for each item speeds up your work process. It supports better concentration and efficiency.
Ergonomic Advantages
A U-shaped desk encourages good posture by supporting your arms and wrists. It allows you to adjust chair and monitor positions easily. This setup reduces strain on your neck, shoulders, and back. It helps prevent discomfort during long work hours. The design promotes a healthier and more comfortable workspace.

Credit: www.amazon.com
Planning Your Desk Layout
Planning your desk layout is the first step to creating a functional U-shaped desk. This stage helps you use your space wisely and meet your work needs. Taking time to plan prevents mistakes and wasted materials.
Think about how you want to move and work at your desk. The layout should give easy access to everything. A well-planned desk supports comfort and boosts productivity.
Measuring Your Space
Measure the room where you will put the desk. Note the length and width of the walls you want to use. Also, measure the height from floor to window sills or shelves.
Mark any doors, vents, or switches that could block the desk. Keep at least 3 feet of walking space around the desk. This makes the area safe and easy to move in.
Choosing Desk Dimensions
Decide how deep and wide each desk section should be. A depth of 24 to 30 inches usually fits most tasks. Width depends on your space and work style.
Consider the height too. Standard desk height is about 29 inches. Adjust height if you use a standing desk or need extra legroom.
Selecting Desk Sections
Pick how many parts your U-shaped desk will have. Often, a U-desk has three sections: one long center and two side wings. Choose sections that fit your space and needs.
Think about adding drawers or shelves in some sections. This helps keep your desk organized. Modular sections are useful if you want to change the layout later.
Materials And Tools Needed
Creating a U-shaped desk for your home office requires specific materials and tools. Choosing the right supplies ensures your desk is sturdy and looks great. This section covers the types of wood and surfaces, hardware and fasteners, and essential tools needed for the project.
Types Of Wood And Surfaces
Solid wood like oak or maple offers strength and durability. Pine is a budget-friendly option but less sturdy. Plywood with a veneer finish provides a smooth, professional look. Laminate surfaces resist scratches and are easy to clean. Choose wood or surface material based on your style and budget.
Hardware And Fasteners
Wood screws and bolts hold the desk parts together firmly. Brackets add extra support at corners and joints. Wood glue strengthens connections between pieces. Drawer slides work well for built-in storage. Pick hardware that matches your desk’s weight and design.
Essential Tools
A power drill makes drilling holes and driving screws faster. A circular saw or jigsaw cuts wood pieces to size. A measuring tape and carpenter’s square ensure accurate dimensions. Sandpaper smooths rough edges for a clean finish. Safety gear like gloves and goggles protects during work.
Building The Desk Frame
Building the frame is the foundation for your U-shaped desk. A strong frame supports the desktop and holds everything together. Careful construction ensures the desk lasts long and feels solid. Follow these steps to build a sturdy frame that fits your workspace perfectly.
Constructing The Base
Start by cutting the base pieces from quality wood. Use plywood or hardwood for strength. Arrange the pieces in a U shape on the floor. Secure the corners with wood screws and wood glue. This forms the main support for the desk. Make sure the base is square by measuring the diagonals. A square base keeps the desk stable and easy to assemble.
Assembling The Legs
Choose strong, thick legs to hold the desk weight. Attach the legs to the inside corners of the base. Use metal brackets and screws for a tight fit. Check the height of each leg before fixing. Legs must be even to prevent wobbling. Add extra legs along the sides if the desk is wide. This adds more support and keeps the frame solid.
Ensuring Stability
Use cross braces between the legs for extra strength. Attach braces with screws and wood glue. Test the frame by pressing down on different spots. It should not sway or move. Sand rough edges and check all joints. Tighten any loose screws. A stable frame creates a safe and comfortable workspace.
Creating The Desk Surface
Creating the desk surface is a key step in building a U-shaped desk. This surface must be strong, smooth, and well-joined. Good preparation of the wood and careful assembly help make a durable and attractive workspace. Let’s explore how to cut, join, and finish the desk surface for a great home office setup.
Cutting And Sanding Wood
Start by measuring each desk section carefully. Use a saw to cut wood panels to the correct sizes for the U-shape. Make straight cuts to ensure clean edges. After cutting, sand all surfaces and edges with fine-grit sandpaper. Sanding removes rough spots and splinters. It also helps the finish stick better. Smooth surfaces create a comfortable workspace and a neat look.
Joining Desk Sections
Arrange the cut wood pieces in the U-shape on the floor. Use wood glue along the edges where sections meet. Clamp the sections tightly to hold them as the glue dries. For extra strength, add screws or brackets underneath the desk. Check that the joints are flush and even. Strong joints keep the desk steady and prevent gaps between sections.
Finishing Techniques
After joining, apply a finish to protect the wood. Choose a finish such as varnish, polyurethane, or paint. Use a brush or cloth to apply even coats. Let each coat dry completely before adding the next. Sand lightly between coats for a smooth finish. Finishing seals the wood against spills and stains. It also enhances the wood’s natural beauty.

Credit: www.amazon.com
Adding Storage And Accessories
Adding storage and accessories to your U-shaped desk boosts its function and keeps your workspace tidy. It creates a spot for everything, reducing clutter. Smart storage options help you stay organized and focused. Accessories enhance comfort and improve productivity. This part covers simple ways to add drawers, shelves, cable management, and lighting.
Installing Drawers And Shelves
Drawers keep small items close and hidden. Choose drawers with smooth slides for easy access. Position them under the desk or at the sides.
Shelves hold books, files, and decor. Open shelves add style and quick reach. Adjustable shelves fit different items perfectly. Use sturdy materials to hold weight well.
Cable Management Solutions
Cables can make your desk look messy fast. Use cable trays or raceways under the desk to guide wires neatly. Clips and ties bundle cords together. Label cords for quick identification. Keep power strips off the floor to avoid dust and damage.
Incorporating Lighting
Good lighting reduces eye strain and brightens the workspace. Add LED strip lights under shelves or along desk edges. Desk lamps with adjustable arms focus light where needed. Choose bulbs that mimic natural daylight for a calm effect.
Customizing For Comfort And Style
Customizing your U-shaped desk blends comfort with style. It transforms a simple workspace into a personal haven. Thoughtful choices improve your workday and reflect your taste. Focus on three key areas: colors and finishes, ergonomic features, and personal touches. Each adds unique value to your in-home office.
Choosing Colors And Finishes
Select colors that create a calm, focused environment. Soft neutrals and light tones reduce eye strain. Darker shades add elegance and hide stains well. Finishes matter too. Matte surfaces reduce glare and fingerprints. Glossy finishes bring a modern, sleek look. Match your desk’s finish with room decor for harmony.
Adding Ergonomic Features
Comfort prevents fatigue and boosts productivity. Choose adjustable chairs with good back support. Add a keyboard tray to keep wrists straight. Monitor stands raise screens to eye level, avoiding neck pain. Consider a footrest to support your legs. Include cable management to keep wires neat and out of the way.
Personalizing Your Setup
Add items that inspire and motivate you. A small plant brings life and fresh air. Use desk organizers to keep tools within reach. Place photos or artwork that make you smile. Choose lighting that suits your tasks—desk lamps or LED strips. Customize tech accessories like mousepads and keyboard covers for extra comfort.
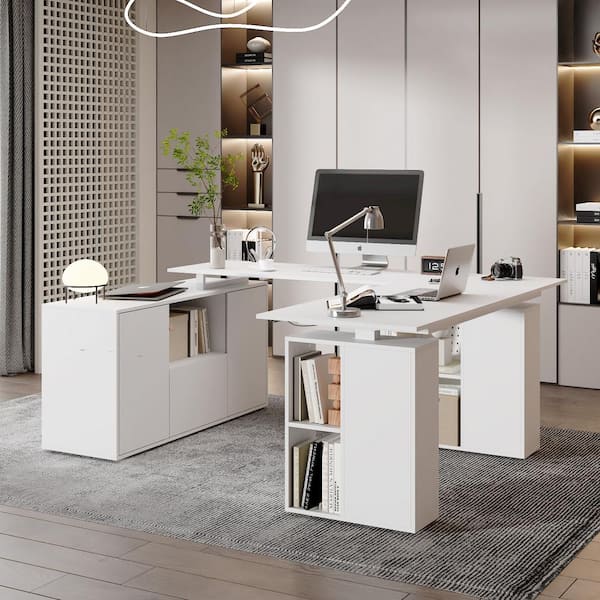
Credit: www.homedepot.com
Maintaining Your Desk
Maintaining your U-shaped desk keeps it functional and looking fresh. Regular care helps extend its life. Simple steps preserve the wood and hardware. A well-maintained desk supports your productivity and comfort.
Cleaning Tips
Dust your desk often using a soft cloth. Avoid abrasive cleaners that can scratch the surface. Use mild soap mixed with water for sticky spots. Dry the desk with a clean towel right after cleaning. Keep liquids away to prevent stains and warping.
Repairing Minor Damages
Fix scratches with a wood touch-up marker or wax stick. Tighten loose screws and bolts regularly to keep the desk stable. Fill small dents with wood filler and sand gently. Replace damaged drawer slides or handles to maintain smooth use.
Upgrading Components
Add extra shelves or organizers for better storage. Swap old hardware for modern knobs and pulls to refresh the look. Install cable management trays to keep wires neat. Consider adding LED lights for better workspace illumination.
Frequently Asked Questions
What Materials Are Best For Building A U-shaped Desk?
Use sturdy materials like oak, plywood, or MDF for durability. Oak offers strength and a polished look. Plywood is budget-friendly yet strong. MDF provides a smooth finish ideal for painting.
How Do I Maximize Space With A U-shaped Desk?
Arrange the desk to surround your workspace efficiently. Use the center for your main tasks. Place storage or tech on the sides. This setup boosts productivity and keeps essentials within reach.
Can I Customize The Size Of My U-shaped Desk?
Yes, measure your room carefully before building. Customize each segment to fit your space perfectly. Modular sections allow flexibility and easy rearrangement for future needs.
What Tools Are Needed To Build A U-shaped Desk?
Basic woodworking tools suffice: saw, drill, screws, measuring tape, and clamps. Sandpaper and paint or stain add finishing touches. Ensure safety gear is used during construction.
Conclusion
Creating a U-shaped desk for your home office boosts space and productivity. It offers plenty of room for work and storage. Building it yourself saves money and fits your needs perfectly. Remember to measure your space carefully before starting. Choose sturdy materials for a lasting desk.
Arrange your tools and supplies within easy reach. A well-planned desk makes working from home more comfortable. Try customizing it to match your style and workflow. Enjoy a neat, organized workspace that helps you focus every day.