Looking for the perfect home office desk that fits your space, style, and budget? Instead of settling for something off the shelf, why not create your own?
Building your own desk gives you full control over its size, materials, and design—making your workspace truly yours. Plus, it’s easier than you might think. In this guide, you’ll discover simple steps to craft a sturdy, stylish desk that boosts your productivity and comfort.
Ready to transform your work area and enjoy a desk tailored just for you? Let’s get started!
Planning Your Desk
Planning your home office desk is the first step toward a productive workspace. Thoughtful planning ensures your desk fits your needs and space perfectly. This stage helps avoid costly mistakes and wasted materials. Focus on size, style, and space measurements. These factors shape your desk’s functionality and comfort.
Choosing The Right Size
Select a desk size that matches your work needs. A small desk may feel cramped for multiple monitors. A large desk might overwhelm a tiny room. Think about what you use daily. Include space for a computer, paperwork, and other tools. Leave extra room for writing or other tasks. Balance between enough surface area and fitting the room.
Selecting A Design Style
Pick a design style that suits your home and taste. Simple, modern desks fit small spaces well. Classic wooden desks add warmth and charm. Consider the desk’s shape, color, and storage options. A minimalist style reduces clutter and distractions. Choose a style that makes you want to work. Your desk should inspire focus and comfort.
Measuring Your Space
Measure the area where your desk will go carefully. Note the width, depth, and height limits. Check for nearby doors, windows, and outlets. Allow space to move comfortably around the desk. Consider lighting sources and natural light flow. Accurate measurements prevent buying or building a desk too big or small. Measure twice, build once.

Credit: home.by.me
Picking Materials
Choosing the right materials is a key step in building your home office desk. The materials determine the desk’s strength and appearance. It helps to pick materials that suit your needs and budget. This section covers wood types, affordable options, and necessary tools.
Best Wood Types For Durability
Hardwoods like oak, maple, and cherry offer great durability. They resist dents and scratches well. These woods can last for many years with proper care. Pine is softer but still a good choice for beginners. It costs less and is easier to work with. Avoid softwoods if you want a desk that lasts long.
Affordable Countertop Options
Laminate countertops are budget-friendly and come in many designs. They resist stains and are easy to clean. Plywood is another cheap option and is simple to cut. You can paint or stain plywood to match your room. MDF boards are smooth but less strong than plywood. Choose based on your style and how much you want to spend.
Tools You’ll Need
Basic tools make building easier and safer. A circular saw or handsaw is needed to cut wood. Sandpaper or a power sander smooths rough edges. A drill helps to assemble the desk with screws. Clamps hold pieces steady while gluing or screwing. Measuring tape and pencil ensure accurate cuts. Having these tools ready speeds up your project.
Cutting And Preparing Wood
Cutting and preparing wood is a crucial step in building your own home office desk. It shapes the foundation of your project and ensures all pieces fit perfectly. Proper preparation helps avoid mistakes and saves time during assembly.
Start with good measurements and clear markings. Accurate cuts lead to a stable and attractive desk. After cutting, sanding smooths the wood, making it safe and ready for finishing.
Measuring And Marking
Measure the wood pieces twice before cutting. Use a tape measure and a straight edge for precision. Mark the cut lines clearly with a pencil or chalk. Mark both sides to guide your saw accurately. Double-check your measurements to avoid errors.
Safe Cutting Techniques
Always wear safety goggles and gloves before cutting. Use clamps to hold wood steady on a work surface. Cut slowly and steadily along the marked lines. Keep your hands away from the saw blade. Use the right saw for your wood type and thickness.
Sanding For A Smooth Finish
Start sanding with medium-grit sandpaper to remove rough edges. Move to fine-grit sandpaper to smooth the surface. Sand along the wood grain, not against it. Check for splinters or sharp spots and smooth them out. Clean the dust off before finishing your desk.

Credit: www.amazon.com
Assembling The Desk
Assembling your home office desk is a key step in creating a functional workspace. It brings all your carefully prepared pieces together. This part requires attention to detail and patience to ensure a sturdy final product.
Follow each step carefully. Use the right tools and take your time. The result will be a desk built to last and suit your needs perfectly.
Joining Pieces Together
Start by aligning the main parts of your desk. Use clamps to hold pieces steady if needed. Make sure edges meet evenly without gaps. This alignment is important for a clean look and strong build.
Check that all holes for screws or dowels line up. Adjust pieces gently until everything fits. Avoid forcing parts, which can cause damage.
Using Glue And Screws
Apply wood glue to the surfaces that will join. Spread glue evenly for a strong bond. Press pieces together and wipe off any excess glue immediately.
Next, insert screws into pre-drilled holes to hold the parts firmly. Use a drill or screwdriver with steady pressure. Do not overtighten, as this can crack the wood.
Glue and screws work together to ensure your desk stays solid. Let the glue dry completely before moving on.
Adding Support Structures
Support structures improve your desk’s stability and weight capacity. Add braces or crossbars under the desktop and between legs. These parts prevent wobbling and sagging.
Attach supports using screws and glue for extra strength. Check that everything is level and secure before final tightening.
Good support extends your desk’s lifespan and keeps it safe for daily use.
Finishing Touches
Finishing touches bring your home office desk to life. They protect the surface and improve its look. Small details make the desk more useful and personal. Focus on painting, coatings, and adding smart accessories. Each step helps create a desk that feels complete and ready for work.
Painting And Staining Options
Choose paint or stain based on the desk’s wood type. Paint adds color and covers imperfections well. Stain shows the wood’s natural grain and texture. Use light colors for a modern look or dark tones for warmth. Apply thin, even coats for a smooth finish. Let each layer dry fully before the next one.
Protective Coatings
Protect your desk with clear coatings to prevent damage. Polyurethane is a popular choice for durability and shine. Water-based coatings dry fast and have low odor. Oil-based coatings offer a richer finish but take longer to dry. Apply two to three coats, sanding lightly between each. This keeps the surface safe from scratches and spills.
Adding Functional Accessories
Add accessories that boost desk comfort and organization. Use cable clips to manage cords neatly. Attach a small drawer for pens and paper. Consider a monitor stand to improve screen height and posture. A desk lamp can brighten your workspace effectively. These extras make your desk more practical and enjoyable.
Setting Up Your Workspace
Setting up your workspace is a key step in making your own home office desk. A well-organized space helps boost focus and productivity. It also makes your work time more comfortable and less tiring. Take time to plan your desk placement, manage cables, and consider ergonomic needs.
Desk Placement Tips
Place your desk near natural light to reduce eye strain. Avoid glare on your screen by positioning your desk at an angle. Keep enough space around your desk for easy movement. Choose a quiet spot to limit distractions. Make sure outlets are nearby for easy access.
Cable Management Solutions
Use cable clips or ties to keep wires neat and tidy. Attach a cable tray under your desk to hide cords. Label cables to find them quickly when needed. Avoid tangled cables by separating power and data cords. Regularly check cables for damage and replace if needed.
Ergonomic Considerations
Choose a chair with good back support to protect your spine. Set your desk height so your elbows are at a 90-degree angle. Keep your feet flat on the floor or on a footrest. Position your monitor at eye level to avoid neck strain. Take short breaks to stretch and relax muscles.
Budget-friendly Tips
Creating your own home office desk can save money and add a personal touch to your workspace. Budget-friendly tips help keep costs low without sacrificing quality. Simple ideas and smart choices make a big difference.
Using Reclaimed Materials
Reclaimed wood and old furniture parts offer great value. These materials often cost less than new ones. They add character and durability to your desk. Check for sturdy pieces like pallets, doors, or shelves. Sand and treat them for a smooth finish. This approach supports recycling and reduces waste.
Where To Find Deals
Discount stores and online marketplaces have good bargains. Thrift shops and flea markets hold hidden gems for desks. Keep an eye on clearance sales in hardware stores. Local buy-and-sell groups offer used materials at low prices. Buying in bulk or during off-seasons can lower costs. Patience pays off when searching for the best deal.
Diy Alternatives To Store-bought Parts
Replace expensive desk legs with simple wooden blocks or crates. Use brackets and screws instead of fancy connectors. Cut your own shelves and panels from plywood sheets. Paint or stain materials to match your style. Basic tools like saws and drills handle most tasks. Crafting parts yourself reduces spending and adds pride to your project.
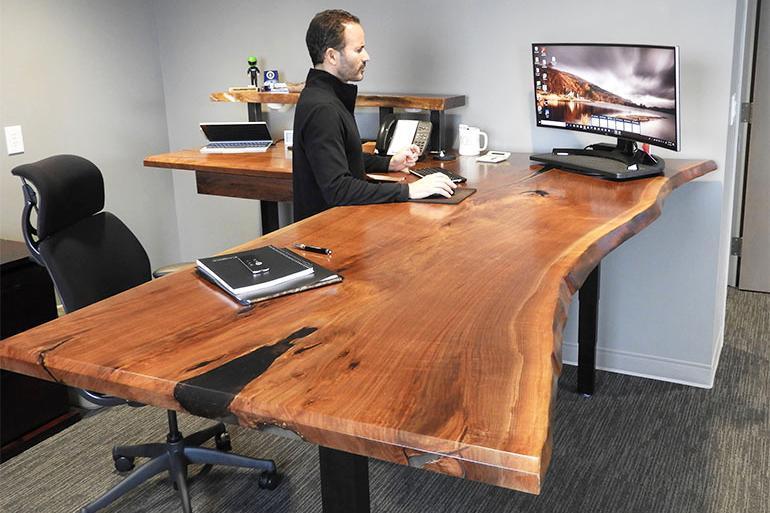
Credit: chagrinvalleycustomfurniture.com
Frequently Asked Questions
What Is The Best Material For A Diy Desk?
Hardwoods like oak and maple offer durability and a classic look. Plywood provides affordability and ease of use. Metal frames add strength and modern style. Choose based on your budget, tools, and desired desk durability.
Can I Build A Desk By Myself?
Yes, you can build a desk yourself using basic tools and materials. Start by measuring, cutting, sanding, and assembling wood pieces carefully. This DIY project suits beginners and allows creating a custom, budget-friendly workspace.
How To Create An Office Desk?
Measure your space and choose desk size. Cut wood to fit, sand surfaces smooth. Assemble parts with glue or screws. Finish with paint or stain for durability and style.
What Is The Best Cheap Countertop For A Desk?
Laminate countertops offer the best cheap option for desks. They are affordable, low-maintenance, and mimic expensive surfaces effectively.
Conclusion
Building your own home office desk saves money and fits your space. Use simple tools and materials for the best results. Take your time measuring and cutting carefully. Personalize your desk with paint or stain to match your style. A well-made desk improves comfort and work focus.
Enjoy the satisfaction of creating something useful by yourself. Start your project today and transform your workspace easily.