Looking to add a magical touch to your holiday decor? Creating a light string Christmas tree is a simple and fun way to brighten up any room.
Imagine a sparkling tree made entirely of glowing lights that you can customize to fit your style. You don’t need expensive materials or special skills—just a few supplies and a little creativity. Keep reading, and you’ll discover easy steps to make your own stunning light string Christmas tree that will impress your family and friends this season.
Your festive transformation starts here!
Materials Needed
Building a light string Christmas tree is a fun and creative project. You need the right materials to make it look great and last long. Gather everything before you start. It saves time and keeps things smooth.
Here are the essential materials you need for your light string Christmas tree.
Choosing The Right Lights
Pick LED string lights for bright and safe decoration. They use less energy and stay cool. Choose lights with a green wire to blend with the frame. Decide on the light color: white, multicolor, or a single color. Check the length to cover your tree frame fully.
Selecting A Frame
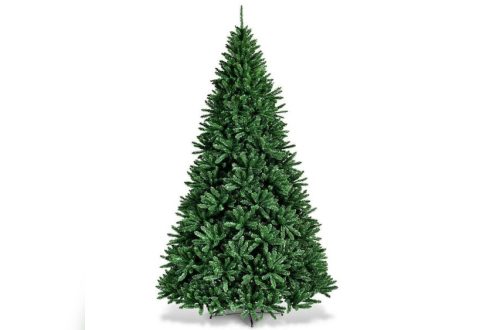
Choose a sturdy frame to hold the lights. Metal frames work well for outdoor use. For indoor trees, wooden or plastic frames are good. Pick a size that fits your space. Make sure the frame has enough support for the lights and decorations.
Additional Supplies
Gather zip ties or twist ties to secure lights to the frame. Use extension cords for extra length if needed. A power strip with a switch helps control the lights easily. Gloves protect your hands while working. Have scissors or wire cutters ready for trimming.
Preparing The Frame
Preparing the frame is the first step to creating a light string Christmas tree. A strong frame will hold the lights and shape the tree. It sets the base for your project and makes sure the tree stands steady. Follow simple steps to build a solid frame that fits your space.
Assembling The Base
Start by gathering materials like wood or metal rods for the base. Cut them into equal lengths for balance. Arrange the pieces in a square or triangle shape on the floor. Join the ends tightly using screws or strong tape. Make sure the base is flat and stable. This base will support the whole tree structure above.
Shaping The Tree Structure
Use longer rods or sticks to form the tree’s shape. Attach one end of each rod to the base’s corners. Bring the rods together at the top point like a pyramid. Secure the top ends firmly with wire or rope. Check the angles so the shape looks like a Christmas tree. This frame will guide your light strings and keep them neat.
Attaching The Lights
Attaching the lights to your light string Christmas tree is an important step. It helps create a bright and festive display. Doing this carefully makes your tree look neat and beautiful. Use simple methods to keep the lights in place and avoid tangles or loose wires.
Wrapping Techniques
Start by wrapping the lights around the tree frame evenly. Move from the top to the bottom in a spiral. Keep the lights close but not too tight. This helps the lights stay secure and shine brightly. Use gentle loops to avoid damaging the wires. Even spacing makes the tree look balanced and full.
Securing The Lights
Use small clips or twist ties to hold the lights firmly. Attach them to the frame or branches carefully. Avoid using heavy materials that can bend or break the frame. Check all connections to make sure they are tight. Secure loose ends to prevent wires from hanging. This keeps your tree safe and tidy.
Adding Decorations
Adding decorations to your light string Christmas tree brings it to life. Decorations create a festive and joyful look. They give your tree personality and charm. You can choose simple or bold decorations. The goal is to make your tree unique and bright.
Ornaments And Toppers
Ornaments add color and fun to your light tree. Use small, lightweight ornaments to avoid pulling the lights down. Choose shiny or glittery ones to reflect the light beautifully. Place ornaments evenly for a balanced look. A topper crowns your tree with style. Pick a star, angel, or any festive shape you like. Secure the topper well so it stays in place.
Enhancing With Ribbons And Garlands
Ribbons and garlands add texture and depth. Wrap ribbons loosely around the tree for a soft touch. Use colors that match your ornaments for harmony. Garlands can be beaded, tinsel, or natural like pine. Drape garlands in gentle curves to create movement. These decorations fill empty spaces and add warmth to your tree.
Safety Tips
Safety is very important when making a light string Christmas tree. Using lights and setting up your tree needs care. This helps prevent accidents and keeps your home safe. Follow these safety tips to enjoy your festive decoration without worries.
Electrical Precautions
Check all light strings before use. Look for frayed wires or broken bulbs. Use lights that are rated for indoor use only. Avoid overloading electrical outlets. Plug lights into a power strip with a fuse for extra safety. Turn off the lights before going to bed or leaving the house. Keep cords away from water and heat sources. Use LED lights for lower heat and energy use.
Stable Setup Advice
Choose a flat, firm surface for your tree base. Secure the light string firmly to prevent slipping. Use hooks or clips designed for hanging lights. Avoid placing the tree where pets or children can pull it down. Make sure the structure holding the lights is strong and stable. Check the setup regularly to keep it safe and steady. Remove the lights and store them properly after the holidays.
Maintenance And Storage
Taking care of your light string Christmas tree keeps it bright and safe. Proper maintenance and storage help the tree last many holiday seasons. Cleaning removes dust and dirt that dull the lights. Storing the tree correctly prevents damage and tangles.
Cleaning The Tree
Unplug the tree before cleaning. Use a soft cloth to wipe the lights gently. Avoid water or harsh cleaners that can damage bulbs and wires. Dust the branches with a dry brush or cloth. Check for broken bulbs or loose wires. Replace bulbs to keep the lights shining bright.
Proper Storage Methods
Remove all decorations and lights carefully. Coil the light string loosely to avoid tangling. Store the tree in a dry, cool place. Use a sturdy box or storage bag to protect it from dust. Keep the storage container off the floor to avoid moisture. Label the box for easy finding next year.
Frequently Asked Questions
How Do I Start Making A Light String Christmas Tree?
Begin by selecting a sturdy frame or wall space. Next, arrange your light strings in a triangular shape. Secure lights evenly for balance and safety. Finally, add decorations to enhance the tree’s festive look.
What Materials Are Needed For A Light String Christmas Tree?
You’ll need LED string lights, a frame or wall hooks, extension cords, and decorations. Opt for energy-efficient lights for safety and cost savings. Basic tools like tape or clips help secure the lights properly.
How To Safely Install Light Strings For Christmas Trees?
Always use outdoor-rated lights if placing outside. Avoid overloading electrical outlets. Secure wires to prevent tripping hazards. Turn off lights when unattended to reduce fire risks and keep your home safe.
Can I Use Any Type Of Lights For The Tree?
LED lights are best due to low heat and energy use. Avoid incandescent bulbs as they get hot and pose fire risks. Choose lights with a proper voltage rating matching your power source.
Conclusion
Making a light string Christmas tree brings joy and warmth. It brightens any room with simple steps and materials. You can enjoy the festive spirit in a creative way. This project suits all ages and skill levels. Try different light colors to match your style.
Gather your supplies and start building today. Celebrate the season with a glowing, handmade tree. It’s a fun and cozy holiday activity for everyone.