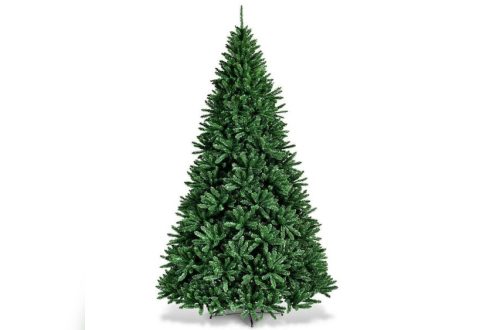
Stringing lights on your Christmas tree can transform your home into a magical winter wonderland. But if you’re like many people, the task might feel tricky or time-consuming.
What if you could make your tree sparkle evenly and beautifully without all the hassle? In this guide, you’ll discover simple, step-by-step tips to string your lights like a pro. By the end, your tree will glow with warmth and charm, impressing everyone who sees it.
Ready to light up your holiday season? Let’s get started!
Choosing The Right Lights
Choosing the right lights for your Christmas tree is important. The right lights make your tree look bright and beautiful. They also help you save energy and money. Picking the perfect lights can be simple if you know what to check.
Types Of Christmas Lights
There are many types of Christmas lights. The most common are incandescent and LED lights. Incandescent lights give a warm, classic glow. LED lights are brighter and last longer. You can find lights with clear or colored bulbs. Some lights blink or change colors for extra fun. Choose the type that fits your style and budget.
Selecting Light Length And Bulb Size
Measure your tree before buying lights. Small trees need fewer lights than big ones. Use about 100 lights for every foot of tree. Bulb size matters too. Mini lights are small and fit well on any tree. Larger bulbs give a bold look but need more space. Pick a length and bulb size that covers your tree well.
Energy-efficient Options
Energy-efficient lights save power and lower bills. LED lights use less electricity than old bulbs. They also stay cool, reducing fire risks. Solar-powered lights are another option for outdoor trees. Choosing energy-saving lights helps the environment. It also means you can leave your tree lights on longer without worry.
Preparing Your Tree
Preparing your Christmas tree is the first step to a beautiful holiday display. Taking time to set up the tree correctly makes stringing lights easier. A well-prepared tree looks fuller and stands steady. This preparation helps your decorations stay safe and neat all season.
Setting Up The Tree Stand
Choose a sturdy tree stand that fits your tree’s trunk. Place the tree in the stand and tighten the screws evenly. Make sure the trunk is straight and centered. Add water to keep the tree fresh longer.
Fluffing Branches For Fullness
Start from the bottom and work upward. Gently pull each branch outward to create space. Spread the needles evenly to avoid gaps. Fluffing makes your tree look fuller and helps lights shine well.
Checking Tree Stability
Once the tree is in place, give it a gentle shake. It should not wobble or lean. Adjust the stand or reposition the tree as needed. A stable tree keeps decorations safe and prevents accidents.
Planning Your Lighting Design
Planning your lighting design is a key step to make your Christmas tree look beautiful. Thoughtful planning saves time and avoids frustration. It helps you create a balanced and bright display. Start with a clear idea of how you want the tree to shine.
Consider the size of your tree and the style of your decorations. This will guide your choice of lights and their placement. Good planning makes stringing lights easier and more fun.
Deciding On Light Color And Style
Choose light colors that match your room and tree decorations. Warm white lights create a cozy feel. Bright white lights add sparkle. Colored lights bring a playful touch.
Pick the style of lights, such as classic bulbs or tiny LED fairy lights. Larger bulbs stand out more. Smaller lights blend softly with ornaments. Decide what fits your taste and theme best.
Mapping Light Placement
Think about how to place the lights for even coverage. Start from the bottom and move upwards. Wrap lights around branches, spacing them evenly.
Plan to put more lights near the tree’s front and fewer at the back. This avoids dark spots. Mark where you want clusters or special highlights. A simple sketch can help guide your work.
Testing Lights Before Stringing
Test each string of lights before putting them on the tree. Check for broken bulbs or loose connections. Replace any faulty parts to avoid dark spots.
Plug the lights in and watch them glow. This step saves time and frustration later. It ensures your tree shines bright and safe throughout the season.
Stringing The Lights
Stringing the lights on your Christmas tree is a key step to bring festive sparkle to your home. This process takes patience but creates a warm, inviting glow. Follow these simple steps to place your lights evenly and securely.
Starting At The Base
Begin by plugging in the lights to check they work. Find the bottom of the tree and start wrapping the light strand there. Make sure the plug reaches the outlet without stretching the cord. This prevents any hazards and keeps your setup neat.
Wrapping Lights Around Branches
Wrap the lights around each branch, moving upward slowly. Push the lights slightly into the branches to hide the wires. Spread the bulbs evenly to avoid dark spots. Use gentle loops, not tight twists, to protect the lights and the tree.
Securing Loose Ends
After reaching the top, tuck the remaining cord into the tree or behind nearby furniture. Use small clips or twist ties to hold loose wires in place. Check the lights from different angles to spot any gaps or loose bulbs. This keeps your tree looking tidy and bright all season.
Tips For Even Lighting
Even lighting makes your Christmas tree look bright and beautiful. It helps every part of the tree shine. Follow simple tips to spread lights evenly and avoid dark spots or clumps.
Spacing Lights Consistently
Keep the lights the same distance apart. Start at the tree base and move upward in a spiral. This method gives a balanced look. Check often to keep spaces even. Avoid bunching lights in one spot.
Using Multiple Light Strands
Use more than one strand for bigger trees. Connect strands carefully to cover all tree areas. Start with one strand at the bottom, then add others higher up. This fills gaps and keeps brightness steady across the tree.
Adjusting For Tree Shape
Shape matters. Wider trees need more lights near the base. Slim trees look better with lights spread out more. Adjust spacing to fit the tree’s curves. Step back often to see the overall effect.
Safety Considerations
Safety is key when stringing lights on your Christmas tree. Small mistakes can cause big problems like fires or shocks. Following simple safety steps keeps your home and family safe during the holidays.
Avoiding Overloading Circuits
Plugging too many light strings into one outlet can cause circuits to overload. This may lead to sparks or fire. Use power strips with built-in circuit breakers. Spread your lights across different outlets to reduce risk.
Inspecting Light Strands For Damage
Check each light strand before use. Look for frayed wires, broken bulbs, or loose connections. Damaged lights can short circuit and start fires. Replace any strand that shows signs of wear or damage.
Using Outdoor-rated Lights When Needed
Use outdoor-rated lights for trees placed outside or near doors and windows. These lights are made to handle wet and cold conditions. Indoor lights can fail or cause hazards if used outside. Always check the label before hanging lights outdoors.
Maintaining Your Lights
Maintaining your Christmas tree lights keeps them shining bright all season long. Proper care saves time and avoids frustration. Follow simple steps to enjoy a glowing, festive tree every year.
Replacing Burnt-out Bulbs
Check your lights before placing them on the tree. Find any bulbs that no longer shine. Turn off the lights and unplug them first. Use the correct replacement bulbs for your string. Push the new bulb gently into the socket. Test the lights again to make sure they work. Replace bulbs one at a time to avoid damaging the string.
Storing Lights Properly After Use
Turn off and unplug lights before removing them from the tree. Wrap the lights loosely around a spool or cardboard. Avoid tight coils to prevent wire damage. Store lights in a cool, dry place to stop moisture and rust. Use a labeled container to find the lights easily next year.
Troubleshooting Common Issues
Check for loose bulbs if part of the string is dark. Make sure all bulbs are fully seated in their sockets. Inspect wires for breaks or damage before use. Replace damaged sections or the whole string if needed. Test lights on a different outlet to rule out power issues. Keep your tree safe and bright with regular checks.
Frequently Asked Questions
How Many Lights Do I Need For A Christmas Tree?
Use 100 lights per foot of tree height for a full look. For example, a 6-foot tree needs about 600 lights. Adjust based on tree fullness and personal preference for brightness.
Should I Test Christmas Lights Before Stringing?
Yes, always test lights before stringing to ensure all bulbs work. Replace any burnt-out bulbs to avoid dark spots on your tree.
What Is The Best Way To String Lights On A Tree?
Start from the tree’s base, wrapping lights evenly around branches. Move upward in a spiral, spacing lights to cover the entire tree.
Can I Use Indoor Lights On An Outdoor Tree?
No, indoor lights are not designed for outdoor conditions. Use lights labeled for outdoor use to ensure safety and durability in weather.
Conclusion
Stringing lights on your Christmas tree makes it shine bright. Start at the bottom and wrap lights evenly around branches. Use enough lights to create a warm, cozy glow. Check for any dark spots and add more lights if needed.
Always plug in your lights before placing them on the tree. This helps avoid surprises and keeps your tree safe. Enjoy the festive look and the cheerful mood it brings. Simple steps create a beautiful holiday centerpiece everyone will love.
Now, your tree is ready to brighten up the season.