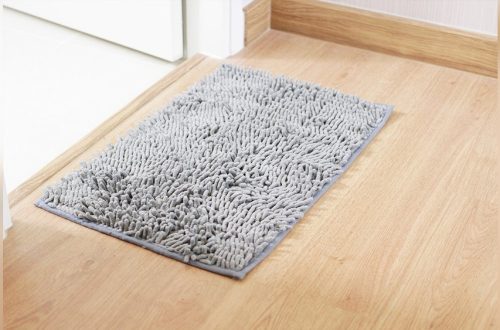
Is your bathroom rug slipping or losing its grip? A worn-out rubber backing can make your rug slide around, creating a safety hazard and causing frustration every time you step out of the shower.
But before you toss it out and buy a new one, you can save money and give your rug a fresh life by replacing that rubber backing yourself. You’ll discover simple, step-by-step methods to fix your bathroom rug’s backing quickly and easily.
Keep reading, and you’ll be able to stop slipping and start enjoying a secure, comfortable bathroom space again.
Tools And Materials Needed
Replacing the rubber backing on a bathroom rug requires specific tools and materials. Preparing these items beforehand makes the process smooth and efficient. This section covers what you need to get started.
Choosing The Right Rubber Backing
Select a rubber backing that fits your rug size perfectly. Look for non-slip rubber sheets or mats designed for bathroom use. The material should be waterproof and flexible. Thickness matters; too thin may wear out quickly. Too thick can make the rug stiff. Pick a backing that feels comfortable underfoot.
Essential Tools For The Job
Gather tools to cut, attach, and secure the new backing. A sharp utility knife or heavy-duty scissors works well for cutting rubber. Use a measuring tape to get exact dimensions. Strong adhesive glue made for rubber and fabric is necessary. A paintbrush or spreader helps apply glue evenly. Clamps or heavy books hold the rug and backing together while drying. Have a clean cloth handy to wipe excess glue.
Removing Old Rubber Backing
Removing the old rubber backing is the first step to replace it on a bathroom rug. This process helps prepare the rug for a new, fresh layer. Proper removal ensures the new backing sticks well and lasts longer.
Old rubber can become sticky or crumbly over time. It may cause the rug to slip or look worn out. Cleaning the surface after removal is important for a smooth finish.
Peeling Off The Old Layer
Start by placing the rug on a flat surface. Gently lift one corner of the rubber backing. Use your fingers or a plastic scraper to peel it away slowly. Avoid using sharp tools that can damage the rug fibers.
Work carefully across the rug, peeling the rubber in small sections. If the rubber is hard to remove, soften it with warm water. A damp cloth can help loosen the backing for easier peeling.
Cleaning The Rug Surface
Once the rubber backing is removed, clean the rug surface thoroughly. Use a mild detergent mixed with warm water. Apply the solution with a soft brush or cloth. This removes any leftover adhesive or dirt.
Rinse the rug with clean water to remove soap residue. Let the rug dry completely before applying new backing. A clean, dry surface helps the new rubber stick properly and last longer.
Preparing The New Rubber Backing
Preparing the new rubber backing is a key step in replacing the old one on your bathroom rug. This part makes sure the new backing fits well and sticks properly. Taking time to prepare helps the rug stay in place and last longer.
Attention to detail during this stage prevents issues like slipping or peeling later on. Below are two important tasks: measuring and cutting the rubber backing, and choosing the right adhesive.
Measuring And Cutting To Size
Start by measuring the rug’s backside carefully. Use a tape measure to get the exact length and width. Write down the numbers to avoid mistakes.
Next, lay the rubber backing flat on a clean surface. Use sharp scissors or a utility knife to cut the rubber. Cut slowly and follow the measurements closely.
Cutting the backing to the correct size ensures a neat fit. Avoid cutting too small or too large. A perfect fit keeps your rug secure and safe.
Selecting Adhesive Options
Choose an adhesive that works well with rubber and fabric. Look for glue labeled safe for bathroom use or moisture resistance.
Spray adhesives offer even coverage and quick drying times. Contact cement provides a strong, lasting bond but needs careful use.
Test a small spot first to see how the adhesive reacts. Pick one that holds well without damaging the rug.
Attaching The New Backing
Attaching the new rubber backing to your bathroom rug is a key step. It ensures the rug stays in place and feels safe underfoot. Take your time to do this right. Proper attachment helps the backing last longer and prevents slipping. The process involves applying adhesive and pressing the backing firmly. Both steps need care for the best result.
Applying Adhesive Properly
Choose an adhesive made for rubber and fabric. Spread it evenly on the rug’s underside. Use a brush or a roller for smooth coverage. Avoid thick globs that can create bumps. Let the glue become tacky before placing the backing. This helps it stick better. Work in a well-ventilated area to avoid strong smells.
Pressing And Securing The Backing
Lay the rubber backing carefully over the glued side. Start from one edge and press down slowly. Use a flat board or rolling pin to press firmly. Push out air bubbles and wrinkles. Apply steady pressure for several minutes. Let the rug dry flat under a heavy object. This keeps the backing tight and secure.
Finishing Touches
Finishing touches make your bathroom rug look neat and last longer. After applying the new rubber backing, small steps help complete the job. These steps improve safety and keep the rug in place.
Trimming Excess Material
Cut off extra rubber backing around the rug edges. Use sharp scissors for a clean cut. Trim close but do not cut the rug fabric. Smooth edges prevent tripping and give a tidy look.
Allowing Time To Set
Let the rubber backing dry completely before using the rug. This may take several hours or overnight. Avoid moving or stepping on the rug during this time. Proper setting ensures the backing sticks well and lasts longer.
Maintenance Tips For Longevity
Maintaining your bathroom rug helps it last longer and stay fresh. Proper care protects both the fabric and the rubber backing. Simple daily habits can prevent damage and keep the rug safe to use. Follow these tips for better rug care and longer life.
Cleaning The Rug Safely
Clean the rug regularly but gently. Use mild detergent and cold water. Avoid harsh chemicals that can break down the backing. Hand wash or use a gentle cycle in the machine. Let it air dry completely before placing it back. Never put the rug in direct sunlight to dry.
Preventing Backing Wear
Keep the rug dry to protect the rubber backing. Avoid placing it on wet floors for long times. Rotate the rug often to spread out wear. Use a non-slip pad if the backing starts to wear out. Avoid heavy foot traffic or dragging furniture over the rug.
Frequently Asked Questions
How Do I Remove Old Rubber Backing Safely?
To remove old rubber backing, gently peel it off using a plastic scraper. Avoid sharp tools to prevent fabric damage. Use a mild adhesive remover to clean residue. Always test the remover on a small rug area first.
What Materials Replace Rubber Backing On Rugs?
Common replacements include non-slip rug pads, silicone mats, or fabric-backed adhesives. Choose a material that matches your rug size and bathroom floor type. Ensure it provides grip and is water-resistant for bathroom use.
Can I Apply Rubber Backing At Home Easily?
Yes, applying rubber backing at home is straightforward. Clean the rug’s underside, cut the backing to size, and adhere it with fabric glue or double-sided tape. Allow it to dry fully before use.
How Long Does New Rubber Backing Last On Rugs?
New rubber backing typically lasts 1 to 3 years. Its lifespan depends on bathroom humidity and foot traffic. Regular cleaning and avoiding excessive moisture can extend its durability.
Conclusion
Replacing the rubber backing on a bathroom rug is simple and affordable. You only need a few tools and some patience. A fresh backing keeps the rug in place and stops slipping. It also makes your bathroom safer and cleaner.
Take your time to do it right. You will feel proud of your work. Enjoy a better, safer bathroom space every day.