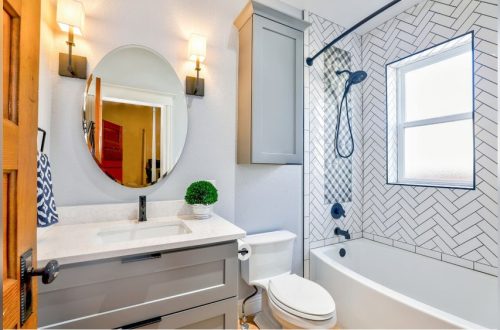
Are you looking to add a fresh, natural touch to your bathroom? A moss bathroom rug might be just what you need.
It’s soft, unique, and brings a bit of the outdoors inside. Imagine stepping onto a cushion of green moss every time you get out of the shower. Sounds relaxing, right? In this guide, you’ll discover simple steps to create your own moss rug that feels amazing under your feet and looks stunning.
Keep reading, and you’ll learn how easy it is to transform your bathroom into a peaceful, green retreat.
Choosing The Right Moss
Choosing the right moss is the first step to making a beautiful moss bathroom rug. The moss should be soft, durable, and easy to care for. It must hold up well in a moist bathroom environment. Picking the right type helps your rug stay fresh and green for a long time.
Types Of Moss Suitable For Rugs
Sheet moss is soft and flat, perfect for rugs. It creates a smooth surface that feels good underfoot. Cushion moss is thick and spongy, adding a plush texture. Reindeer moss is light and bushy, but less durable for rugs. Choose moss that stays green and resists drying out. Avoid moss that is too thin or brittle. Soft moss types last longer and are more comfortable.
Where To Source Quality Moss
Buy moss from garden centers or nurseries with good reviews. They often sell moss meant for indoor use. Check online stores specializing in moss and plants. Look for moss that arrives fresh and healthy. Avoid moss that looks dry or brown. Local forest or parks may have moss, but check rules first. Harvesting moss responsibly protects the environment. Quality moss ensures your bathroom rug looks great and lasts longer.
Preparing Your Workspace
Preparing your workspace is the first step in making a moss bathroom rug. A tidy and organized area helps you work faster and better. It keeps your moss fresh and your materials safe. This part of the process ensures your project starts smoothly.
Gathering Materials And Tools
Collect all items needed before starting. You will need moss, a rug base, glue, scissors, and gloves. Having everything close saves time. Check the moss for freshness and color. Choose a rug base that fits your bathroom size. Use strong glue to hold the moss in place. Scissors help trim the moss to the right size. Gloves protect your hands from glue and dirt.
Setting Up A Clean Area
Pick a flat surface with good light. Clean the surface to avoid dirt in your rug. Lay down newspaper or a plastic sheet to catch glue drips. Make sure the area is well ventilated. This helps the glue dry faster and keeps air fresh. Keep tools within reach but not crowded. A clean and neat space helps you focus and work well.
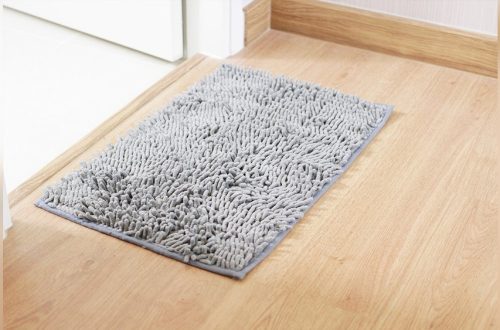
Creating The Rug Base
Creating the rug base is the first step in making a moss bathroom rug. This base holds the moss and keeps it in place. A strong, water-resistant base helps the rug last longer in a damp bathroom. Choose the right material and size before adding the moss.
Take your time to prepare a sturdy base. It will make your moss rug safe and comfortable for your feet.
Selecting A Rug Backing Material
Choose a backing material that resists water and mold. Felt, rubber, or plastic mats work well. Felt is soft but may absorb water. Rubber or plastic mats dry quickly and stop mold growth. Pick a material that feels good underfoot and suits bathroom use.
Cutting The Base To Size
Measure your bathroom floor space before cutting the base. Use scissors or a utility knife for clean cuts. Cut the base a little bigger than the moss patch. This extra margin helps keep the moss secure. Make sure edges are smooth to avoid tripping or curling.
Attaching Moss To The Base
Attaching moss to the base is a key step in making a moss bathroom rug. It helps create a soft, natural surface that feels great underfoot. The moss should be firmly attached to prevent it from moving or falling off. This process starts with arranging the moss and then securing it properly. Both steps ensure a lush, durable rug that lasts long.
Arranging Moss For A Lush Look
Place moss pieces close together to cover the base fully. Overlap edges slightly for a thick, full appearance. Use different moss types for texture and color variety. Arrange moss so no base material shows through. This makes the rug look natural and dense. Take time to shape the moss evenly across the surface.
Securing Moss With Adhesive Or Stitching
Choose a strong adhesive safe for moss and the base material. Apply glue in small sections for better control. Press moss firmly onto the glue to secure it well. For extra durability, use needle and thread to stitch moss. Sew in a grid pattern to hold moss tightly. Both glue and stitching keep moss in place through use.
Maintaining Your Moss Rug
Maintaining your moss bathroom rug keeps it fresh and soft. Moss needs care to stay green and healthy. Simple steps help your rug last a long time.
Watering And Humidity Tips
Moss loves moisture but not too much water. Spray your rug lightly with water two times a week. Use a spray bottle for even watering. Keep your bathroom humid to help moss thrive. Place a small bowl of water nearby or use a humidifier. Avoid dry air that makes moss dry and brown.
Cleaning Without Damage
Clean your moss rug gently to protect its texture. Shake the rug softly to remove dust and dirt. Use a soft brush to clear away any debris. Avoid harsh chemicals or strong soaps. These can harm the moss and make it lose color. Spot clean stains with a damp cloth and mild soap. Let the rug air dry completely before placing it back.
Creative Variations
Creative variations can make your moss bathroom rug unique and personal. Small changes bring new life to a simple design. Experimenting with colors, textures, and decorations creates a special rug. These ideas help you enjoy the crafting process more.
Try different styles to fit your bathroom’s look. A moss rug can be soft, colorful, or even patterned. Use your imagination to make a piece that feels right.
Adding Decorative Elements
Decorative elements add charm and interest to the moss rug. Small stones, shells, or beads work well. They create texture and make the rug visually appealing. Use waterproof glue to secure these items. Keep decorations simple to avoid making the rug slippery. Natural pieces like twigs or dried flowers also fit nicely. These add an earthy and cozy feel.
Using Different Moss Combinations
Mixing various moss types creates depth and color contrast. Use soft cushion moss with rough sheet moss together. This mix gives a beautiful natural pattern. Try shades of green or even add hints of brown or gray moss. Different moss textures make the rug comfortable underfoot. Combining mosses also helps the rug last longer. Choose moss that grows well in moist places for best results.
Frequently Asked Questions
What Materials Are Needed For A Moss Bathroom Rug?
You need preserved moss, a non-slip rug base, adhesive spray, scissors, and optional decorative stones. These materials ensure durability and comfort for your moss bathroom rug.
How Do You Attach Moss To The Rug Base?
Spray adhesive evenly on the rug base, then press moss firmly onto it. Let it dry for a secure hold.
Can Moss Rugs Survive Bathroom Humidity?
Yes, preserved moss rugs tolerate humidity well but avoid direct water contact. Proper ventilation helps maintain their fresh appearance.
How Do You Clean A Moss Bathroom Rug?
Gently dust or vacuum the rug using a soft brush attachment. Avoid water to preserve moss texture and color.
Conclusion
Creating a moss bathroom rug adds a fresh, natural touch to your space. It feels soft underfoot and brings greenery indoors. You only need a few simple materials and some patience. This project helps you enjoy nature’s beauty every day.
Cleaning and caring for the rug keeps it healthy and vibrant. Try making one to brighten your bathroom with calm, green vibes. A little effort brings big rewards in style and comfort. Give it a go, and enjoy your new, cozy moss rug.