Are you ready to add a personal touch to your home lighting? Making your own pendant lights is easier than you think—and it can transform any room instantly.
Imagine creating a light fixture that perfectly matches your style, saves you money, and sparks compliments from everyone who visits. In this guide, you’ll discover simple steps to craft pendant lights that shine bright and fit your space perfectly. Keep reading, and by the end, you’ll have all the tools and tips you need to light up your home like a pro.
Choosing Materials
Choosing the right materials is key to making beautiful pendant lights. The materials affect how the light looks and feels. They also impact the durability and style of your fixture. Pick materials that match your room and your budget. Consider how each material handles heat and light. Think about the shape and size of your pendant light too. Below are some common choices to help you decide.
Popular Materials For Pendant Lights
Glass is popular for its clear, bright look. It spreads light well and looks elegant. Metal adds a modern or industrial touch. It is strong and lasts long. Wood gives a warm, natural feel. It fits well in cozy rooms. Fabric shades soften the light. They create a calm and gentle glow. Each material changes the look and mood of your light.
Eco-friendly Options
Bamboo is a green choice. It grows fast and looks stylish. Recycled glass helps reduce waste. It can be colorful and unique. Upcycled metal parts give new life to old items. Natural fibers like jute or cotton are soft and safe. These materials help protect the environment while making your light special.
Budget-friendly Choices
Plastic is cheap and easy to shape. It comes in many colors and styles. Thin metal sheets offer a low-cost, durable option. Paper shades are simple and affordable. They work well for soft lighting. Consider mixing materials to save money but keep style. Choosing the right materials helps make your pendant light both beautiful and affordable.
Tools You’ll Need
Creating your own pendant lights starts with having the right tools. Using proper tools makes the process easier and safer. Some tools are basic and common. Others are more specialized for electrical work. Safety gear is also very important to protect you during the project.
Basic Tools For Beginners
Start with simple tools you likely have at home. A screwdriver set helps with screws and fixtures. Wire cutters and strippers make handling wires easier. A measuring tape ensures accurate lengths and placements. Pliers help bend and hold wires firmly. A drill might be needed to make holes for mounting.
Specialized Equipment
Some tools are designed for electrical tasks. A voltage tester checks if wires carry electricity. A wire crimper secures connectors to wires. Heat shrink tubing and a heat gun protect wire joints. A multimeter measures electrical values for safety. These tools help create professional and safe pendant lights.
Safety Gear Essentials
Protection is key during any electrical project. Safety glasses shield your eyes from debris. Insulated gloves prevent electric shocks. A dust mask keeps you safe from dust and particles. Work in a well-lit area to avoid mistakes. Always double-check power is off before starting work.
Simple Diy Designs
Simple DIY designs make pendant lights easy and fun to create. They use common materials and require little skill. These projects brighten your space with a personal touch. You can customize each piece to fit your style and room.
Jar Pendant Lights
Jar pendant lights use glass jars as lamp covers. Clean a mason jar and remove the lid. Drill a hole in the lid for the light cord. Insert a small bulb socket and secure the lid. Hang the jar with the cord and plug it in. This design gives a cozy, rustic glow.
Wire Frame Shades
Wire frame shades bring an industrial look to pendant lights. Use a wire basket or bend thick wire into a shape. Attach the wire frame to a light socket and cord. The open design lets light shine freely. These shades suit modern and minimalist rooms well.
Wooden Accents
Wooden accents add warmth to pendant lights. Use wood rings, blocks, or slices as part of the fixture. Drill holes to thread the light cord through the wood. Pair wood with simple bulbs for a natural look. This style blends well with farmhouse or vintage decor.
Advanced Techniques
Advanced techniques bring creativity to pendant lights. They help you build unique and stylish lighting.
These methods require more tools and practice. Start with simple steps, then try these skills.
Metalworking Basics
Metalworking shapes the frame or body of pendant lights. Use tools like hammers, pliers, and files. Cut and bend metal sheets carefully. Join parts with soldering or welding. Smooth rough edges for safety. Choose metals like copper or brass for a warm look.
Glass And Resin Crafting
Create shades using glass or resin for a bright effect. For glass, cut and polish pieces to fit your design. Use a kiln to shape or fuse glass safely. Resin allows more freedom. Mix colors or add small objects inside. Pour resin into molds and let it harden fully.
Custom Fabric Shades
Fabric shades soften light and add texture. Pick thick fabrics that block light well. Cut fabric to size and shape. Use glue or stitching to fix fabric on a frame. Add trims or patterns for style. Fabric shades suit cozy or modern spaces.
Wiring And Installation
Wiring and installing pendant lights is a crucial step. It ensures your light works safely and looks great. This part needs care and attention. Follow clear instructions to avoid problems.
Electrical Safety Tips
Turn off power at the circuit breaker before starting. Use a voltage tester to confirm no electricity flows. Wear insulated gloves for extra protection. Avoid working in wet areas to prevent shocks. Use tools with insulated handles only. Follow local electrical codes strictly to stay safe. If unsure, ask a professional electrician.
Step-by-step Wiring Guide
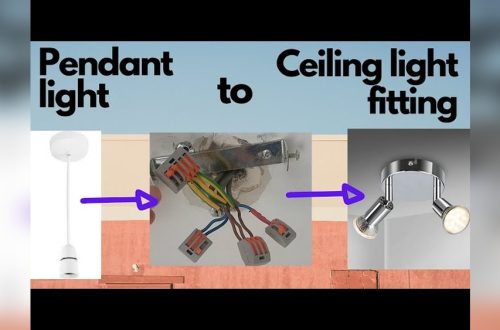
First, strip about half an inch of insulation from each wire. Connect the black (hot) wire from your pendant to the black house wire. Twist the white (neutral) wires together securely. Attach the green or bare copper wire to the ground wire. Use wire nuts to cover all connections firmly. Wrap connections with electrical tape for safety. Tuck wires neatly into the ceiling box. Double-check all connections before restoring power.
Mounting Your Pendant Light
Attach the mounting bracket to the ceiling box using screws. Carefully lift the pendant light and connect the wires. Push the fixture base against the ceiling. Secure the base with screws or clips provided. Adjust the pendant length if it has a chain or rod. Check the fixture is stable and does not wobble. Turn power back on and test the light.
Styling Your Lights
Styling your pendant lights shapes the room’s mood and look. Thoughtful placement and design choices make your lights stand out. Good styling blends function with beauty, enhancing your space’s feel.
Matching Decor Styles
Choose pendant lights that fit your room’s style. For modern rooms, sleek and simple lights work well. Rustic spaces look great with warm, wooden pendants. Classic rooms suit elegant, metal or glass fixtures. Match colors and materials to keep the look smooth and unified.
Layering With Other Lighting
Use pendant lights with other light sources. Combine them with floor lamps or wall sconces. This mix creates balance and depth in the room. Layered lighting helps control brightness for different times and moods. Pendants often work best as task or accent lights.
Adjusting Height And Placement
Hang pendant lights at the right height for the space. Over dining tables, keep lights about 30 to 36 inches above the surface. In living rooms, adjust height to avoid glare. Group several pendants close for a dramatic effect. Proper placement ensures comfort and style together.
Troubleshooting Tips
Troubleshooting pendant lights can feel tricky at first. Simple issues often cause big problems. Fixing these quickly saves time and money. This section covers common problems and easy solutions. Follow these tips to keep your pendant lights bright and safe.
Common Wiring Issues
Loose wires cause many pendant light problems. Check all connections inside the light fixture. Make sure wires are tight and secure. Look for damaged or frayed wires. Replace any damaged parts before use. Use a voltage tester to confirm power is off before touching wires. Proper wiring prevents flickers and shorts.
Fixing Flickering Lights
Flickering lights annoy many users. This can happen from a loose bulb or wiring issue. Tighten the bulb gently to see if flickering stops. If flickering continues, check the wiring connections. Faulty switches or dimmers also cause flickers. Replace these parts if needed. Use bulbs with the correct wattage for your fixture.
Maintaining Your Pendant Lights
Clean your pendant lights regularly to keep them bright. Dust and dirt reduce light quality. Turn off power before cleaning. Use a soft cloth and mild cleaner. Check wiring and bulbs during cleaning. Replace bulbs as soon as they burn out. Routine care extends your pendant light’s life and performance.
Frequently Asked Questions
What Materials Do I Need To Make Pendant Lights?
You need a light socket, cord, bulb, ceiling hook, and a shade. Optional tools include wire strippers, pliers, and a screwdriver. Choose materials based on your design and safety requirements.
How Do I Safely Wire A Pendant Light?
Turn off power before wiring. Connect wires matching colors: black to black, white to white, ground to ground. Secure connections with wire nuts and electrical tape. Test the light after installation.
Can I Customize Pendant Lights For Any Room?
Yes, you can customize size, color, and style to fit any room. Choose shades and bulbs that complement your décor and lighting needs. Customization enhances both function and aesthetics.
How Long Does It Take To Make Pendant Lights?
Making pendant lights typically takes 1 to 3 hours. Time varies by complexity and materials. Simple designs are quicker, while intricate ones need more time for assembly and finishing.
Conclusion
Making pendant lights at home can be fun and rewarding. You choose the style and materials yourself. This lets you add a personal touch to your space. The steps are simple to follow and don’t need special skills. Try different designs to see what fits your room best.
Handmade lights can brighten your home and your mood. Start your project today and enjoy the warm glow you create.