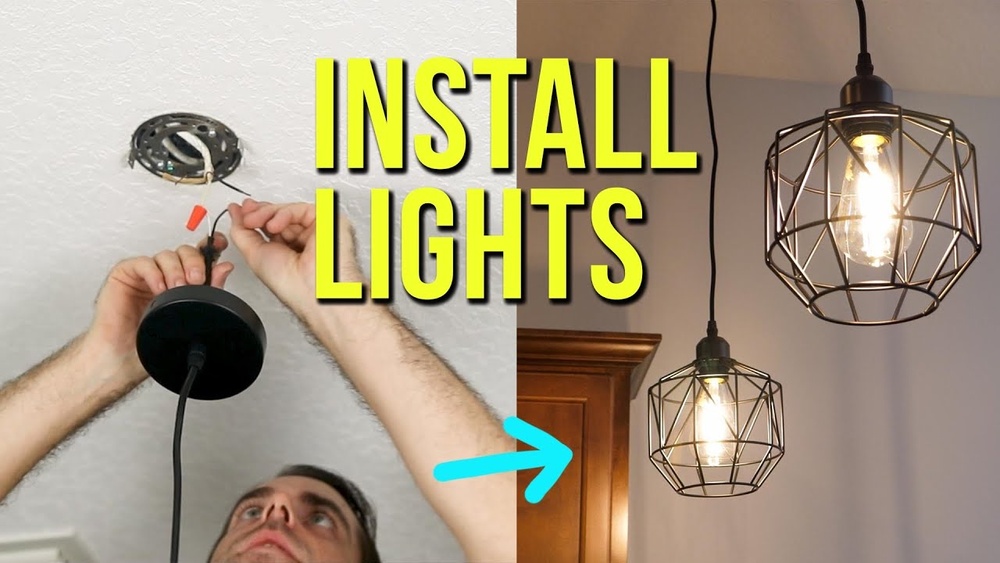
Are you ready to transform your space with a stylish pendant light but unsure where to start? Installing a pendant light might seem tricky, but with the right steps, you can do it yourself and add a warm, inviting glow to any room.
This guide will walk you through each part of the process clearly and safely, so you feel confident from start to finish. Keep reading, and you’ll soon have a beautiful new light fixture that brightens your home—and your mood.
Choosing The Right Pendant Light
Choosing the right pendant light is important for your room’s look and feel. It affects the room’s brightness and style. Picking the right one helps create a cozy and beautiful space. Consider the style, size, room, ceiling height, and electrical needs before buying.
Selecting The Style And Size
Choose a pendant light that matches your room’s design. Simple styles suit modern rooms well. Ornate lights fit classic or vintage spaces. Size matters. Big pendants can overwhelm small rooms. Small lights may look lost in large areas. Pick a size that balances the space.
Considering The Room And Ceiling Height
Think about the room’s purpose. Bright lights work well in kitchens and work areas. Soft lighting suits bedrooms and living rooms. Ceiling height affects the hanging length. Low ceilings need shorter pendants. High ceilings allow longer fixtures. Keep enough headroom for comfort.
Checking The Electrical Compatibility
Check your home’s wiring before buying. Confirm the voltage matches the pendant light. Look at the bulb type the fixture uses. Make sure the fixture fits your current setup. Safety comes first. If unsure, ask a professional for help.
Credit: www.upshine.com
Gathering Necessary Tools
Before installing a pendant light, gather all needed tools. This saves time and avoids frustration. Having the right tools ensures a smooth and safe installation process.
Essential Tools Checklist
- Screwdriver (flathead and Phillips)
- Wire stripper
- Voltage tester
- Drill with bits
- Measuring tape
- Wire nuts
- Ladder or step stool
- Electrical tape
- Pliers
Safety Equipment To Use
Safety is important when working with electricity. Use insulated gloves to protect your hands. Wear safety goggles to shield your eyes from dust or sparks. Turn off power at the circuit breaker before starting. Use a sturdy ladder that fits your height. Have a helper nearby if possible for extra safety.
Preparing For Installation
Preparing for installation is the first step to safely and successfully install a pendant light. It means making sure the power is off, the old fixture is removed, and the wiring is ready. Careful preparation saves time and avoids problems during the installation.
Turning Off The Power
Always start by turning off the power at the circuit breaker. Do not rely on just the wall switch. Use a voltage tester to check the wires. This ensures no electricity flows to the fixture area. Safety is the top priority.
Removing The Old Fixture
Remove the old light fixture carefully. Unscrew any screws or bolts holding it in place. Gently pull the fixture away from the ceiling. Disconnect the wires by loosening wire nuts. Keep the wires separate to avoid confusion later.
Inspecting The Wiring
Check the wiring for damage or wear. Look for cracks in the insulation or loose connections. Ensure the wires match the pendant light’s requirements. Fix any problems before installing the new fixture. Proper wiring prevents electrical hazards.
Credit: www.nichemodern.com
Mounting The Pendant Light
Mounting the pendant light is a crucial step. It secures the fixture and ensures safe operation. Follow each step carefully for a perfect installation. Take your time. Safety first.
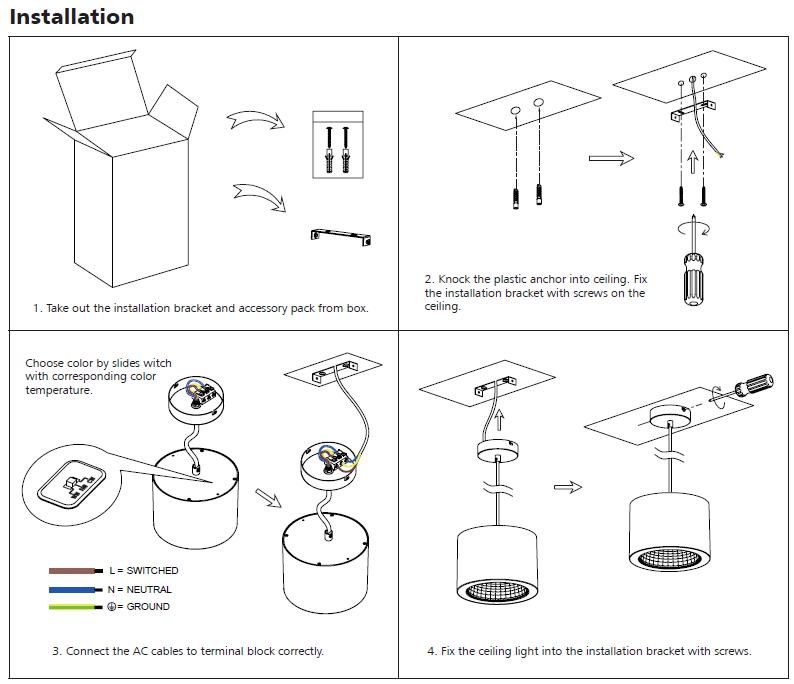
Assembling The Fixture
Start by unpacking all parts. Check the instruction manual for specific details. Attach the shade or glass to the fixture base. Tighten screws but do not overtighten. Make sure all parts fit well. This step prepares the pendant for mounting.
Attaching The Mounting Bracket
Locate the electrical box in your ceiling. Attach the mounting bracket to the box using screws. Use a screwdriver to secure it tightly. The bracket holds the pendant light firmly. It must be stable to prevent wobbling.
Connecting The Wiring
Turn off the power at the breaker. Match the wires by color: black to black, white to white. Connect the ground wire to the green screw or bare wire. Use wire nuts to secure connections. Wrap with electrical tape for safety. Double-check all connections before continuing.
Securing And Adjusting The Light
Securing and adjusting the pendant light is a key step. It ensures safety and the perfect look for your room. Take your time to fix the light properly. Adjust the height and position to fit your space well. Finally, install the bulb and shade carefully. This process makes your pendant light functional and stylish.
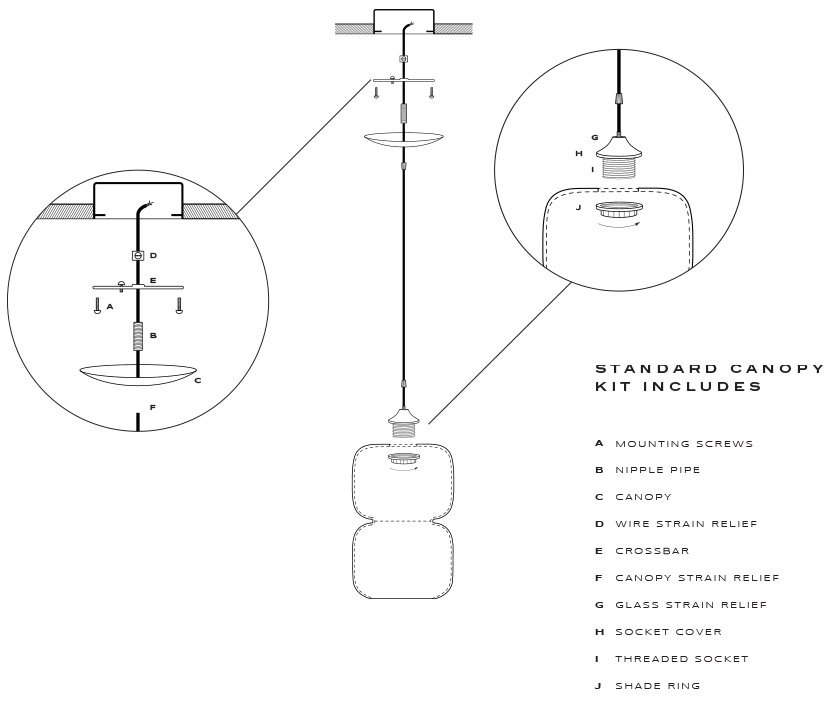
Fixing The Pendant To The Ceiling
Start by attaching the mounting bracket to the ceiling box. Use screws that fit tightly to hold the bracket in place. Make sure the bracket is secure and does not wobble. Next, connect the pendant light’s wires to the ceiling wires. Match colors: black to black, white to white, and green to ground. Use wire nuts to cover the connections. Carefully tuck the wires into the ceiling box. Finally, lift the pendant light and attach it to the bracket. Tighten screws to hold the light firmly.
Adjusting Height And Position
Most pendant lights have adjustable cords or rods. Shorten or lengthen them based on your room size. Keep the light low for dining tables or kitchen islands. Raise it higher in rooms with tall ceilings. Make small position changes to center the light. Ensure the pendant hangs straight and does not tilt. Check the height before tightening all screws.
Installing The Bulb And Shade
Choose the correct bulb type and wattage for your pendant. Screw the bulb into the socket gently. Avoid overtightening to prevent damage. Attach the shade by sliding or clipping it on. Make sure the shade fits snugly and does not wobble. Clean the bulb and shade before turning on the light. This step finishes the installation and improves room ambiance.
Testing And Final Touches
After installing your pendant light, it is important to test it and add the final touches. This step ensures the light works properly and looks great. It also helps catch any small problems before you finish. Follow these simple steps to complete your installation safely and confidently.
Restoring Power And Testing
Turn the circuit breaker back on to restore power. Switch on the light to check if it works. The bulb should light up immediately without flickering. Test the switch a few times to confirm the connection is stable. If the light does not turn on, double-check your wiring and connections. Make sure all wires are secure and connected correctly.
Troubleshooting Common Issues
If the light flickers or does not work, inspect the bulb first. Replace it with a new one to rule out a faulty bulb. Check that the wires are properly connected and tight. Look for any damaged wires or loose screws. Use a voltage tester to ensure power reaches the fixture. If problems persist, switch off the breaker and review your installation steps carefully.
Cleaning And Maintenance Tips
Clean the pendant light gently with a soft cloth. Avoid using harsh chemicals that can damage the finish. Dust the fixture regularly to keep it bright and attractive. Replace bulbs with the recommended wattage to prevent overheating. Check connections once a year to maintain safety. Simple care helps your pendant light last longer and look its best.

Credit: www.homdiyhardware.com
Frequently Asked Questions
How Do I Safely Install A Pendant Light?
Turn off power at the circuit breaker before installation. Use a voltage tester to confirm no electricity flows. Follow the manufacturer’s instructions carefully. Securely mount the fixture to a ceiling box rated for the light’s weight. Use proper tools and hardware for a safe setup.
What Tools Are Needed To Install Pendant Lights?
You need a screwdriver, wire stripper, voltage tester, drill, pliers, and ladder. These tools help you safely connect wires and mount the fixture. Having the right tools ensures a smooth and secure installation process.
How High Should I Hang A Pendant Light?
Hang pendant lights 28 to 34 inches above a table or counter. Maintain 7 feet clearance from the floor in open areas. Proper height improves lighting effectiveness and room aesthetics.
Can I Install A Pendant Light Myself?
Yes, if you have basic electrical knowledge and follow safety steps. Always turn off power and use a voltage tester. If unsure, consult a licensed electrician to avoid hazards and ensure code compliance.
Conclusion
Installing a pendant light can brighten any room quickly. Follow safety steps to avoid accidents during installation. Choose the right tools and parts before you start. Take your time to connect wires carefully and securely. Test the light once everything is in place.
Enjoy the new style and light in your space. Simple steps lead to great results every time. Ready to add charm and light to your home? This guide makes it easy and safe.


