Are you ready to add a personal touch to your home with a unique wooden table lamp? Wiring your own lamp might sound tricky, but with the right steps, you can easily bring your creation to life.
Imagine the satisfaction of lighting up a room with something you built yourself. In this guide, you’ll learn exactly how to wire a wooden table lamp safely and simply. Keep reading—you’re just a few steps away from crafting a beautiful, functional piece that’s truly yours.
Materials Needed
Wiring a wooden table lamp needs the right materials. These help you build a safe and working lamp. Gather all items before starting. This saves time and keeps work smooth.
Electrical Cord With Plug
This cord connects the lamp to power. Choose one with a plug and switch. It should be long enough for your space.
Lamp Socket
The socket holds the light bulb. Pick one that fits your bulb size. It must support the wattage you want to use.
Wire Connectors
Wire connectors join electrical wires safely. They keep wires tight and stop sparks. Use connectors that match your wire size.
Screwdriver And Pliers
These tools help attach parts securely. A screwdriver fits screws in sockets or plugs. Pliers twist wires and hold small parts.
Wooden Table Lamp Base
The wooden base holds all parts together. Make sure it has space for wiring inside. Sand it smooth to avoid splinters.
Electrical Tape
Wrap electrical tape around wire connections. This adds safety and prevents short circuits. Use good quality tape for durability.
Preparing The Lamp Base
Preparing the lamp base is the first important step in wiring a wooden table lamp. This part holds the lamp components and supports the whole structure. Careful preparation ensures safety and a neat finish.
Focus on choosing the right wood and making the hole for the wiring. These tasks set the stage for the rest of the project.
Selecting The Wood
Pick a sturdy wood that can hold the lamp parts firmly. Hardwoods like oak, maple, or walnut work well. Softwoods may crack or wear out faster.
Choose wood with a smooth surface. It makes sanding and finishing easier. Avoid wood with many knots or cracks. These can weaken the lamp base.
Drilling The Hole
Mark the center point where the cord will pass through. Use a ruler or tape to find the exact spot.
Drill a hole that fits the lamp cord snugly. Start with a small drill bit, then use a larger one to widen the hole.
Drill slowly to avoid splintering the wood. Sand the hole edges smooth to protect the cord from damage.
Choosing The Right Wiring Kit
Choosing the right wiring kit is important for your wooden table lamp project. It affects safety and how well the lamp works. The right kit fits your lamp size and style. It also makes wiring easier and safer. This section explains the types of wiring kits and their safety features.
Types Of Wiring Kits
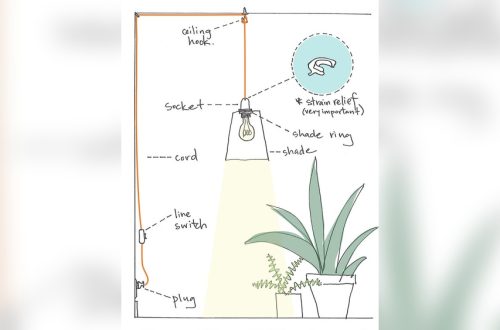
There are several wiring kits for table lamps. Basic kits include a cord, plug, and socket. These are good for simple lamps. Complete kits add switches and light bulb holders. They save time and effort. Some kits have decorative cords for style. Choose a kit that matches your lamp size and design. Check if the kit supports the bulb wattage you want.
Safety Features
Safety is key in wiring a lamp. Look for kits with insulated wires to prevent shocks. Kits with built-in switches help control power safely. UL or CE certification shows the kit meets safety rules. Heat-resistant parts avoid fire hazards. Make sure the cord is thick enough for the lamp’s power. Proper safety features protect you and your home.

Credit: yourwesterndecorating.com
Wiring The Lamp Socket
Wiring the lamp socket is a key step in making your wooden table lamp work safely. It connects the electrical current to the light bulb. This process needs care and attention. A secure wiring ensures the lamp lights up without risks.
Follow simple steps to strip and connect the wires. This will help your lamp function properly and last longer.
Stripping The Wires
Start by preparing the wires for connection. Use a wire stripper tool to remove about half an inch of the outer insulation from each wire. Be gentle to avoid cutting the copper inside. The copper wire must be clean and shiny. Twist the strands together to keep them tight.
Connecting The Wires
Next, attach the stripped wires to the lamp socket terminals. Usually, the black or brown wire connects to the brass terminal. The white or blue wire connects to the silver terminal. Wrap the wire clockwise around the screw terminal. Tighten the screw firmly to hold the wire in place. Make sure no copper is exposed outside the terminals. This prevents short circuits or shocks.
Assembling The Lamp
Assembling the lamp is a key step in making your wooden table lamp ready to use. This part involves putting together the main pieces and making sure all parts fit well. Careful assembly helps the lamp look good and work safely.
Securing The Socket
Start by placing the socket in the lamp base. The socket holds the light bulb. Use screws or clips to fix the socket tightly. Check that it does not move or wiggle. A secure socket keeps the bulb stable and safe. Make sure the wires are connected firmly before tightening.
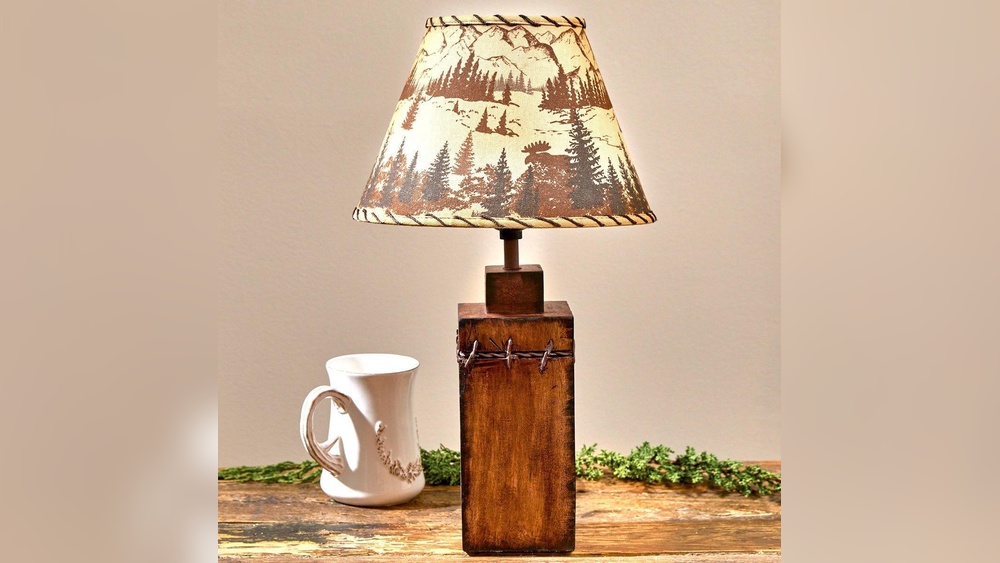
Attaching The Shade
Next, place the lamp shade over the socket. The shade softens the light and adds style. Align the shade with the socket holder. Use the ring or screws to fix the shade in place. The shade should sit evenly and not tilt. A well-attached shade completes the look of your lamp.

Credit: lisasdanceandexercise.com
Testing And Safety Tips
Testing and safety are key steps after wiring a wooden table lamp. They help avoid risks like shocks and fires. Careful checking ensures the lamp works well and stays safe over time.
Checking Connections
Make sure all wires fit tightly in their terminals. Loose connections cause flickering or sparks. Use a small screwdriver to tighten screws on wire terminals. Look for exposed wire strands and cover them with electrical tape. Inspect the lamp socket and cord for damage before use.
Ensuring Electrical Safety
Test the lamp with a voltage tester before plugging it in. Confirm no current flows when the lamp is off. Use a lamp cord with a proper rating for your bulb. Avoid overloading the lamp with high-wattage bulbs. Always unplug the lamp before making any fixes.

Credit: applications2.napier.ac.uk
Frequently Asked Questions
What Tools Do I Need To Wire A Wooden Table Lamp?
You need a wire stripper, screwdriver, electrical tape, wire nuts, and a lamp socket. Also, have a power cord and a bulb ready for assembly.
How Do I Safely Connect Wires In A Wooden Lamp?
Strip wire ends, twist matching wires together, secure with wire nuts, and wrap with electrical tape. Ensure all connections are tight and insulated to prevent shorts.
Can I Use Any Bulb For A Wooden Table Lamp?
Use bulbs within the lamp socket’s wattage rating. LED bulbs are recommended as they produce less heat and are energy efficient.
How Do I Mount The Socket To A Wooden Lamp Base?
Drill a hole in the base matching the socket size. Insert the socket and secure it with the provided nut or screws.
Conclusion
Wiring a wooden table lamp is a simple and rewarding task. Follow each step carefully for safety and success. Use the right tools and take your time. Testing the lamp after wiring ensures it works well. Enjoy your custom-made lamp that fits your style perfectly.
This project adds charm and light to any room. Try it yourself and see how easy it can be. Your effort will brighten your space with a unique touch.