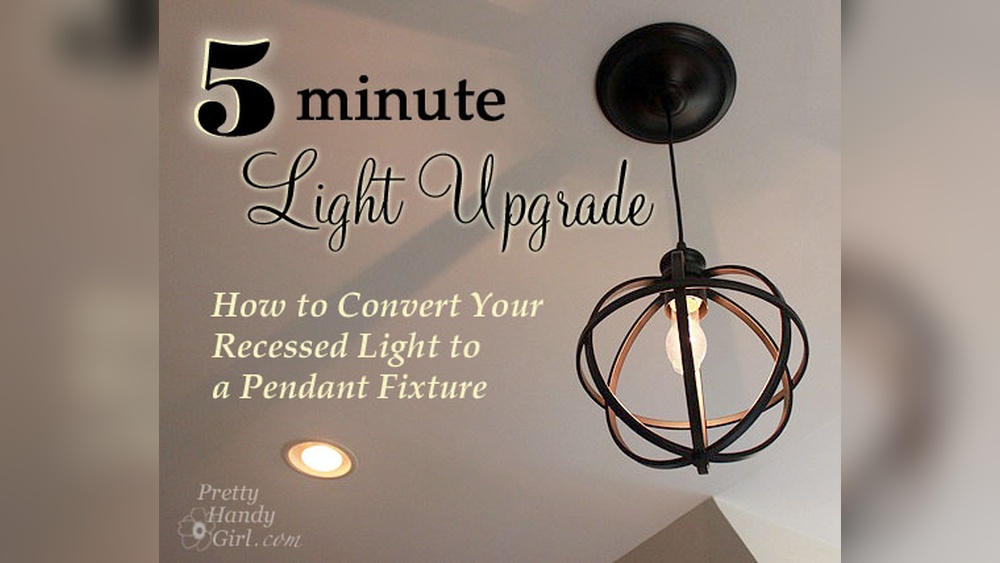
Are you tired of your plain recessed lights and ready for a stylish upgrade? Converting recessed lights to pendant lights can completely transform the look and feel of your space.
Imagine adding personality and warmth to your room with just one simple change. In this guide, you’ll learn exactly how to make this switch safely and easily, even if you’re not an expert. Keep reading to discover the step-by-step process that will help you bring charm and character to your lighting—and your home.
Tools And Materials Needed
Changing recessed lights to pendant lights needs specific tools and materials. Having the right items helps the job go smoothly and safely. This section lists all you need before starting.
Basic Electrical Tools
Get a voltage tester to check power is off. Use wire strippers to remove insulation cleanly. A screwdriver set helps remove and install fixtures. Pliers are useful for bending and twisting wires.
Pendant Light Fixture
Choose a pendant light that fits your room style and size. Make sure it includes the mounting bracket and canopy. The fixture should match the ceiling’s electrical box type.
Electrical Supplies
Get wire nuts to connect wires safely. Use electrical tape for extra insulation. A new electrical box may be needed for support. Check if the wiring is compatible with the fixture.
Safety Equipment
Wear safety glasses to protect your eyes from debris. Use gloves to avoid cuts or shocks. Have a sturdy ladder to reach the ceiling safely.
Safety Precautions
Changing recessed lights to pendant fixtures requires care. Safety is the top priority. Taking the right precautions protects you and your home. Follow simple rules to avoid accidents and damage.
Turn Off Power At The Circuit Breaker
Always shut off the power before starting any electrical work. Find the right switch in your circuit breaker box. This stops electricity flow and prevents shocks. Use a voltage tester to confirm the wires are dead.
Use Proper Tools And Equipment
Select tools designed for electrical jobs. Insulated screwdrivers and wire strippers reduce risk. Wear safety glasses to shield your eyes from debris. Use a sturdy ladder to reach the ceiling safely.
Check Ceiling Support And Wiring
Make sure the ceiling can hold the new pendant light. The fixture may be heavier than the recessed light. Inspect the wiring for damage or wear. Replace old wires to avoid fire hazards.
Follow Manufacturer Instructions
Read the pendant light’s installation guide carefully. Each model has unique requirements. Adhere to all steps and warnings. Proper installation ensures safety and fixture performance.
Consult A Licensed Electrician If Unsure
Electrical work can be complex and dangerous. If you doubt your skills, ask a professional. A licensed electrician guarantees correct and safe installation. This avoids costly mistakes or injuries.
Turn Off Power
Turning off the power is the first and most important step before converting recessed lights to pendant lights. Working with electricity without turning off the power can cause serious injury or damage. Safety must come first in every electrical project.
Switching off the power stops the flow of electricity to the light fixture. This prevents electric shocks while you work. It also protects your tools and the wiring from accidental shorts or sparks.
Take a moment to double-check that the power is really off. This simple step can save you from accidents and costly repairs. Always treat electricity with respect and caution.
Locate The Circuit Breaker
Find the circuit breaker panel in your home. It is usually in the basement, garage, or utility room. The panel controls the electricity supply for different areas of your house.
Look for the switch that controls the light fixture you want to change. It may be labeled as “lighting” or “recessed lights.”
Turn Off The Correct Breaker
Flip the correct breaker switch to the OFF position. This stops power from reaching the recessed light. Do not guess the breaker; find the exact one to avoid turning off other areas.
If you are unsure, turn off the main breaker for full power shutdown.
Test The Light Fixture
Use a voltage tester or a non-contact voltage detector. Check the recessed light to confirm no electricity is flowing. The tester should show no power before you start work.
Do not rely on the light switch alone. The switch may be faulty or still allow power.
Inform Others In The Home
Let others know you turned off the power for safety. This prevents someone from accidentally turning the breaker back on. Place a note on the breaker panel as a warning.
Keep the area clear of distractions and interruptions while working.

Credit: www.thestonybrookhouse.com
Remove Recessed Light Fixture
Removing the recessed light fixture is the first step in converting it to a pendant light. This process involves carefully taking apart the existing fixture. Safety is key. Always turn off the power before starting any electrical work.
The removal includes three main tasks. Detach the trim and bulb, disconnect the wiring, and remove the housing. Each step prepares the space for the new pendant light installation.
Detach Trim And Bulb
Start by removing the trim around the recessed light. This is usually held by clips or springs. Gently pull or twist to release it without breaking. Next, take out the bulb. This clears the way to access the wiring and housing.
Disconnect Wiring
After removing the trim and bulb, locate the wiring connections. Use a voltage tester to confirm the power is off. Unscrew the wire nuts or connectors. Carefully separate the wires. Keep them apart to avoid accidental contact.
Remove Housing
The housing holds the recessed light in place inside the ceiling. It may be attached with screws or clips. Remove these fasteners carefully. Pull the housing down through the ceiling hole. This step frees up the space for the new pendant fixture.
Prepare Electrical Box
Preparing the electrical box is a key step to convert recessed lights to pendant lights. It ensures safety and proper support for the new fixture. You must handle this step carefully for a smooth installation.
Inspect Existing Box
Start by turning off the power at the breaker box. Use a voltage tester to check no electricity flows to the light. Remove the recessed light trim and bulb to see the electrical box.
Look at the box size and condition. Recessed light boxes are often small and may not hold a heavy pendant. Check for cracks, rust, or loose wires. These issues need fixing before proceeding.
Also, note how the box is fastened. Some boxes are nailed to ceiling joists, while others are clip-mounted. The box must be secure to hold the new pendant.
Install Ceiling Box For Pendant
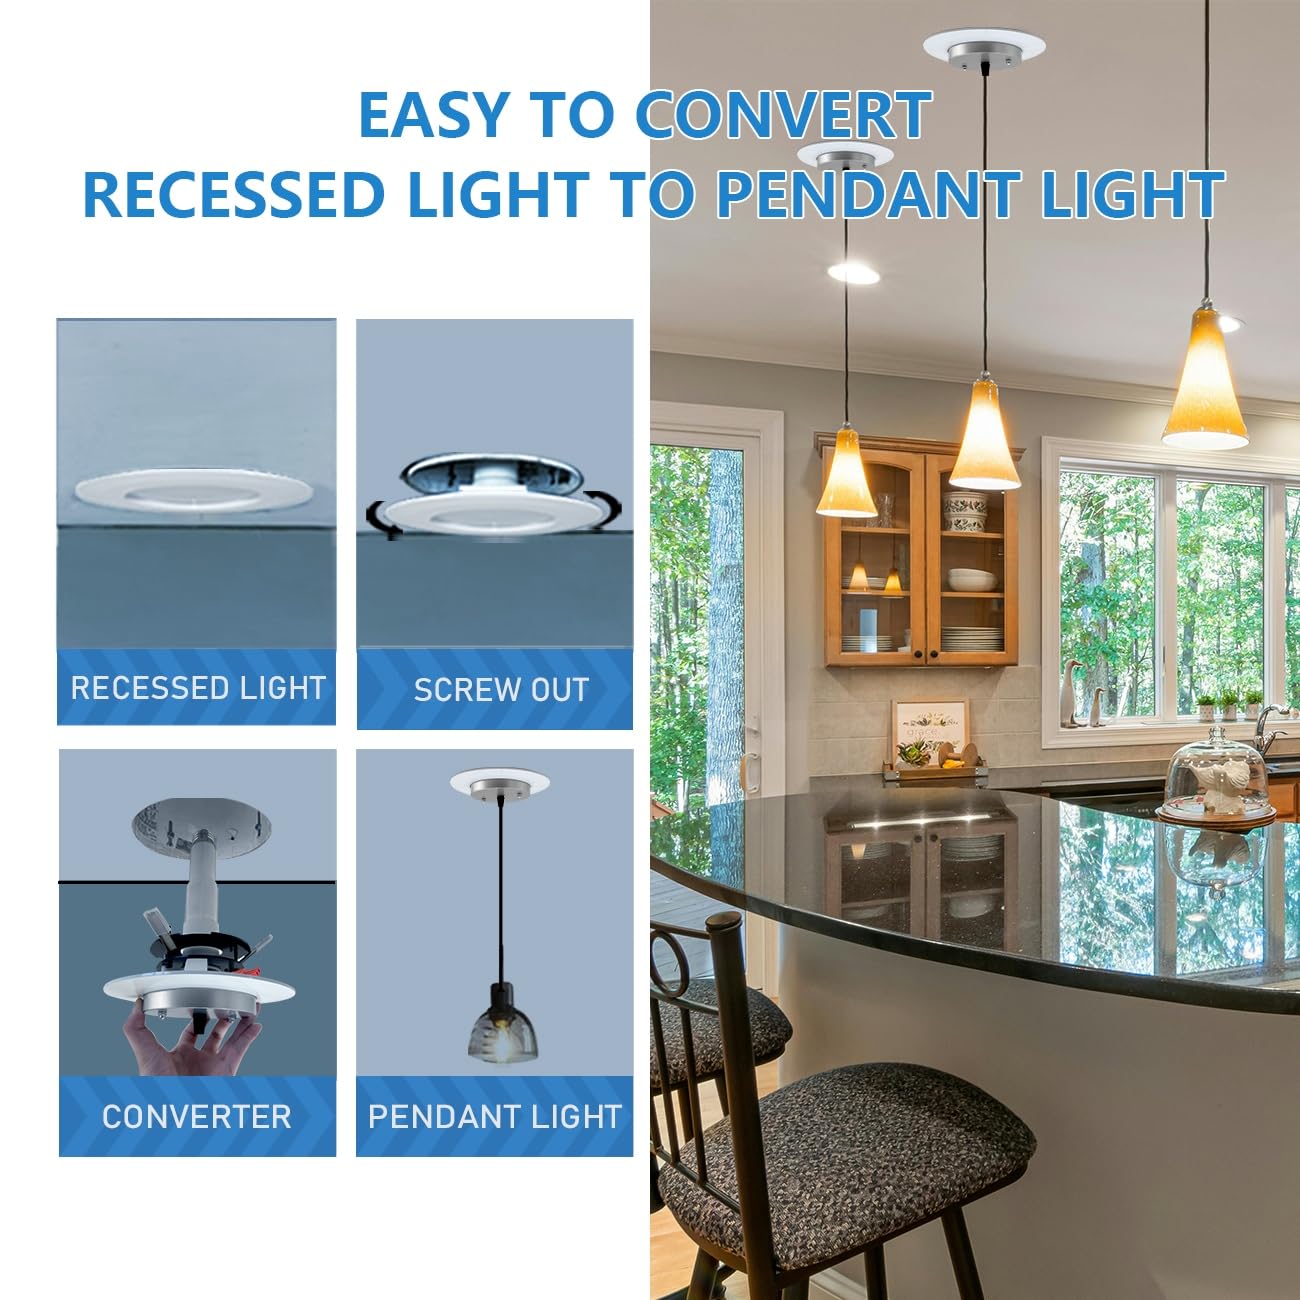
If the existing box is too small or unstable, replace it with a ceiling box designed for pendants. These boxes have strong support for heavier fixtures.
Choose a box rated for the weight of your pendant. Use a remodel or old work ceiling box if you cannot access the joists easily. These boxes clamp tightly to the drywall.
Cut the hole in the ceiling to fit the new box. Insert the box and secure it according to the instructions. Ensure the box is flush with the ceiling surface.
Pull the electrical wires through the new box. Double-check the wiring and box stability before installing the pendant.
Credit: www.amazon.com
Install Pendant Light Mount
Installing the pendant light mount is a key step in converting recessed lighting to a pendant fixture. This process involves attaching the mounting bracket and securing the canopy. Proper installation ensures the pendant hangs safely and looks great.
Attach Mounting Bracket
Start by turning off the power to the light fixture. Remove the recessed light trim and bulb. Locate the electrical box in the ceiling. Place the mounting bracket over the box. Use screws to fix the bracket tightly. Make sure it is secure and level. This bracket will hold the pendant fixture firmly.
Secure Canopy
Next, connect the pendant wires to the house wires using wire nuts. Match colors: black to black, white to white, and green or copper to ground. Push the wires into the electrical box carefully. Slide the canopy up to cover the box and bracket. Use screws or clips to fasten the canopy. Check that the canopy fits flush against the ceiling. This step hides the wiring and supports the pendant’s weight.
Connect Wiring
Connecting wiring is a key step when converting recessed lights to pendant lights. It ensures your new fixture works safely and correctly. Proper wiring helps avoid electrical problems and keeps your home safe. Take time to do this part carefully.
Match Wire Colors
Start by matching the wire colors from the ceiling to the pendant light wires. Usually, black wires connect to black, white to white, and green or bare copper to ground. This color code helps keep the electrical flow correct. Double-check the wires before joining them.
Use Wire Connectors
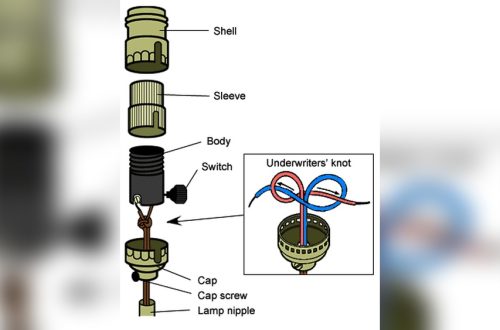
Use wire connectors to join the wires securely. Twist the wires together and screw on the connector tightly. These connectors keep wires safe and prevent shorts. Avoid loose connections; they can cause sparks or failure. Always use the right size wire connectors for your wires.

Credit: www.anikasdiylife.com
Attach Pendant Fixture
Attaching the pendant fixture is a key step to change a recessed light. It gives a fresh look and better lighting style. This part requires care and some basic tools. Follow simple steps to secure the new fixture safely and neatly.
Turn Off The Power
Start by turning off the power at the breaker box. This prevents electric shocks during the process. Double-check the light switch to make sure the power is off.
Remove The Recessed Light Trim
Take off the trim and bulb from the recessed light. This clears space for the new pendant fixture. Keep the parts in case you want to reuse them later.
Install The Mounting Bracket
Attach the mounting bracket that comes with the pendant. Use screws to secure it to the electrical box. Make sure it is tight and stable for safety.
Connect The Wires
Match the wires from the pendant to the house wires. Usually, black connects to black, white to white, and green to ground. Use wire nuts to join them securely.
Attach The Pendant Fixture
Lift the pendant and align it with the mounting bracket. Use screws or clips to fix it firmly in place. Check the fixture is steady and not loose.
Install The Light Bulb And Shade
Screw in the correct bulb type for the pendant. Attach the shade or cover according to the instructions. This finishes the look and protects the bulb.
Test The Light
Testing the light is a crucial step before converting recessed lighting to a pendant fixture. It ensures everything works safely and correctly. This step helps avoid surprises after installation.
Testing confirms the power supply is active and wires are connected properly. It also checks if the circuit can handle the new fixture. Proper testing saves time and effort later.
Turn Off The Power
Start by switching off the circuit breaker. This stops electricity flow to the light. Use a voltage tester to confirm no power is present. Safety first.
Remove The Recessed Light
Carefully take out the recessed light trim and bulb. This reveals the wiring and housing. Handle parts gently to avoid damage.
Check The Wiring
Look at the wires for any damage or wear. Confirm the wires are secure and properly connected. Use a voltage tester to check for live wires.
Test The Light Socket
Use a multimeter to test the socket’s voltage. This ensures the socket receives power. A good reading means the socket works fine.
Inspect The Junction Box
Check the junction box for space and condition. Make sure it can support the new pendant fixture. Look for loose or exposed wires.
Turn The Power Back On
Switch on the circuit breaker carefully. Check the wires and socket once again with a tester. Confirm power flows correctly before final installation.
Troubleshooting Tips
Changing recessed lighting to pendant lighting can be tricky. Some common problems may slow down the process. These troubleshooting tips help fix issues quickly and safely.
Knowing what to check saves time and frustration. Basic tools and clear steps make the job easier. Follow these tips to avoid common mistakes and ensure your new pendant light works well.
Check Power Supply Before Starting
Make sure the power is off at the breaker. Use a voltage tester to confirm no electricity flows. This step is crucial for safety. Working with live wires is dangerous.
Inspect The Electrical Box
The box should support the weight of the pendant light. Recessed light boxes are usually not strong enough. Replace or reinforce the box if needed. This prevents accidents or damage.
Verify Wire Connections
Match wire colors carefully: black to black, white to white, and ground wires together. Loose or wrong connections cause flickering or no light. Tighten all wire nuts securely for good contact.
Measure Pendant Height Correctly
Too low or too high pendant lights look awkward. Measure the drop length before installation. Adjust the chain or cord to fit your room size and ceiling height. Proper height improves both style and function.
Test The Fixture Before Final Installation
Connect the pendant light wires and turn the power on briefly. Check if the light works and stays steady. Fix any problems before mounting the fixture permanently. This step saves you from redoing the work later.
Frequently Asked Questions
How Do I Convert Recessed Lights To Pendant Lights?
To convert recessed lights to pendant lights, first turn off power. Remove the recessed fixture, install a compatible junction box, and mount the pendant fixture. Ensure wiring matches and secure connections with wire nuts. Restore power and test the new pendant light for functionality.
What Tools Are Needed For This Light Conversion?
You will need a voltage tester, screwdriver, wire stripper, pliers, electrical tape, and a compatible pendant light fixture. Safety gloves and ladder may also be necessary. These tools help safely remove recessed lights and install pendant lights with proper wiring connections.
Can I Convert Recessed Lighting Without An Electrician?
Yes, if you have basic electrical knowledge and follow safety precautions. Turn off power at the breaker, use a voltage tester, and carefully handle wiring. If unsure, hiring a licensed electrician is recommended to avoid hazards and ensure code compliance.
How Long Does It Take To Convert Recessed Lights?
The conversion typically takes 1 to 2 hours for one fixture. Time varies based on your skill level and fixture complexity. Preparing tools and ensuring safety precautions can speed up the process and result in a successful installation.
Conclusion
Converting recessed lights to pendant lights can change your room’s look easily. It brings style and better lighting to your space. The process is simple with basic tools and safety steps. Choose the right pendant to match your room’s design.
Take your time and follow each step carefully. Enjoy the new light and fresh feel in your home. This small change can make a big difference. Try it yourself and see the bright results.