Your artificial Christmas tree holds the magic of the holiday season, but if it looks flat or lifeless, it can steal that festive sparkle. You want your tree to look full, lush, and inviting—just like the ones in holiday magazines.
The good news? Fluffing your artificial tree is simple, and with the right steps, you can transform it from plain to picture-perfect in no time. Ready to bring your tree to life and impress your family and guests? Let’s dive into how you can fluff your artificial Christmas tree like a pro.
Choosing The Right Tree
Choosing the right artificial Christmas tree sets the stage for a beautiful holiday. The tree you pick affects how it looks and feels in your space. Consider style, size, and shape before buying. These factors help you find a tree that fits your home and taste perfectly.
Think about how the tree matches your decorations and room size. A well-chosen tree looks fuller and more inviting once fluffed. Let’s explore the key points to guide your choice.
Realistic Vs. Traditional Styles
Realistic trees mimic real pine needles and branches closely. They offer a natural look with detailed textures. Traditional trees use classic green branches that look simple and clean. They often have a fuller, uniform shape. Pick realistic for a lifelike feel. Choose traditional for a classic holiday vibe.
Size And Shape Considerations
Measure your space before choosing a tree size. Tall ceilings suit taller trees, while small rooms need shorter ones. Think about the tree’s width too. Slim trees fit tight spaces better. Full trees fill large areas nicely. Decide on the shape—cone, slim, or full—based on your room and style.
Preparing Your Tree For Fluffing
Preparing your artificial Christmas tree for fluffing is an important first step. It helps the tree look full and natural. Proper preparation saves time and effort later. Follow a simple process to get your tree ready for decorating.
Unpacking And Inspecting Branches
Carefully remove the tree from its box. Lay it flat on a clean surface. Check each branch for damage or missing tips. Straighten bent branches gently with your hands. Untangle any needles or wires to avoid damage.
Setting Up A Stable Base
Place the tree stand on a flat surface. Tighten all screws to secure the stand. Insert the tree trunk firmly into the stand. Make sure the tree stands straight and does not wobble. A stable base keeps the tree safe and steady.
Step-by-step Fluffing Process
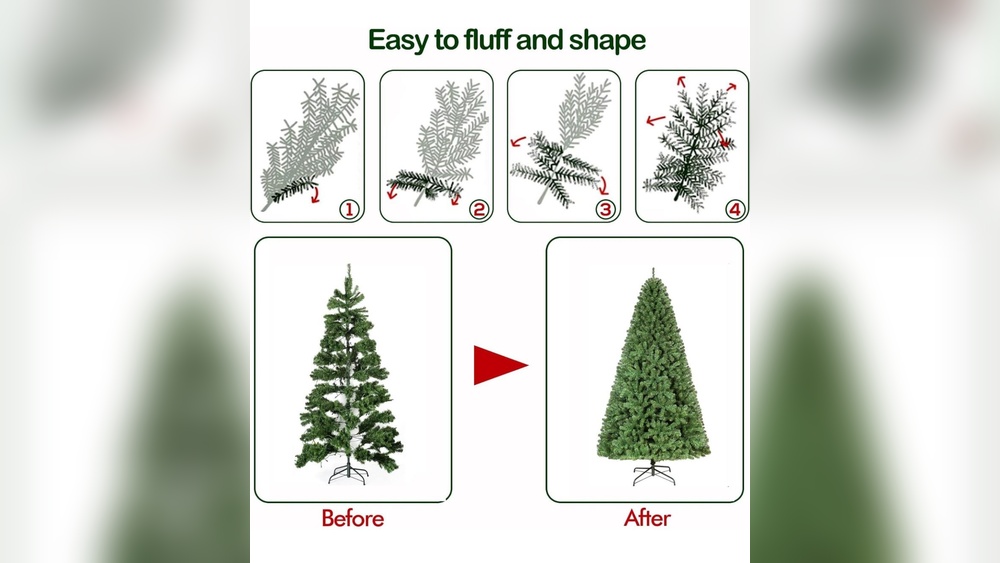
Fluffing an artificial Christmas tree brings it to life. It makes the tree look natural and full. This step-by-step process helps you create a beautiful tree ready for decorations. Follow each step carefully to achieve the best look.
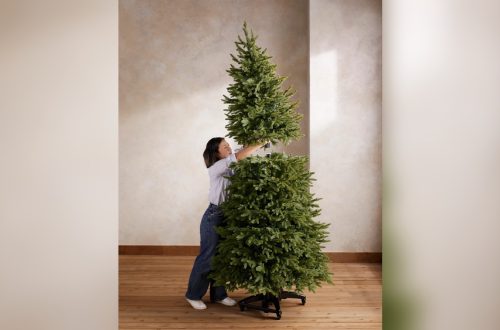
Starting From The Bottom
Begin fluffing at the tree’s base. Gently pull each branch away from the trunk. Spread out the needles on each branch. This opens the branches and avoids a flat look. Work your way around the tree’s bottom layer.
Shaping Each Branch
Move upward and shape each branch. Separate the branch tips carefully with your fingers. Fluff the needles to add volume and texture. Adjust the branches to look natural and spread evenly. This step creates a balanced appearance.
Filling Gaps And Creating Fullness
Check the tree for empty spaces or thin spots. Pull inner branches outward to fill gaps. Bend smaller branches gently to cover bare areas. Keep adjusting until the tree looks full and even. This step makes the tree look lush and inviting.
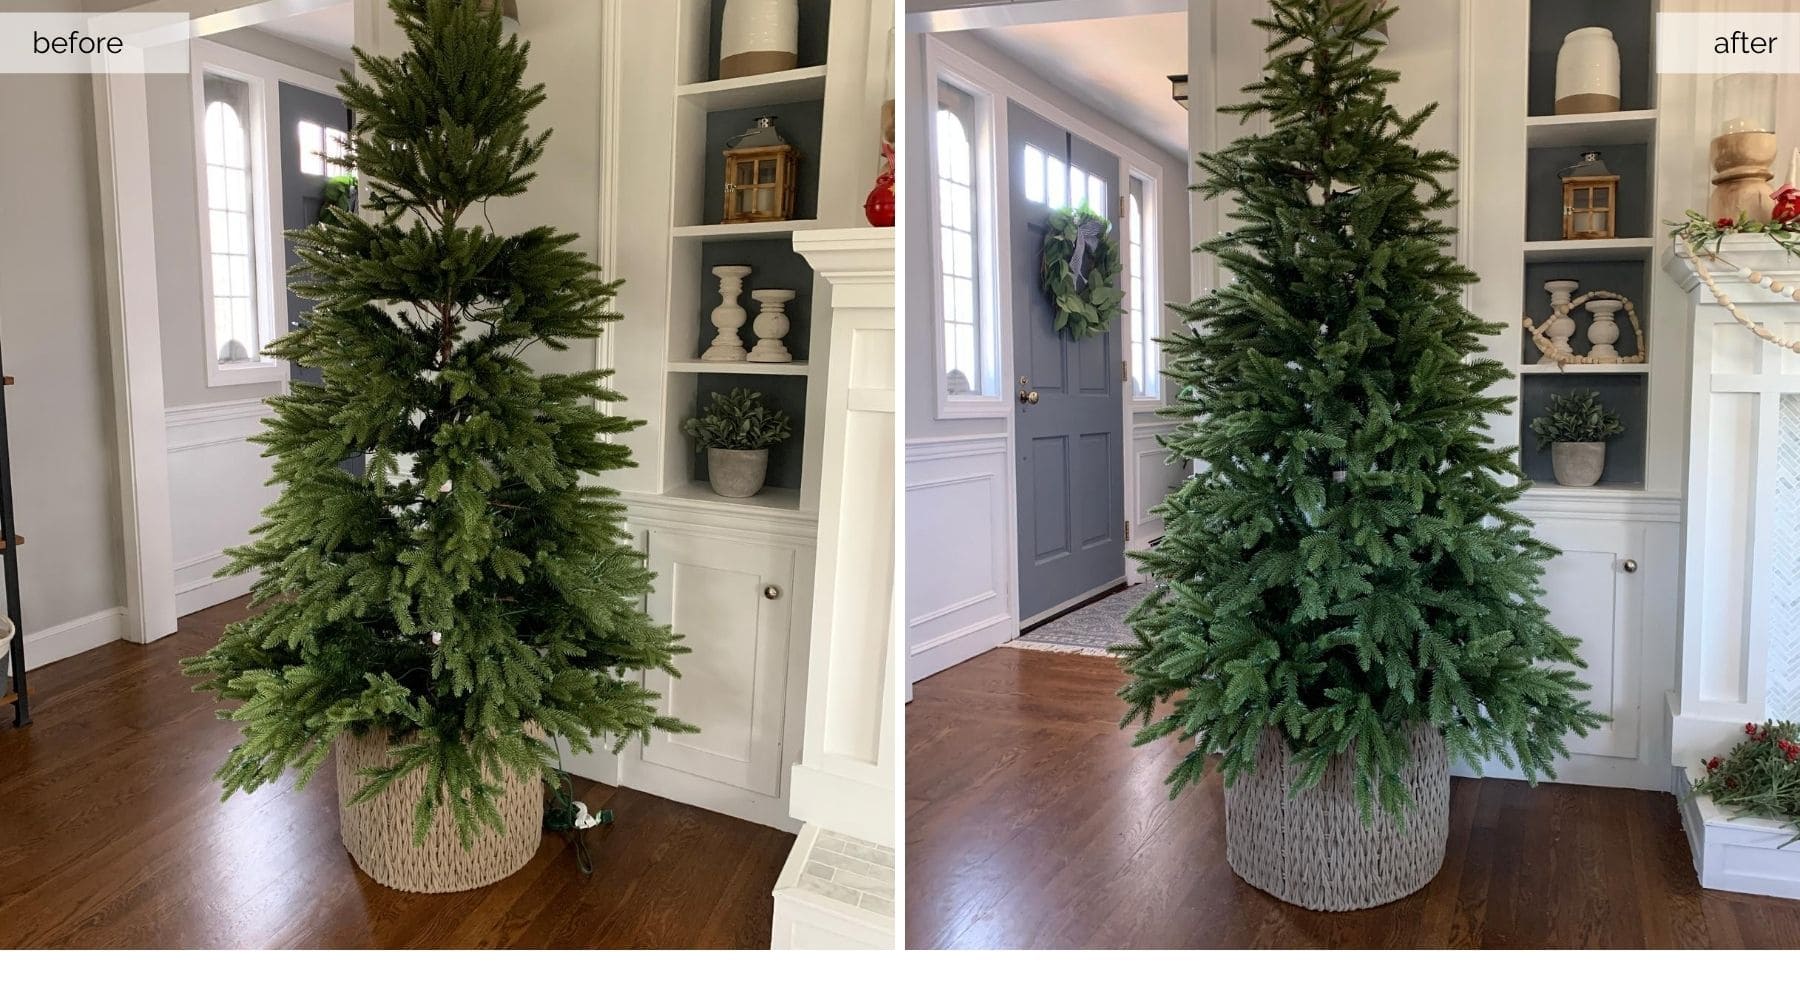
Credit: jennakateathome.com
Common Mistakes To Avoid
Fluffing an artificial Christmas tree can bring it to life. Avoiding common mistakes saves time and effort. These errors can make your tree look odd or unsafe. Knowing what to avoid helps you create a perfect tree.
Over-fluffing Branches
Too much fluff makes branches look crowded and unnatural. It can also damage the tips. Spread the needles gently and evenly. Stop once the tree looks full but not stuffed. Less is often more.
Ignoring Symmetry
A tree should look balanced from all sides. Fluff branches on one side only causes a lopsided look. Check the tree from different angles. Adjust branches to keep the shape even. Symmetry creates a neat, attractive tree.
Neglecting Safety Precautions
Safety matters when fluffing your tree. Avoid using sharp tools near branches. Keep the tree away from heat sources. Check for loose parts that can fall. A safe setup protects your home and family.
Enhancing Your Tree’s Appearance
Enhancing your artificial Christmas tree’s appearance makes it look full and festive. Proper fluffing is just the start. Decorating smartly creates a warm, inviting holiday vibe. Follow simple tips to brighten your tree and room.
Adding Lights Before Decorations
Start with lights for a glowing base. Wrap string lights evenly around branches. Place bulbs deep inside for a natural shine. Use warm white lights for a cozy feel. Turn lights on before adding ornaments to see coverage. This step sets a bright, balanced foundation.
Choosing Complementary Ornaments
Pick ornaments that match your tree’s colors. Use a mix of sizes for depth and interest. Place larger ornaments near the bottom. Smaller ones go near the top and tips. Add shiny and matte finishes for contrast. Balance colors on all sides for a full look.
Using Tree Skirts And Toppers
Tree skirts hide the stand and catch fallen needles. Choose a skirt that fits your room style. Soft fabric skirts add warmth and color. Toppers crown your tree with charm and height. Popular options include stars, angels, or bows. Secure the topper firmly to avoid slips.

Credit: www.youtube.com
Maintaining Your Tree Throughout The Season
Maintaining your artificial Christmas tree throughout the holiday season keeps it looking fresh and full. Regular care helps the tree stay bright and beautiful. It also makes taking down and storing the tree easier later on.
Regular Fluffing Touch-ups
Fluff the branches gently every few days. This keeps the tree looking full and lively. Touch up any branches that get squished or bent. Use your hands to spread out the needles carefully. Small fluffing sessions prevent the tree from looking flat.
Cleaning And Storage Tips
Dust the tree often to keep it clean. Use a soft cloth or a small brush. Avoid harsh cleaning products that can damage the needles. When the season ends, remove all decorations before storing. Store the tree in a cool, dry place. Use the original box or a tree storage bag to protect it. Proper storage helps the tree last many years.

Credit: www.youtube.com
Frequently Asked Questions
How Do I Fluff An Artificial Christmas Tree?
Start by separating each branch and spreading needles evenly. Bend branches upward for fullness. Work from bottom to top for best results.
How Long Does It Take To Fluff An Artificial Tree?
Fluffing usually takes 15 to 30 minutes depending on tree size and branch density. Larger trees require more time.
Should I Fluff Tree Branches Before Or After Assembly?
Fluff branches after assembly for easier access. Fluffing post-assembly ensures a natural, full look with less effort.
How Often Should I Fluff My Artificial Christmas Tree?
Fluff your tree annually before decorating. This keeps the tree looking fresh and full throughout the holiday season.
Conclusion
Fluffing an artificial Christmas tree brings it to life. Spread the branches wide and shape them gently. Start from the bottom and work your way up. Take your time to fill gaps and add fullness. A well-fluffed tree looks natural and inviting.
This simple step makes your holiday decorations stand out. Enjoy the warm, festive feeling it creates in your home. Your tree will shine bright all season long.