Are you planning to decorate your home with mini Christmas lights but unsure about the right size hole to use? Getting this detail right can make your setup look neat and secure, saving you from frustrating twists and loose wires.
In this post, you’ll discover exactly what size hole works best for mini Christmas lights, ensuring your decorations shine bright and stay put all season long. Keep reading—you’re just one step away from a flawless holiday display!
Mini Christmas Lights Basics
Mini Christmas lights bring a warm glow to holiday decorations. They are small, bright, and easy to use. Knowing the basics helps you choose the right lights for your project. This includes understanding types, wire thickness, and bulb sizes.
These details also affect what size hole to make for the lights. Let’s explore the main features of mini Christmas lights.
Types Of Mini Lights
Mini lights come in several types. The most common are incandescent and LED. Incandescent lights use small bulbs that get warm. LED lights stay cool and save energy. Both types have many colors and styles.
Some sets have steady lights, while others blink or change colors. Choose the type based on your decoration needs and safety preferences.
Common Wire Thickness
Mini lights usually have thin wires. The wire thickness affects how flexible the lights are. Thin wire bends easily but can be fragile. Thicker wire is stronger but less bendy. Most mini lights use wire around 22 to 24 gauge.
Wire thickness also influences the size of holes needed to pass the wire through decorations.
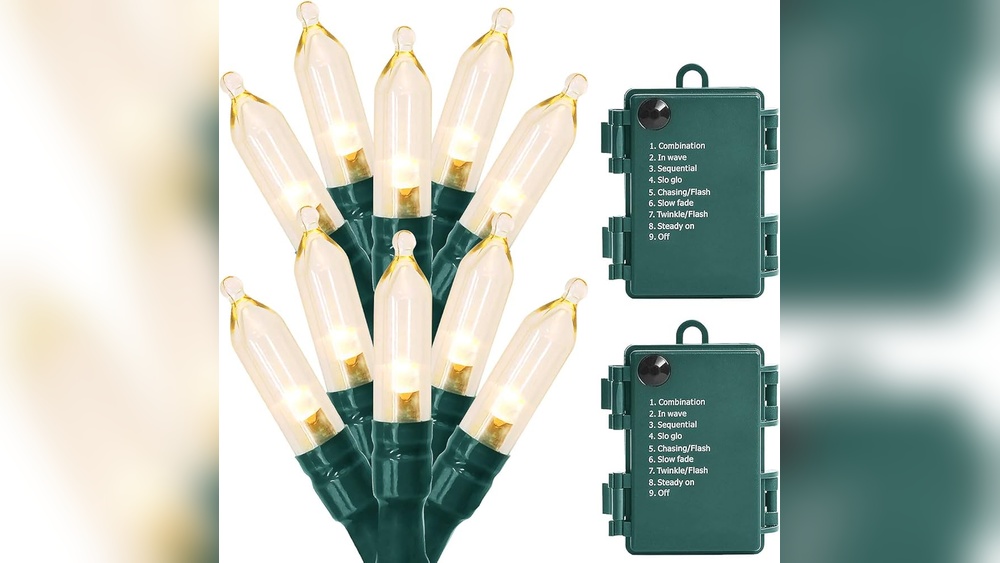
Bulb Sizes
Mini light bulbs come in small sizes. The most popular size is the T5 bulb. These bulbs are about 5 mm wide. Some sets use even smaller T3 bulbs, around 3 mm wide. Larger bulbs like T7 or T10 are less common for mini lights.
Knowing bulb size helps decide the hole diameter for mounting or threading lights.
Credit: www.ebay.com
Choosing The Right Hole Size
Choosing the right hole size for mini Christmas lights is important. It helps the lights fit well and stay secure. The hole should not be too tight or too loose. A good fit protects the bulbs and wiring from damage. This section explains how to pick the right hole size for your lights.
Measuring Bulb Diameter
First, measure the diameter of the light bulb. Use a ruler or caliper for accuracy. The hole should be slightly larger than the bulb diameter. This makes sure the bulb fits without force. Check the bulb size before drilling any holes.
Considering Wire Gauge
Next, think about the wire size. Mini Christmas lights have thin wires. The hole needs to allow the wire to pass freely. Avoid holes that are too small. Tight holes may pinch the wire and cause damage.
Allowing Room For Expansion
Leave a little extra space in the hole for expansion. Bulbs and wires can get warm and expand slightly. A small gap prevents pressure on the lights. This helps the lights last longer and stay safe.
Tools For Creating Holes
Creating the right holes for mini Christmas lights helps ensure a neat, safe setup. The right tools make this job easier and faster. Choosing the best tool depends on the surface you work on and the size of the holes needed.
Drill Bit Sizes
Drills offer precise holes for mini lights. Common drill bit sizes for these lights range from 1/8 inch to 3/16 inch. These sizes fit most mini Christmas light wires snugly. Use smaller bits for tighter fits and larger bits for thicker wires. Always check the wire thickness before drilling.
Hole Punch Options
Hole punches are simple tools for softer materials like plastic or fabric. They create clean holes quickly without much effort. Small hand-held punches work well for crafting light displays. Choose a punch size close to the wire diameter. This keeps the lights secure and avoids damage.
Safety Tips
Wear safety glasses to protect your eyes from debris. Keep fingers clear of drill bits and punch blades. Work on a stable surface to avoid slips. Use slow, steady pressure for drilling or punching. Unplug electric tools when changing bits or cleaning. Follow all safety instructions on tool labels.

Credit: www.homedepot.com
Hole Placement Tips
Placing holes for mini Christmas lights needs care. Proper hole placement helps lights look neat and stay safe. This section covers tips on spacing, protecting wires, and spreading light well. Follow these steps for a tidy and bright decoration.
Spacing Between Holes
Keep holes about 6 to 8 inches apart. This distance fits most mini light bulbs. Too close can crowd the lights. Too far makes gaps in the display. Measure before drilling to keep even spacing. This helps lights shine evenly and look balanced.
Avoiding Wire Damage
Use a drill bit slightly larger than the wire. This stops tight spots that pinch wires. Pinched wires can break or short-circuit. Drill slowly and carefully for clean holes. Avoid sharp edges that can cut wires. Smooth holes protect your lights and keep them working.
Optimizing Light Distribution
Plan hole placement to spread light evenly. Place holes in a pattern that covers the area well. Avoid clustering holes in one spot. This spreads brightness across the whole display. Think about where shadows fall and adjust holes to reduce dark spots. Good placement makes your lights glow beautifully.
Testing And Adjusting Fit
Testing and adjusting the fit of mini Christmas lights is key for a neat and safe decoration. A good fit keeps bulbs secure and bright. This step saves time and prevents damage during setup.
Trial Installation
Start by placing each bulb into the hole gently. Check if the bulb slides in with light pressure. A smooth fit means the hole size is right. Test a few bulbs to be sure. This avoids surprises later.
Handling Tight Fits
Tight fits can break bulbs or wires. Avoid forcing bulbs into small holes. Use a slightly larger drill bit for the hole if needed. Sanding the edges gently helps the bulb slide in. Soft pressure keeps bulbs safe.
Fixing Loose Bulbs
Loose bulbs fall out easily and can cause shorts. Wrap a bit of tape or a small piece of foam around the bulb base. This fills space and holds the bulb snugly. Check the fit again after fixing. A tight bulb stays lit longer.
Materials For Mounting Lights
Choosing the right materials for mounting mini Christmas lights is key. The surface affects how well the lights stay up. It also changes the size hole needed for the lights. Different materials need different approaches. This helps keep lights secure and safe.
Using Foam Boards
Foam boards are lightweight and easy to work with. They need small holes for mini lights. Usually, a 1/8 to 3/16 inch hole works well. This size keeps the light snug. Too big a hole lets lights fall out. Foam can tear, so gentle handling is best.
Wood And Plastic Surfaces
Wood and plastic are common for decorations. These materials need stronger support. Drill holes about 1/4 inch wide for mini lights. This size fits most light bulbs and wires. Use screws or clips to hold lights in place. Avoid forcing the lights into holes that are too small.
Outdoor Considerations
Outdoor surfaces need careful planning. Weather can affect holes and mounting. Use waterproof materials like plastic or treated wood. Holes should be slightly bigger, about 1/4 inch. This allows for expansion and contraction. Secure lights with weatherproof clips or hooks. This keeps lights safe from wind and rain.
Common Mistakes To Avoid
Choosing the right hole size for mini Christmas lights can be tricky. Many people make simple mistakes that cause problems later. Avoid these common errors to keep your lights secure and safe. Small changes can make a big difference in your decorating experience.
Oversized Holes
Making holes too big is a frequent error. Large holes let lights wobble or fall out easily. This can damage the bulbs or wires. Holes should be just large enough for the wire to pass through snugly. A tight fit keeps the lights stable and neat.
Ignoring Wire Flexibility
Ignoring how flexible the wire is causes trouble. Wires need space to bend without breaking. Holes that are too tight can pinch the wire and cause damage. Leave a little room for the wire to move freely. This extends the life of your lights.
Skipping Safety Checks
Safety checks are often skipped, risking accidents. Check holes for sharp edges that can cut wires. Make sure wires do not get pinched or stressed. Inspect connections before plugging in your lights. Proper safety prevents short circuits and fire hazards.

Credit: www.christmaslightsetc.com
Frequently Asked Questions
What Size Hole Is Best For Mini Christmas Lights?
A 1/8 inch (3 mm) hole is ideal for most mini Christmas lights. This size allows the bulb to fit snugly without damage or looseness. It ensures secure placement and proper light display on your decorations.
Can I Use Larger Holes For Mini Christmas Lights?
Using larger holes can cause bulbs to fall out or wobble. It’s best to match the hole size closely to the bulb base diameter. A slightly smaller hole is preferable to keep the lights secure and stable.
How Do I Drill Holes For Mini Christmas Lights?
Use a 1/8 inch drill bit for precision. Drill slowly to avoid cracking your decoration material. Mark the spots before drilling to ensure even light placement and a neat appearance.
Are Pre-made Holes Suitable For Mini Christmas Lights?
Pre-made holes vary in size and may not fit all mini lights. Measure the hole diameter before use. If too large, consider using tape or plugs to stabilize the bulbs.
Conclusion
Choosing the right hole size for mini Christmas lights is important. A hole that is too big makes lights loose. Too small, and the lights won’t fit. Most mini lights need a hole about 1/8 inch wide. This size holds the light firmly and looks neat.
Measure carefully and test a light before drilling many holes. This helps avoid damage and frustration. Proper hole size makes decorating easier and safer. Enjoy your festive lights shining bright and steady all season long.