Are you struggling with a flat, lifeless artificial Christmas tree? You’re not alone.
When you first unpack your tree, the branches often look cramped and unnatural. But don’t worry—there’s a simple way to fix that. Knowing how to open artificial Christmas tree branches the right way can transform your tree from dull to dazzling in minutes.
In this guide, you’ll learn easy, effective tips to fluff up your tree so it looks full and festive, just like a real one. Keep reading and discover how small changes can make a big difference in your holiday decor!
Choosing The Right Tree
Choosing the right artificial Christmas tree is important for easy branch shaping. Different trees have different branch types and materials. These affect how easily you can open and arrange the branches. Knowing these details helps you pick a tree that is simple to set up and looks full and natural.
Types Of Artificial Trees
There are several types of artificial Christmas trees. Some have hinged branches, while others use individual branch tips. Hinged branches are attached to the tree frame and fold up for storage. They open easily and hold their shape well.
Trees with individual branch tips come with separate pieces you attach to the main frame. These allow more customization but take longer to set up. Consider the time you want to spend on assembly before choosing.
Branch Materials And Flexibility
Artificial tree branches are made from different materials. PVC branches are common and usually stiff. They hold their position but may feel plastic. PE branches look more realistic and are softer.
Flexible branches are easier to open and shape. Some trees mix materials to balance looks and ease of use. Check the branch flexibility before buying to ensure simple setup and a natural look.

Credit: www.reddit.com
Preparing Your Workspace
Preparing your workspace is the first step to open artificial Christmas tree branches smoothly. A clean and organized area helps you work faster. It also protects your tree from damage. Taking time to prepare makes the whole process easier and more enjoyable.
Clearing Space
Start by finding a large, flat area. This space should be free of clutter and obstacles. Move furniture or items that might get in the way. You need room to spread out the tree parts safely. Enough space prevents bending or breaking branches.
Gathering Tools
Collect all tools before you start. Common tools include gloves, scissors, and a soft cloth. Gloves protect your hands from sharp tips. Scissors help trim loose or tangled fibers. A soft cloth cleans dust from branches. Having tools ready saves time and keeps you focused.
Unboxing The Tree
Unboxing an artificial Christmas tree is the first step to bringing holiday cheer into your home. Carefully opening the box sets the stage for a beautiful tree. Take your time to avoid damage and make the process smooth. This part is simple but important.
Handling The Sections
Start by gently lifting each tree section from the box. Avoid pulling or dragging to keep branches intact. Place sections on a clean surface with enough space. Handle each part with care to prevent bending or breaking. Take a moment to familiarize yourself with the parts before opening branches.
Inspecting For Damage
Check each tree section for any signs of damage. Look for bent or broken branches and missing tips. Small damages can be fixed, but large ones need attention. Report any major issues to the seller promptly. Inspecting early helps ensure your tree looks perfect once assembled.
Assembling The Tree Base
Assembling the tree base is the first step to a perfect artificial Christmas tree. A strong base keeps the tree steady and safe. This step makes sure your tree stands firm throughout the holiday season.
Careful setup of the base prevents accidents and keeps the tree upright. Let’s break down how to set up the stand and secure stability.
Setting Up The Stand
Start by finding a flat surface for the stand. Spread the legs of the stand evenly. Make sure they are fully open. This creates a wide base to hold the tree.
Place the stand in the spot where you want the tree. Insert the tree trunk into the center of the stand. Push down firmly to fit it well. This keeps the tree balanced from the start.
Securing Stability
Check if the tree can stand on its own. Tighten the screws or bolts on the stand. This locks the trunk in place and stops it from wobbling.
Give the tree a gentle shake. If it moves too much, adjust the screws again. A steady tree base means less chance of tipping over.
Double-check the stand’s position. It should not slide or tilt on the floor. Use a mat or rug under the stand for extra grip.
Attaching Tree Sections
Attaching the sections of your artificial Christmas tree is a key step. It helps the tree look full and natural. Doing this carefully makes the setup easier. It also keeps the tree stable and ready for decorating. Follow simple steps to connect the parts smoothly.
Stacking And Connecting
Start by stacking the tree sections one on top of another. Each section fits into the one below it. Line up the metal connectors or poles inside the tree. Push down firmly but gently to secure each part. Avoid forcing pieces; they should slide in with little effort. Check that each section is steady before adding the next.
Aligning Branch Tips
After stacking, focus on the branches. Spread out each branch tip to fill gaps. Bend the branches slightly up or down for a natural look. Make sure no branch overlaps too much. This helps the tree look even and full. Take your time; small adjustments make a big difference.

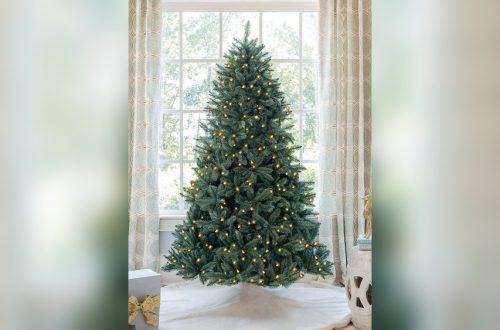
Credit: www.christmascentral.com
Opening Branches Step-by-step
Opening the branches of your artificial Christmas tree helps it look full and natural. It takes time and care to make each branch look its best. Follow these simple steps to spread out the branches evenly and create a beautiful shape.
Start from the bottom and work your way up. This method gives the tree a steady base and a balanced look. Take each branch and gently pull it away from the trunk.
Starting From The Bottom
Begin with the lowest branches on the tree. Pull each branch out and away from the trunk slowly. Spread the needles wide to fill empty spaces. This gives the base a strong and full look. Avoid pulling too hard to prevent damage.
Fluffing Outer Branches
Focus on the outer branches next. Fluff the needles by separating them with your fingers. Spread them in different directions to add volume. This step makes the tree look lush and natural. Make sure the branches are not too flat or tight.
Shaping Inner Branches
Finally, shape the inner branches closer to the trunk. Bend them gently to fill gaps inside the tree. Shape each branch to create a round, full form. This step completes the tree’s natural appearance. Take your time to adjust each branch carefully.
Tips For Natural Appearance
Creating a natural look for your artificial Christmas tree makes it feel warm and inviting. Properly opening the branches gives your tree shape and fullness. It also helps the tree appear more like a real one. Careful handling of the branches is key to avoid a fake or messy look.
Avoiding Over-fluffing
Do not open the branches too much. Over-fluffing makes the tree look bulky and unnatural. Spread each branch gently and evenly. Stop once you see the tree looks full but not crowded. Leave some space between branches for a natural feel.
Balancing Branch Density
Check the tree from all sides. Some areas may need more fluffing, others less. Make sure the branch density feels balanced. Avoid thick clusters or empty spots. A well-balanced tree looks fuller and more real. Adjust branches slowly for the best result.
Maintaining Your Tree
Maintaining your artificial Christmas tree keeps it looking fresh and new year after year. Proper care helps the branches stay full and vibrant. Simple steps protect your tree from damage and dust. Follow these tips to enjoy a beautiful tree every holiday season.
Storage Tips
Store your tree in a cool, dry place. Avoid damp areas to stop mold and rust. Use the original box or a special tree bag. Keep branches straight to prevent bending or breaking. Label the box for easy finding next year. Store decorations separately to avoid damage.
Cleaning Branches
Dust your tree before storing it. Use a soft brush or cloth to clean branches. A vacuum with a brush attachment works well. For stubborn dirt, lightly wipe with a damp cloth. Let branches dry fully before packing. Clean branches keep your tree looking fresh and bright.

Credit: www.youtube.com
Frequently Asked Questions
How Do I Safely Open Artificial Christmas Tree Branches?
Gently separate each branch from the center pole. Use slow, careful movements to avoid bending or breaking. Start from the bottom and work upwards. This method ensures branches open fully without damage, keeping the tree looking full and natural.
How Long Does It Take To Open Tree Branches Fully?
Opening branches usually takes about 10 to 20 minutes. Time varies based on tree size and branch density. Allow branches to settle for a few hours to achieve a natural, full look. Patience ensures the best appearance for your tree.
Can I Use Tools To Open Artificial Tree Branches?
No tools are needed to open branches. Using hands is safest to avoid damaging the tree. If branches are stuck, gently wiggle them free with fingers. Tools can bend or break branches, reducing the tree’s lifespan.
Why Do Branches Stay Closed On A New Artificial Tree?
Branches are compressed for shipping and storage. They need time and gentle pulling to open fully. Opening branches carefully prevents permanent damage. Allowing branches to relax after setup improves the tree’s natural appearance.
Conclusion
Opening artificial Christmas tree branches takes a little time and care. Start by gently pulling the branches apart to give the tree a full look. Spread each branch evenly to avoid gaps. Take breaks if needed; patience helps. Doing this right makes your tree look natural and beautiful.
Enjoy decorating your tree with lights and ornaments afterward. Remember, a well-fluffed tree brings holiday cheer to any room.