Looking to add a warm, inviting glow to your outdoor space or blank block wall? Attaching string lights to a block wall can transform your area instantly, making it cozy and stylish.
But you might wonder—how do you do it without damaging your wall or making a mess? In this guide, you’ll discover simple, effective ways to hang your string lights securely and safely. By the end, you’ll have the confidence to brighten up your space just the way you want.
Keep reading, and let’s get those lights shining!
Choosing The Right String Lights
Choosing the right string lights for your block wall is key to a great look and lasting setup. The right lights brighten the space and stand up to weather and wear. Picking the best type, checking for weather resistance, and knowing the right length and power source help you get the perfect fit.
Types Of String Lights
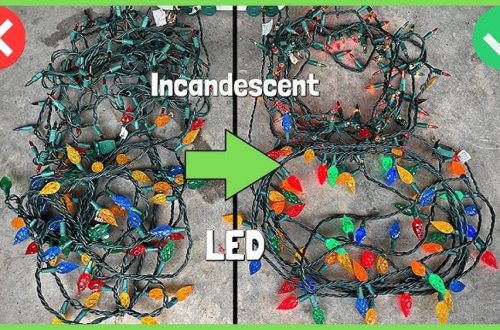
There are many types of string lights. LED lights are bright and use little energy. They last longer than traditional bulbs. Globe lights add a soft, warm glow. Fairy lights offer a delicate sparkle, great for cozy spots. Choose a style that matches your space and mood.
Weather Resistance
Block walls are often outside. Lights must handle rain, wind, and sun. Look for lights labeled waterproof or weatherproof. These lights use special coatings and seals. They stay safe and work well even in wet weather. This helps avoid damage and keeps your space safe.
Length And Power Source
Measure the wall before buying lights. Too short means gaps; too long means extra cords. Pick a length that fits your space well. Decide if you want plug-in or solar-powered lights. Solar lights save electricity and work without outlets. Plug-in lights need a nearby power source but often shine brighter.
Preparing The Block Wall
Preparing the block wall is an important step before attaching string lights. It helps the lights stick well and last longer. Taking time to prepare the wall avoids problems later. Follow these simple steps to get the wall ready.
Cleaning The Surface
Remove dirt, dust, and loose paint from the wall. Use a stiff brush or broom to scrub the surface. Clean walls help adhesive and hooks stick better. Wipe the wall with a damp cloth to remove any leftover dust. Let the wall dry completely before moving on.
Inspecting For Damage
Check the wall for cracks or loose blocks. Small cracks can grow and cause problems later. Repair any damage with mortar or filler. Make sure the wall is strong and stable. This step ensures your lights stay safe and secure.
Marking Attachment Points
Plan where to place the hooks or clips for your string lights. Use a pencil to mark the spots on the wall. Space the marks evenly for a neat look. Marking helps to hang the lights straight and tight. Double-check the marks before attaching anything.
Using Adhesive Hooks And Clips
Using adhesive hooks and clips is a simple way to hang string lights on a block wall. These tools do not require drilling or nails. They stick directly to the wall and hold the lights in place. This method keeps the wall safe and the lights neat. It works well for outdoor and indoor spaces. Let’s explore how to use these tools correctly.
Selecting Suitable Adhesives
Choose hooks and clips with strong adhesive backing. Look for products labeled for outdoor use if lights go outside. Adhesives should stick well to rough surfaces like block walls. Avoid cheap options that peel off easily. Clear plastic hooks blend well with any decor. Test the adhesive on a small wall spot first.
Proper Placement Techniques
Clean the wall surface before applying hooks. Dirt or dust weakens the adhesive. Press hooks firmly for at least 30 seconds. Space hooks evenly to support the string lights. Avoid placing hooks too far apart to stop sagging. Use clips to guide wires along the wall corners. This keeps lights tidy and secure.
Weight Limits And Durability
Check the weight limit on each hook package. Most hold lightweight string lights safely. Heavy or large bulbs may need stronger support. Replace hooks if adhesive weakens over time. Weather changes can reduce stickiness outside. Remove hooks gently to avoid wall damage. Using the right hooks ensures long-lasting light displays.
Attaching With Masonry Nails And Screws
Attaching string lights to a block wall using masonry nails and screws is a strong and reliable method. It holds the lights firmly, even in windy weather or rough conditions. This method needs careful steps and the right tools. The wall is tough, so drilling and securing must be done with care.
Tools Required
Gather a hammer or drill, masonry nails or screws, wall plugs, and a screwdriver. A drill with a masonry bit is important for making holes in the wall. A tape measure helps to space the lights evenly. Safety glasses protect your eyes from dust or debris.
Drilling Into Block Walls
Mark the points where nails or screws will go. Use a drill with a masonry bit to make holes at these marks. Drill slowly to avoid cracking the block. The hole size must fit the wall plug or screw. Clean out dust from the hole before inserting plugs.
Securing The Lights Safely
Insert wall plugs into the drilled holes for a tight grip. Drive masonry nails or screws into the plugs carefully. Do not force nails too hard to prevent damage. Hang the string lights gently on the nails or screws. Check the lights to make sure they are secure and not loose.
Utilizing Cable Ties And Wire
Using cable ties and wire is a simple way to attach string lights to a block wall. These tools hold the lights firmly without causing damage. They work well on rough surfaces like block walls where nails or hooks may not fit easily.
Cable ties are strong and easy to use. Wire adds flexibility to secure the lights in different positions. Both help keep the lights neat and tidy along the wall.
Finding Anchor Points
Look for natural gaps or holes in the block wall. These spots can hold the cable ties or wire tightly. Corners and edges often work well as anchor points. Avoid places where the wall surface is loose or crumbling.
Looping And Tightening
Wrap the cable tie or wire around the string light and the anchor point. Pull the cable tie tight but not too hard. The wire should be snug but not squeeze the light bulbs. Secure the ends by twisting or clipping to stop slipping.
Avoiding Damage To Lights
Do not pull the ties or wire too tight. This can break the light bulbs or damage the wires inside. Place the ties where the light cord is thickest. Keep the bulbs free from pressure or bending. This helps the lights last longer and stay bright.
Using Mounting Tracks And Channels
Using mounting tracks and channels is a smart way to attach string lights to a block wall. These tools hold the lights firmly in place. They help keep the lights organized and neat along the wall. This method avoids damage to the wall and makes the lights easy to remove or adjust.
Benefits Of Mounting Tracks
Mounting tracks offer strong support for string lights. They keep lights straight and prevent sagging. Tracks protect the wall from holes and marks. This method is reusable and easy to update. It makes the setup look clean and professional.
Installation Steps
Start by cleaning the block wall surface. Measure the length where the lights will go. Cut the mounting tracks to the right size. Use screws or adhesive to fix the tracks on the wall. Snap the string lights into the tracks carefully. Test the lights to ensure they fit well.
Maintaining A Clean Look
Keep the tracks dust-free by wiping them regularly. Check for loose screws or clips every few months. Replace any damaged sections quickly to avoid mess. Avoid tangled cords by arranging the lights neatly. This keeps the wall and lights looking tidy and fresh.
Safety Tips And Maintenance
Attaching string lights to a block wall adds charm and warmth to any space. Safety and maintenance are key to keep the lights working well. Proper care helps avoid electrical hazards and extends the life of your lights.
Checking Electrical Connections
Always check the plugs and wires before use. Look for cracks, frays, or loose parts. Make sure the connections are tight and dry. Use a tester to ensure the power flows correctly. Turn off the power before handling any wires.
Weatherproofing Tips
Block walls are outdoors, so protect your lights from rain and sun. Use weatherproof covers on plugs and connectors. Seal any gaps with silicone or waterproof tape. Choose lights rated for outdoor use. Keep cords off the ground to avoid water damage.
Regular Inspection And Repairs
Inspect your string lights every month for damage. Replace bulbs that are burnt out or broken. Fix loose connections immediately to prevent sparks. Clean the lights gently to remove dust and dirt. Proper maintenance keeps the display safe and bright.
Frequently Asked Questions
How Do I Attach String Lights To A Block Wall Safely?
Use adhesive hooks or masonry nails designed for block walls. Avoid drilling too deep to prevent wall damage. Ensure the lights are rated for outdoor use if the wall is outside.
What Tools Are Needed To Hang Lights On A Block Wall?
You will need a hammer, masonry nails or adhesive hooks, a measuring tape, and a ladder. Optionally, use a drill with a masonry bit for anchors if needed.
Can I Use Regular Nails To Hang String Lights On Block Walls?
Regular nails may not hold well in block walls. Use masonry nails or anchors for a secure fit. These provide better stability and prevent damage.
How Do I Prevent String Lights From Falling Off A Block Wall?
Secure the lights firmly with appropriate hooks or nails. Check the attachment points periodically and avoid overloading with heavy lights or decorations.
Conclusion
Attaching string lights to a block wall can brighten any space. Use the right tools and follow simple steps for best results. Choose hooks or clips that hold lights firmly without damage. Take your time to plan the layout before starting.
Enjoy the warm glow and cozy atmosphere your lights create. A little effort brings great charm to your outdoor or indoor area. Now, your block wall looks inviting and beautiful with string lights.