Are you ready to make your Christmas tree shine like never before? Stringing lights on your tree might seem simple, but doing it right can transform your holiday space into a magical wonderland.
In this guide, you’ll discover easy steps to wrap your tree with lights that sparkle evenly and glow warmly. Whether you’re a first-timer or want to improve your technique, this article will help you create a stunning display that impresses everyone who walks in.
Let’s dive in and light up your holiday season!
Choosing The Right Lights
Choosing the right lights sets the tone for your Christmas tree. The perfect lights make your tree shine and feel warm. Picking the right style and type helps your tree look its best. Think about light colors, brightness, and energy use. These details matter for a beautiful and safe tree.
Types Of Christmas Lights
Christmas lights come in many styles. Mini string lights are popular for their small bulbs. They wrap nicely around branches. C7 and C9 bulbs are bigger and give a classic look. Net lights cover large areas quickly. Icicle lights hang like frozen water drops. Choose lights that match your tree size and style.
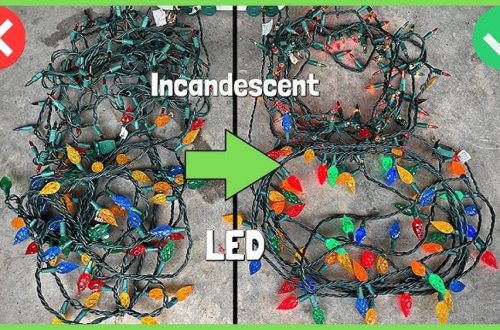
Led Vs. Incandescent
LED lights save energy and last longer. They stay cool and are safer for children and pets. Incandescent lights give a warm, traditional glow. They use more electricity and can get hot. LED lights also come in many colors and effects. Consider how long you want the lights to last.
Length And Wattage Considerations
Measure your tree height to find the right light length. A good rule is 100 lights per foot of tree. Check wattage to avoid overloading outlets. Lower wattage means less energy use. Longer strands may need multiple plugs or a power strip. Plan your light setup before buying to ensure proper coverage.
Preparing Your Tree
Preparing your Christmas tree is the first step to a beautiful display of lights. A well-prepared tree looks fuller and holds lights better. Take your time to get it right. This makes decorating easier and more fun.
Selecting A Fresh Tree
Choose a tree with bright green needles that do not fall off easily. Fresh trees have strong branches to hold lights and ornaments. Check the tree’s smell; a fresh pine scent means it is recently cut. Avoid trees with brown or dry needles. This ensures your tree stays fresh throughout the holiday season.
Setting Up The Tree Stand
Pick a sturdy tree stand that fits your tree’s trunk size. Clean the stand before placing the tree to avoid slipping. Cut the trunk base straight to help the tree absorb water. Fill the stand with water to keep the tree hydrated. A stable tree stand prevents accidents and keeps your tree upright all season.
Fluffing The Branches
Spread out each branch carefully to fill gaps and create a full look. Separate needles gently to avoid breaking them. Fluffing helps lights reach every part of the tree. Take your time to make the tree look natural and thick. This step makes decorating easier and more beautiful.
Testing The Lights
Testing the lights is a key step before decorating your Christmas tree. It helps avoid dark spots and electrical issues. This step saves time and frustration while stringing lights.
Start by checking each light string carefully. Make sure every bulb works and the wires are safe. Testing ensures a bright and beautiful tree.
Checking For Damaged Bulbs
Look closely at each bulb. Check for cracks or broken glass. Replace any bulbs that look damaged. Damaged bulbs can cause the whole string to fail.
Inspect the wiring too. Frayed or cut wires can be dangerous. Do not use light strings with damaged wires. Safety comes first.
Ensuring Proper Function
Plug in the light string and watch carefully. All bulbs should light up evenly. Flickering or dim bulbs mean a problem.
Test each string separately. This way, you can find issues quickly. Fix or replace faulty strings before decorating the tree.
Stringing Techniques
Stringing lights on a Christmas tree is an art. The right technique makes the tree look bright and beautiful. It also helps the lights last longer. Follow these simple stringing techniques to get a perfect glow on your tree.
Starting From The Bottom
Begin your light string at the base of the tree. This helps hide the plug and excess wire. Work your way up slowly. Moving upward makes it easier to wrap lights around branches. It also prevents tangling and uneven lighting.
Wrapping Around Branches
Wrap lights carefully around each branch. Place lights near the trunk and then on branch tips. This gives a full, glowing effect. Avoid just hanging lights on the outside. Wrapping adds depth and makes the tree shine from inside out.
Spacing Lights Evenly
Keep the lights spaced evenly on the branches. Too close means bright spots and dark gaps. Too far means the tree looks dull. Aim for equal distance between each bulb. This balance creates a steady, warm glow across the tree.
Securing And Hiding Cords
Securing and hiding cords is important when stringing lights on a Christmas tree. It keeps the tree looking neat and safe. Loose cords can cause tripping or damage the lights. Tidy cords help the lights shine brighter and the tree look more beautiful.
Proper cord management also makes setting up and taking down easier. It keeps cords from tangling and extends their life. Use simple tools and natural tree parts to hide and secure cords well.
Using Clips And Hooks
Clips and hooks hold cords firmly on the tree branches. They stop cords from slipping or hanging loosely. Choose small clips to avoid distracting from the lights. Attach clips near the branch base for better support. Hooks work well for thicker cords and heavier light strands. Secure cords every few feet for even hold.
Plastic clips are gentle on branches and easy to use. Metal hooks are stronger but need careful handling. Both tools keep cords organized and reduce the risk of damage. Using clips and hooks is a simple way to keep cords neat.
Concealing Wires With Branches
Use tree branches to hide light cords naturally. Push cords deep inside thick branches for a hidden look. Arrange branches to cover cords from all angles. This method keeps cords out of sight without extra tools. It also protects cords from pets and children.
Spread the lights evenly, then adjust branches to hide wires. Use natural shapes and colors to blend cords with the tree. This technique makes the tree look fuller and lights stand out more. Concealing wires with branches is an easy and effective trick.
Adding Final Touches
Adding final touches to your Christmas tree lights creates a warm, festive glow. This step ensures your tree looks complete and inviting. Small details make a big difference in your holiday decor.
Layering With Ornaments
Place ornaments evenly around the tree. Start with larger ones on the bottom. Use smaller ornaments near the top to balance the look. Mix shiny and matte finishes for texture. Space ornaments to avoid overcrowding. This layering highlights the lights beautifully.
Testing The Overall Look
Turn on the lights in a dim room. Check for dark spots or uneven lighting. Adjust light strands to fill gaps. Step back and view the tree from different angles. Make sure the tree shines brightly and evenly. This final check ensures a perfect holiday display.
Safety Tips
Safety is key when stringing lights on your Christmas tree. Following simple safety tips can prevent accidents and keep your home safe. Lights draw power, so managing electricity well is important. Pay attention to the type of lights you use and how you connect them. Let’s explore two important safety points.
Avoiding Overloads
Check the wattage of your light strings. Do not connect too many strings together. Overloading outlets can cause sparks or fires. Use a power strip with a built-in circuit breaker. Unplug lights when you leave or go to bed. Avoid running wires under rugs or carpets. Keep cords away from water and heat sources.
Outdoor Vs. Indoor Lights
Use lights labeled for outdoor use outside only. Indoor lights are not made to handle weather. Outdoor lights have stronger insulation and waterproof features. Mixing indoor and outdoor lights can cause short circuits. Always check the packaging before use. Place outdoor lights on trees or bushes safely. Secure cords to prevent tripping or damage.
Frequently Asked Questions
How Many Lights Do I Need For A Christmas Tree?
For a 6-foot tree, use 600 lights. Use 100 lights per foot of tree height. Adjust based on tree size and desired brightness.
What Is The Best Way To String Lights On A Tree?
Start at the base, wrap lights around branches evenly. Move upward in a spiral motion for balanced coverage. Ensure lights face outward for best display.
Should I Use Led Or Incandescent Lights?
LED lights are energy-efficient, last longer, and stay cool. Incandescent lights offer traditional warmth but use more power. LED is recommended for safety and savings.
How Do I Prevent Light Tangling On My Tree?
Use light clips or twist ties to secure strands. String lights loosely to avoid tension. Unroll and test strands before hanging for smooth setup.
Conclusion
Stringing a Christmas tree with lights can be fun and simple. Start at the base and work your way up slowly. Keep lights evenly spaced for a bright, balanced look. Check for any broken bulbs before you begin. Take breaks to avoid tangling or frustration.
Enjoy the warm glow that lights bring to your home. This small task adds big cheer to the holiday season. With a little patience, your tree will shine beautifully. Happy decorating!