Are your Christmas lights not shining as bright as they used to? It can be frustrating when a whole string goes dark just because of one bad bulb or a small break.
But don’t worry—you don’t have to toss them out or buy new ones. You can fix your lights yourself, saving money and making sure your holiday decorations sparkle just the way you want. Keep reading, and you’ll learn simple, step-by-step ways to repair your string of Christmas lights quickly and safely.
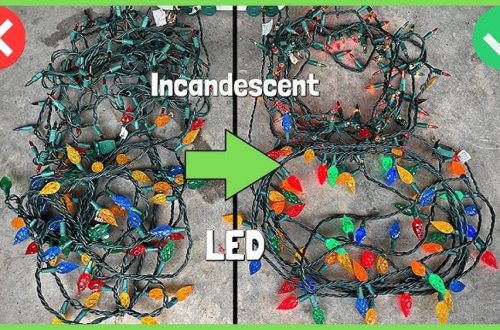
Your home will be glowing in no time!
Common Problems With Christmas Lights
Fixing a string of Christmas lights needs a few simple tools and materials. Having the right items makes the job easier and faster. Each tool plays a specific role in finding and fixing the problem.
Gather everything before starting. This saves time and prevents frustration. Here is a list of what you need for a basic repair.
Basic Repair Kit
A basic repair kit includes wire cutters, pliers, and a small screwdriver. Wire cutters help trim damaged wires. Pliers assist in pulling out bulbs carefully. A screwdriver tightens loose connections or opens battery compartments.
Replacement Bulbs
Replacement bulbs match the size and type of your string lights. Keep extra bulbs handy to swap out broken ones. Using the correct bulbs prevents electrical problems and keeps lights shining bright.
Multimeter
A multimeter checks electrical current and voltage in the light string. It helps find breaks or shorts in the wiring. This tool is useful for diagnosing issues beyond just replacing bulbs.
Electrical Tape
Electrical tape insulates and protects repaired wires. It stops short circuits and keeps connections safe. Use tape to wrap exposed wires after fixing the light string.
Tools And Materials Needed
Safety is the first step before fixing any Christmas light string. It prevents accidents and protects you from electric shocks. Taking simple safety measures saves time and effort later. Read these tips carefully to prepare for a safe repair process.
Unplugging Lights
Always unplug the lights from the power source before starting any work. Do not try to fix the lights while they are plugged in. This can cause electric shocks or short circuits. Check that the plug is completely removed from the socket.
Working In Dry Conditions
Make sure your hands and the work area are dry. Water and electricity are a dangerous mix. Avoid repairing lights outside if it is wet or rainy. A dry environment lowers the risk of electric shock and damage to the lights.
Handling Fragile Bulbs
Christmas light bulbs are delicate and break easily. Handle each bulb gently to avoid cuts or damage. Use a soft cloth or gloves if needed. Replace broken bulbs with the correct type to keep the string safe and working well.
Safety Tips Before Repairing
Repairing a string of Christmas lights can save time and money. It also keeps your decorations bright and cheerful. Follow these simple steps to fix your lights safely and quickly. Each step focuses on a common problem and its solution.
Identifying The Problem Area
Start by finding where the lights stop working. Check the whole string carefully. Look for loose bulbs, dark spots, or broken wires. Plug in the lights and watch for sections that don’t light up. This helps narrow down the faulty area.
Replacing Burnt Out Bulbs
Burnt out bulbs often cause the entire string to fail. Remove the old bulb carefully. Match it with a new one of the same size and voltage. Push the new bulb into the socket firmly. Test the lights again to see if they work.
Fixing Broken Sockets
Broken sockets can stop power flow. Inspect each socket for cracks or corrosion. Use a small tool to clean sockets gently. If a socket is damaged, replace it with a new one. Make sure the new socket fits well and holds the bulb tightly.
Repairing Wiring Issues
Damaged wires can cause shorts or breaks. Look for cuts, frays, or exposed wires. Use electrical tape to cover minor damage. For serious problems, cut out the bad section and reconnect wires with wire connectors. Always unplug lights before working on wiring.
Changing Blown Fuses
Blown fuses stop electricity in the light string. Locate the fuse compartment on the plug. Open it carefully and remove the old fuse. Replace it with a new fuse of the same rating. Close the compartment securely. Test the lights after changing the fuse.
Step-by-step Repair Process
Testing lights after repair is a key step to make sure your Christmas lights work safely. It helps find any issues before you hang them. Testing saves time and prevents frustration during decoration. Follow the steps carefully for best results.
Using A Multimeter
A multimeter measures electrical current in the light string. Set it to the continuity test mode. Touch the probes to each bulb socket or wire end. A beep or reading means the circuit is complete. No beep means a break or faulty bulb. Test each section to find problems.
Plugging In And Checking
After fixing, plug the lights into a power source. Watch for bulbs that do not light up. Check if the entire string glows evenly. Look for flickering or dim bulbs. These signs show where further repair is needed. Turn off the power before adjusting bulbs.
Troubleshooting Remaining Issues
Check bulbs that stay dark first. Replace or reposition these bulbs carefully. Inspect the fuse box and wiring for damage. Use the multimeter again to check wires and connections. Clean dirty contacts to improve connection. Repeat testing until all lights work properly.
Frequently Asked Questions
How Can I Identify The Faulty Bulb In Christmas Lights?
To find a faulty bulb, inspect each bulb closely for dark spots or breaks. Replace any damaged bulbs. Use a bulb tester or swap bulbs with a working string to pinpoint the problem. This helps restore the entire string’s functionality quickly and safely.
What Tools Do I Need To Repair Christmas Lights?
You need a bulb tester, replacement bulbs, electrical tape, wire cutters, and a multimeter. These tools help identify and fix issues like broken wires or faulty bulbs. Having the right tools ensures a faster and safer repair process.
Can I Repair Broken Wires On Christmas Lights?
Yes, you can repair broken wires by carefully stripping the insulation, twisting the wires together, and sealing with electrical tape. Ensure the connection is secure to avoid shorts. Always unplug lights before attempting any wire repairs to stay safe.
How Do I Test Christmas Lights Before Hanging?
Plug in the lights and look for any bulbs that don’t light up. Use a bulb tester for precise identification. Check the entire string for consistent brightness. Testing beforehand prevents installation hassles and ensures festive lighting works perfectly.
Conclusion
Fixing Christmas lights can save money and reduce waste. Test each bulb carefully to find the problem. Replace or tighten bulbs to make the whole string shine. Take your time and work patiently for best results. Enjoy your bright, beautiful holiday decorations without stress.
Simple steps bring back the festive glow you want. Keep these tips handy for future holiday seasons. Bright lights, happy homes.