Are you ready to transform your space with a warm, inviting glow? Mounting string lights is one of the easiest and most affordable ways to add charm and ambiance to any room, patio, or backyard.
But if you’re unsure where to start or worried about making mistakes, don’t worry — this guide will walk you through simple steps to hang your lights safely and beautifully. By the end, you’ll have the confidence to create a cozy atmosphere that friends and family will love.
Let’s get your string lights up and shining!
Choosing The Right String Lights
Choosing the right string lights is key for a beautiful and safe setup. The perfect lights match your space, style, and purpose. This choice affects how well the lights work and how they look. Consider the type, where you will use them, and their size before buying.
Types Of String Lights
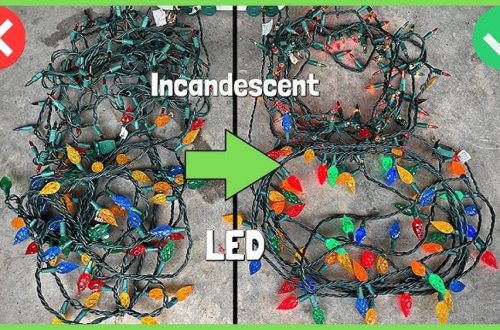
String lights come in many styles. Classic incandescent bulbs give a warm glow. LED bulbs save energy and last longer. Fairy lights are tiny and delicate. Globe lights are bigger and round. Each type creates a different mood and look.
Indoor Vs Outdoor Options
Indoor string lights are lighter and less protected. Outdoor string lights have strong wiring and waterproof bulbs. Outdoor lights resist rain, wind, and sun. Use outdoor lights outside to avoid damage and hazards.
Length And Bulb Spacing
Measure the area where you want to hang lights. Choose string lights long enough to cover the space. Bulb spacing affects brightness and style. Close bulbs give more light but cost more. Wider spacing fits large areas and uses fewer bulbs.
Selecting The Perfect Location
Choosing the right spot for mounting string lights is very important. It affects how well the lights work and how good they look. A good location makes the space feel warm and inviting. Think about power, weather, and the view. These details help you pick the perfect place for your lights.
Assessing Power Sources
Check where your power outlets are before mounting lights. Lights need electricity, so plug access is key. Use outdoor-rated extension cords if needed. Avoid running cords across walkways to prevent tripping. Plan the layout around power spots for safety and ease.
Considering Weather Conditions
Pick a place safe from rain and strong wind. Lights should handle outdoor weather well. Avoid areas with heavy water flow or snow build-up. Use weatherproof clips and fixtures to keep lights secure. A sheltered spot can help lights last longer.
Maximizing Visual Impact
Mount lights where they highlight key areas. Think about seating, pathways, or garden features. Hang lights higher to spread soft, even light. Create patterns like zigzags or curves for style. Good light placement boosts the space’s charm and comfort.
Gathering Necessary Tools And Materials
Gathering the right tools and materials is the first step to mount string lights safely and neatly. Having everything ready helps the work go smoothly. It avoids mistakes and saves time.
Before starting, check what you need. Different mounting jobs require different supplies. Some projects need only a few basic items, while others might need special tools or hardware.
Mounting Hardware Options
Choose the hardware based on where you want to hang the lights. Hooks work well on wood or drywall. Nails or screws offer strong support. For brick or concrete, use masonry anchors. Clips are good for gutters or shingles. Make sure the hardware fits the string light’s weight and size.
Safety Gear Essentials
Wear gloves to protect your hands from sharp edges. Safety glasses keep your eyes safe from dust or debris. A sturdy ladder helps reach high places safely. Avoid loose clothing to prevent accidents. Use tools carefully to avoid injuries.
Additional Accessories
Extension cords extend power to distant spots. Cable ties keep wires tidy and secure. Electrical tape protects connections from weather. A measuring tape ensures even spacing. A pencil or marker helps mark the spots for hardware.
Preparing The Area For Installation
Preparing the area before mounting string lights is a key step. It makes the process easier and safer. Taking time to prepare helps the lights stay secure and look great. Follow these steps to get ready.
Cleaning Surfaces
Clear dust, dirt, and cobwebs from the surfaces. Use a damp cloth or mild cleaner for best results. Clean surfaces help the hooks or adhesive stick better. This prevents lights from falling down later.
Measuring And Marking
Measure the length where the lights will go. Use a tape measure for accuracy. Mark spots with a pencil where hooks or nails will be placed. Even spacing makes the lights look neat and balanced.
Checking Structural Support
Look at the walls, ceilings, or beams where lights will hang. Make sure they can hold the weight of the string lights. Avoid weak or damaged areas that may break. Choose strong support points for safety and durability.
Step-by-step Mounting Process
Mounting string lights is easier than it seems. Follow these clear steps to hang your lights safely and beautifully. The process starts with placing hooks or clips. Next, secure the light strands carefully. Finally, test and adjust to get the perfect look. Let’s break down each step.
Installing Hooks Or Clips
Choose strong hooks or clips that fit your mounting surface. Measure the area to space them evenly. Install hooks at regular intervals for balanced support. Push or screw hooks firmly to avoid falling lights. Use clips for gutters or delicate surfaces. Proper hooks keep lights secure and straight.
Securing The Light Strand
Start at the power source and work outward. Gently hang the light strand on hooks or clips. Avoid pulling too tight to prevent wire damage. Leave slight slack for wind or movement. Check that bulbs face outward and hang evenly. Secure any loose parts with extra clips or ties.
Testing And Adjusting
Plug in the lights to check all bulbs work. Replace any burnt-out bulbs quickly. Look for sagging or uneven sections. Adjust hooks or clips if lights droop. Ensure cords do not create tripping hazards. Test during both day and night for best results.
Safety Tips For String Light Installation
Safety is the top priority when installing string lights. Proper safety helps avoid accidents and damage. Follow these tips to keep your space safe and bright.
Avoiding Electrical Hazards
Check all lights for damage before use. Do not use lights with frayed wires or broken bulbs. Always plug lights into grounded outlets. Avoid overloading circuits by not connecting too many strings. Turn off lights before plugging or unplugging them. Use a tester to check outlets for proper voltage. Keep lights away from water to prevent shocks.
Using Weatherproof Equipment
Use lights rated for outdoor use in outdoor areas. Choose weatherproof extension cords and plugs. Ensure all connections are protected from rain and moisture. Cover plugs with plastic or electrical tape for extra safety. Avoid using indoor lights outside as they can short circuit. Check labels to confirm weather resistance before installation.
Properly Securing Cords
Use clips or hooks to secure cords safely. Avoid using nails or staples that can damage wires. Keep cords off the ground to prevent tripping. Do not pull cords tightly to avoid strain. Arrange cords away from walkways and doorways. Check cords regularly for wear or damage. Replace any damaged cords immediately to prevent hazards.
Creative Ideas For Display
String lights bring a warm and cozy feel to any space. Creative display ideas make them stand out even more. Try different ways to hang and arrange the lights. This adds charm and personality to your room or outdoor area. Below are some fun and easy ideas to inspire your next project.
Draping Techniques
Draping string lights softly over furniture or walls creates a relaxed vibe. Let the lights hang in gentle curves or loops. Use hooks or nails to hold the lights in place. Draping over a headboard or curtain rod adds a dreamy touch. For outdoor spaces, drape lights along tree branches or pergolas. This technique spreads light evenly and looks natural.
Creating Patterns
Arrange string lights in simple shapes like stars or zigzags. Use tape or clips to keep the pattern steady. Create a grid on a blank wall for a modern look. Patterns catch the eye and make the lights a focal point. Try spelling out words or drawing hearts with the lights. This adds a playful and personal touch to your decor.
Combining With Other Decor
Mix string lights with plants, photos, or fabric for extra charm. Wrap lights around vases or jars for glowing centerpieces. Hang lights alongside garlands or banners for festive cheer. Combine lights with mirrors to reflect and brighten the space. This layering effect makes the area feel lively and inviting. Use soft colors and textures to match the lights.
Maintaining And Storing String Lights
Maintaining and storing string lights properly helps them last longer. Careful handling keeps the bulbs bright and safe. Simple steps protect your lights from damage and make them easy to use next time.
Regular Cleaning
Dust and dirt can dull string lights. Clean them gently with a soft cloth. Avoid using water directly on bulbs or sockets. Wipe the wires carefully to remove grime. Clean lights shine brighter and work better.
Inspecting For Damage
Check string lights for broken bulbs or frayed wires. Look closely at plugs and sockets for cracks. Replace any damaged parts before use. Damaged wires can cause short circuits or fires. Safety is key to enjoying your lights.
Proper Storage Methods
Wrap string lights loosely to avoid tangles. Use a spool or a piece of cardboard for winding. Store them in a dry, cool place away from sunlight. Keep them in a box or bag to protect from dust. Proper storage saves time and prevents damage.
Frequently Asked Questions
How Do You Mount String Lights Outdoors Safely?
Use waterproof clips or hooks designed for outdoor use. Avoid nails or staples that damage wires. Secure lights tightly to prevent wind damage. Always plug into a GFCI outlet for safety.
What Tools Do I Need To Mount String Lights?
You’ll need hooks or clips, a ladder, measuring tape, and possibly a drill. Use zip ties or twist ties for extra security. Choose tools based on your mounting surface and light type.
Can I Mount String Lights On Brick Or Concrete?
Yes, use masonry anchors and screws or adhesive hooks made for rough surfaces. Avoid drilling deep holes. Make sure lights are rated for outdoor use to withstand weather.
How High Should String Lights Be Mounted?
Mount lights 7 to 9 feet above the ground for optimal lighting and safety. Adjust height based on area size and purpose. Ensure lights are out of reach of children and pets.
Conclusion
Mounting string lights can brighten any space quickly. Choose the right tools for a safe setup. Plan your layout before hanging the lights. Secure each light firmly to avoid falling. Test the lights to ensure they work well. Enjoy the cozy and warm atmosphere created.
Simple steps lead to beautiful outdoor or indoor spaces. Now, your area looks inviting and festive. Give your home a fresh, glowing touch today.