Have you ever wanted to add a magical touch to your string lights by making them blink? Whether you’re decorating for a party, holiday, or just want to create a cozy atmosphere, blinking lights can instantly transform any space.
In this guide, you’ll learn simple and practical ways to make your string lights blink without needing fancy tools or complicated setups. Keep reading, and you’ll soon have your lights flashing just the way you want, impressing everyone around you.
Let’s get started!
Choosing The Right String Lights
Choosing the right string lights is key to making them blink well. Different lights work better for blinking effects. Picking the right type saves time and effort. It also gives you the look you want.
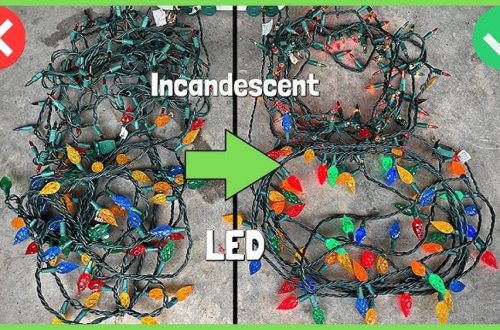
Types Of String Lights
There are many types of string lights. LED lights are popular because they use less energy. Incandescent lights are brighter but use more power. Battery-operated lights offer flexibility and no wires. Solar string lights charge during the day and light up at night. Each type fits different needs and spaces.
Selecting Lights For Blinking Effects
Not all string lights blink naturally. Look for lights with built-in blinking modes. Some LED lights come with remote controls to change flash patterns. Choose lights labeled as “twinkle” or “flash” for easy blinking. Simple lights can blink too, but you need a separate controller. Check power sources and compatibility with blink controllers before buying.
Basic Tools And Materials Needed
Making string lights blink is a fun and simple project. You need some basic tools and materials to start. These items help you work safely and create the blinking effect easily. Gather everything before you begin to avoid interruptions.
Essential Tools
A pair of wire cutters is important for trimming wires. You also need a soldering iron to connect wires securely. A multimeter helps check electrical connections and safety. Small screwdrivers assist in opening light casings or battery compartments. Lastly, heat shrink tubing or electrical tape protects your connections.
Additional Materials For Customization
To make your lights blink, buy a blinking light controller or timer. Different colored bulbs or LED lights add variety. Batteries or a power adapter provide power for your setup. You may want decorative covers or diffusers to change the light look. Extra wires and connectors help extend or fix your string lights.
Simple Methods To Make Lights Blink
Making string lights blink adds fun and charm to any space. Simple tools and small circuits create blinking effects easily. These methods do not need complex skills or expensive parts. Just follow the steps and enjoy the twinkling lights.
Using A Blinking Light Controller
A blinking light controller is a device made for flashing lights. Plug your string lights into the controller. Then, plug the controller into the power source. The controller sends signals that turn lights on and off quickly. You can find controllers with different blinking speeds and patterns. They are easy to use and safe for most string lights.
Adding A Blinking Switch
A blinking switch lets you control the light’s flashing manually. Install the switch between the power and the string lights. Flip the switch to start blinking. Some switches have built-in timers for automatic blinking. This method works well for small light sets. It is simple and does not require wiring skills.
Diy Circuit For Blinking Effects
Creating a DIY circuit is a fun way to make lights blink. Use a timer chip or a small microcontroller. Connect it to the string lights with basic wiring. The circuit turns the lights on and off at set intervals. This method gives more control over blinking speed and style. It needs some basic electronics knowledge but can be done with simple tools.
Advanced Diy Blinking Techniques
Advanced DIY blinking techniques let you control string lights with precision. These methods go beyond simple on-off switches. You can create unique light shows and custom effects. This section covers the basics of microcontroller programming, how to make custom blink patterns, and power supply tips.
Learning these skills opens new creative possibilities. Your string lights can become part of art projects, holiday decorations, or mood lighting. Let’s explore how to bring your ideas to life.
Microcontroller Programming Basics
Microcontrollers are small computers that control your lights. Popular types include Arduino and ESP8266. They read code and send signals to the lights. Start by installing simple software like Arduino IDE. Write basic code to turn lights on and off. Upload the code through a USB cable. Test your setup with a few LEDs first. This helps avoid damage and errors. Use tutorials to learn how to connect your lights to the microcontroller.
Creating Custom Blink Patterns
Custom blink patterns make your lights unique. Use loops in your code to repeat sequences. Change timing with delay commands to control blink speed. Combine different LEDs for flashing effects. Experiment with random or fading patterns. Use arrays to store multiple patterns. Switch between patterns using buttons or sensors. This adds interaction to your project. Keep patterns simple at first, then increase complexity.
Power Supply Considerations
Power is crucial for blinking string lights. Use a power supply matching your lights’ voltage and current needs. Too much voltage can burn out LEDs. Too little causes dim lights or no blinking. Check your microcontroller’s power limits. Use external power if your lights need more current. Add resistors to protect LEDs from excess current. Consider battery packs for portable setups. Always test power connections before running your code.
Safety Tips For Diy String Lights
Safety is key when making string lights blink by yourself. Working with electricity needs care. Small mistakes can cause big problems like shocks or fires. Follow safety steps closely to keep yourself and your home safe.
Handling string lights with safety in mind protects your tools and your space. Know what you are doing before starting. Use the right materials and check everything twice. Safety helps your project go smoothly and lasts longer.
Handling Electrical Components
Always unplug string lights before starting any work. Touching wires while powered can cause shocks. Use insulated tools to avoid accidents. Check wires for damage or wear. Replace any broken parts before use.
Do not force parts together. Connect wires firmly but gently. Use electrical tape to cover exposed wires. Keep water away from electrical parts. Dry hands and work area reduce risk of shock.
Preventing Overheating And Short Circuits
Use bulbs and wires that match the string light’s rating. Overloading wires can cause heat and fire. Avoid using too many lights on one outlet. Spread out connections to balance the load.
Regularly check lights for signs of heat or melting. If lights feel hot, turn them off immediately. Use timers or smart plugs to limit on-time. Short circuits cause sparks; fix wiring problems quickly.
Creative Ideas To Enhance Blinking Lights
Blinking string lights can create a lively, fun atmosphere. Simple blinking is good, but adding creative touches makes them stand out. Brighten up your space with unique effects. Try new ideas to make your lights more exciting. These tips help you enhance blinking lights with style and flair.
Combining Colors And Patterns
Use different colored bulbs to create colorful patterns. Mix warm and cool tones for a pleasing look. Arrange lights to flash in sequences or random bursts. Change the speed of blinking to match the mood. Use timers or controllers to switch between patterns easily. Play with colors and rhythm for a fresh effect.
Incorporating Sensors For Interactive Effects
Sensors add interaction to your blinking lights. Motion sensors can trigger lights to blink when someone moves nearby. Light sensors adjust blinking based on the room’s brightness. Sound sensors make lights blink to music beats or claps. These sensors create a dynamic and fun environment. Interactive lights respond to you, making any space lively.
Frequently Asked Questions
How Do String Lights Blink Automatically?
String lights blink automatically using built-in controllers or timers. These devices regulate power flow, creating on-off blinking effects. Some lights come with preset blinking modes, while others allow custom settings. Using a smart plug or remote control can also enable blinking without rewiring.
Can I Make Regular String Lights Blink?
Yes, you can make regular string lights blink by adding a blinking controller. Plug the lights into the controller, which interrupts power flow. This device creates a blinking effect without modifying the lights. Ensure the controller matches the voltage and type of your string lights.
What Tools Are Needed To Make String Lights Blink?
To make string lights blink, you need a blinking controller or timer, and optionally a smart plug. No special wiring tools are required if using plug-in controllers. For advanced DIY, you might need basic electrical tools like wire cutters and soldering equipment.
Are Blinking String Lights Safe To Use Indoors?
Yes, blinking string lights designed for indoor use are safe. Always check the manufacturer’s safety ratings and certifications. Avoid overloading circuits and use proper voltage controllers. Keep lights away from flammable materials to prevent hazards.
Conclusion
Making string lights blink adds charm to any space. You only need a few tools and simple steps. Start with safe power sources to avoid risks. Choose the right blinking method for your lights. Test the setup before final use to ensure it works well.
Enjoy the cozy, festive glow that blinking lights bring. Small changes create big effects. Try this easy project to brighten up your home or party. Keep experimenting to find your perfect blinking style.