Are your outdoor string lights flickering or dim because of burnt-out bulbs? Don’t let a few broken bulbs ruin the cozy atmosphere you’ve created.
You might think replacing them is tricky, but it’s easier than you expect. In this guide, you’ll learn simple steps to swap out those bulbs quickly and safely. Keep reading, and you’ll have your lights shining bright again in no time.
Your outdoor space deserves to sparkle every evening, and you’re just a few easy fixes away.
Tools Needed
Replacing bulbs in outdoor string lights is simple with the right tools. Having these tools ready makes the job faster and safer. This section lists all the tools needed for the task.
Replacement Bulbs
Use bulbs that match the size and type of your string lights. Check the packaging or manual for the correct bulb model. Using the wrong bulbs can cause damage or poor light.
Gloves
Wear gloves to protect your hands and keep bulbs clean. Gloves stop oils from your skin damaging the bulbs. They also prevent cuts from broken glass.
Step Ladder
Use a sturdy step ladder to reach high or hanging lights. Make sure the ladder is stable and on flat ground. Avoid standing on chairs or unstable surfaces.
Multimeter
A multimeter helps check if the string lights have power. It tests voltage and continuity in the wire. This tool helps find electrical problems easily.
Soft Cloth
Use a soft cloth to wipe bulbs and sockets gently. Cleaning removes dirt and dust for better light. It also helps bulbs fit correctly into sockets.
Safety Precautions
Always turn off the power before changing bulbs to avoid electric shocks. Use a sturdy ladder and avoid wet conditions for safety. Handle bulbs gently to prevent breaking and injury.
Turn Off The Power
Always switch off the power before handling outdoor string lights. Unplug the lights from the outlet or turn off the circuit breaker. This prevents electric shocks and keeps you safe.
Use A Stable Ladder
Choose a sturdy ladder to reach high string lights. Place it on flat ground to avoid slips. Have someone hold the ladder steady for extra safety.
Wear Protective Gloves
Wear gloves to protect your hands from sharp bulbs or wires. Gloves also help you grip bulbs better without breaking them.
Check For Damaged Wires
Inspect the string light wires before replacing bulbs. Look for cracks, frays, or exposed wires. Avoid using lights with damaged wiring to prevent hazards.
Use The Correct Bulbs
Match the replacement bulbs to the original wattage and size. Using wrong bulbs can cause overheating and damage the string lights.
Identifying Bulb Types
Identifying the right bulb type is the first step in replacing bulbs in outdoor string lights. Different lights use various bulb styles, sizes, and bases. Knowing the type helps you find the correct replacement fast. It also prevents damage to your string lights and ensures safety.
Bulbs vary in shape, size, and connection style. Some are small and round, while others are long or tubular. The base or socket type also changes how the bulb fits into the string. Recognizing these details makes the replacement simple and stress-free.
Common Bulb Shapes In Outdoor String Lights
Many outdoor string lights use globe or C7 bulbs. Globe bulbs are round and smooth. C7 bulbs are slightly pointed with a classic look. Miniature bulbs are smaller and often used for decorative lights. Spot or flood bulbs provide brighter light for larger areas. Check your string lights to see which shape fits best.
Types Of Bulb Bases
Bulbs connect to sockets through bases. The most common are screw bases and bayonet bases. Screw bases twist into place. Bayonet bases push in and lock with a twist. Some bulbs use wedge bases that slide into the socket. Identifying the base type helps you pick the correct bulb.
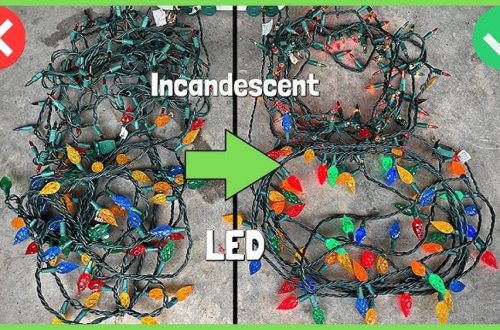
Led Vs. Incandescent Bulbs
Outdoor string lights use LED or incandescent bulbs. LEDs save energy and last longer. Incandescent bulbs give warmer light but use more power. Both types come in similar shapes and sizes. Check the bulb’s look and feel to identify the type. Using the right type keeps your lights working well.
Locating The Faulty Bulb
Locating the faulty bulb is the first step to fixing outdoor string lights. A single bad bulb can cause the whole string to go dark. Finding that bulb saves time and effort. It also makes your lights shine bright again quickly.
Visual Inspection
Start by looking closely at each bulb. Check for any broken glass or dark spots inside the bulb. These signs often mean the bulb is burnt out. Look at the base of the bulb too. Corrosion or damage there can stop the bulb from working.
Also, check if the bulb is loose. Sometimes, a bulb just needs a firmer twist. Tighten any loose bulbs and see if the lights turn on. This simple step can fix many problems fast.
Testing Each Bulb
Next, test each bulb one by one. Use a bulb tester or swap the bulb with a new one. If the string lights up after changing a bulb, you found the faulty one. Testing bulbs helps avoid guessing and saves time.
Test bulbs in the dark to see which ones do not glow. This method clearly shows which bulbs need replacement. Keep spare bulbs handy for quick swaps.
Removing The Old Bulb
Removing the old bulb from outdoor string lights is the first step in replacing it. This task requires care to avoid damage to the bulb or socket. Proper removal helps ensure the new bulb fits well and works perfectly. Follow simple techniques to make this process safe and easy.
Twist And Pull Method
Start by turning off the power to the string lights. Hold the bulb gently but firmly. Twist the bulb counterclockwise just a little. Then, pull it straight out of the socket. This method loosens the bulb safely without breaking it.
Handling Fragile Bulbs
Outdoor string light bulbs are often thin and fragile. Avoid gripping the glass too tightly. Use a cloth or gloves for a better grip and protection. Remove the bulb slowly to prevent snapping or cracking. Treat each bulb with care to keep the string lights working longer.
Choosing The Right Replacement Bulb
Choosing the right replacement bulb is important for outdoor string lights. The correct bulb keeps your lights bright and safe. Picking the wrong bulb can cause flickering or damage. It also affects the overall look of your lights.
Consider the size, shape, and type of the bulb. Check the wattage and voltage to match the original bulb. This helps your lights work properly without overload. Also, think about the bulb’s color and brightness for the right mood.
Identifying Bulb Size And Shape
Look closely at your current bulb. Bulbs come in many sizes and shapes. Common types include globe, candelabra, and standard bulbs. The size code is usually on the bulb base or packaging. Use this code to find the exact match.
Matching Wattage And Voltage
Check the wattage printed on the bulb. Use a bulb with the same or lower wattage. Higher wattage bulbs can cause overheating. Also, confirm the voltage matches your string lights. This keeps your lights safe and lasting longer.
Choosing The Right Bulb Type
Outdoor string lights use different bulb types. Incandescent bulbs are traditional but use more energy. LED bulbs save energy and last longer. LEDs also stay cool, reducing fire risk. Pick a bulb type that fits your needs and fixture.
Considering Color And Brightness
Bulb color changes the atmosphere of your space. Warm white gives a cozy feel. Cool white looks brighter and modern. Brightness is measured in lumens. Choose brightness that suits your outdoor area size.
Installing The New Bulb
Installing a new bulb in outdoor string lights is simple but requires care. A proper fit ensures the light works well and lasts longer. Follow these steps to place your new bulb correctly.
Proper Alignment
Check the bulb base and the socket shape. Match the bulb pins with the socket holes carefully. Avoid forcing the bulb into place. Align the pins straight to prevent damage. A correct fit allows the bulb to connect securely.
Securing The Bulb
Push the bulb gently into the socket. Turn it slightly if needed, until it feels snug. Do not over-tighten, which can break the bulb. Make sure it sits firmly to avoid flickering. A secure bulb stays in place during wind and weather.
Testing The Lights
Testing the lights is a key step after replacing bulbs in outdoor string lights. It helps to check if the bulbs work and the string lights shine bright. This step saves time and prevents further issues.
Testing also shows if the problem is fixed or if more bulbs need replacement. It ensures safety by confirming the lights have no electrical faults. Follow these simple steps to test your string lights properly.
Inspect The Power Source
First, make sure the power source is working. Check the outlet or extension cord for any damage. Plug in another device to confirm it has power. Without power, the lights will not turn on.
Turn On The Lights
Switch on the string lights after connecting them to the power source. Watch carefully to see if all bulbs light up. If some bulbs stay off, those may need replacement or adjustment.
Check Each Bulb Socket
Look at each bulb socket for loose connections or dirt. Gently push bulbs into their sockets to ensure a good fit. Clean sockets with a soft cloth if needed to improve contact.
Replace Faulty Bulbs
Identify any bulbs that do not light up. Remove and replace them with new ones of the correct type. Test the lights again after replacement to confirm they all work.
Maintaining Outdoor String Lights
Maintaining outdoor string lights helps them last longer and work better. Proper care keeps bulbs bright and wires strong. Small efforts prevent damage and save money on replacements. Follow easy steps to keep your lights shining through every season.
Regular Cleaning
Clean string lights often to remove dirt and dust. Use a soft cloth or brush for gentle cleaning. Avoid water on electrical parts to prevent damage. Cleaning stops grime from dulling the bulbs’ glow. Check bulbs for cracks or wear during cleaning. Replace any broken bulbs quickly for safety.
Storage Tips
Store lights carefully after use to avoid tangles and breaks. Coil the string loosely around a spool or hanger. Keep lights in a dry, cool place to stop rust and corrosion. Avoid heavy items that could crush the bulbs or wires. Use a plastic container or box for protection. Proper storage makes setup easier next time.
Frequently Asked Questions
How Do I Safely Replace Bulbs In Outdoor String Lights?
Turn off and unplug the lights first. Use a ladder if needed. Remove the old bulb gently and replace it with the correct type. Avoid touching the new bulb with bare hands to prevent damage.
What Type Of Bulbs Fit Outdoor String Lights?
Check your string lights’ packaging or manual for bulb type. Common types are G40, G50, or candelabra base bulbs. Using the wrong bulb can cause damage or poor lighting.
Can I Replace Broken Bulbs Individually?
Yes, you can replace individual bulbs without changing the whole string. Make sure the replacement bulb matches the original’s voltage and size for proper function.
How Often Should Outdoor String Light Bulbs Be Replaced?
Replace bulbs as soon as they burn out or flicker. Regular checks every few months help maintain consistent lighting and extend the lifespan of the string lights.
Conclusion
Replacing bulbs in outdoor string lights is simple with the right steps. Always check that the power is off before starting. Use the correct bulb type for safety and brightness. Handle bulbs gently to avoid damage. Regularly inspect your lights to keep them shining bright.
With care, your outdoor space stays cozy and well-lit. Enjoy your beautifully lit evenings without hassle or worry.