Want to make your outdoor space magical by adding string lights to a tree? You’re in the right place.
Hanging lights might seem simple, but doing it the right way can save you time, protect your tree, and create a stunning glow that lasts. In this guide, you’ll discover easy, practical steps to attach string lights safely and beautifully.
Keep reading—your perfect outdoor ambiance is just a few tips away.
Choosing The Right String Lights
Choosing the right string lights is the first step to a beautiful tree decoration. The lights should match your style and the tree’s size. They must also withstand outdoor conditions. This guide helps you pick the perfect string lights for your tree.
Types Of String Lights
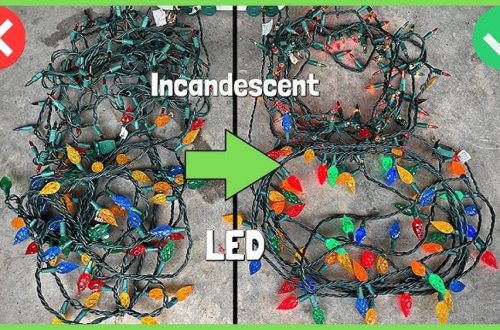
There are many types of string lights. LED lights are bright and use less energy. Incandescent lights give a warm glow but use more power. Solar string lights charge during the day. Battery-operated lights offer flexible placement. Choose the type that suits your needs and look.
Outdoor Durability And Safety
Outdoor lights need to resist rain, wind, and sun. Look for lights with waterproof and weatherproof ratings. Check for safety certifications on the packaging. Avoid lights with exposed wires or weak plugs. Safe lights last longer and protect your home.
Length And Power Source
Measure the tree’s height and width before buying lights. Pick a length that covers the tree without too many gaps. Consider the power source carefully. Plug-in lights need an outdoor outlet nearby. Solar and battery lights are good for places without power. Plan your setup for easy access to power.
Preparing The Tree
Preparing the tree is the first step to successfully attach string lights. It helps the lights look neat and last longer. A well-prepared tree also makes the setup safer and easier. Focus on cleaning, understanding the tree’s shape, and planning the light placement carefully.
Cleaning Branches And Trunk
Remove dirt, dust, and loose bark from branches and trunk. Use a soft brush or cloth to wipe surfaces gently. Clear away spider webs and small debris. Clean branches help the lights stick better and look brighter.
Assessing Tree Shape And Size
Look at the tree from all sides. Notice the height and width. Identify thick and thin branches. This helps decide how many lights you need. Knowing the tree’s shape guides where to start and end the string lights.
Planning Light Placement
Decide which parts need more light. Plan to wrap lights around branches evenly. Think about spacing between bulbs for a balanced look. Avoid overcrowding or leaving big empty spots. Proper planning saves time and creates a beautiful display.
Gathering Tools And Materials
Gathering the right tools and materials is the first step to attach string lights to a tree. Preparing well makes the job safer and easier. It helps ensure your lights stay secure and look great. Below are key items to collect before you start.
Ladders And Safety Gear
A sturdy ladder is essential for reaching high branches safely. Choose one that fits the tree height and is stable on the ground. Wear gloves to protect your hands from rough bark and sharp edges. Safety glasses keep your eyes safe from twigs or debris. Always have a helper nearby for extra support.
Fastening Supplies
Use zip ties or twist ties to fasten lights without damaging the tree. Light clips designed for outdoor use work well too. Avoid nails or staples, as they can harm the tree. Make sure the ties are tight but gentle on the branches. This keeps lights secure during wind and rain.
Extension Cords And Timers
Outdoor-rated extension cords extend your reach safely. Check the cord’s length before buying to avoid short connections. Timers help save energy by turning lights on and off automatically. Choose timers with easy settings for day and night use. This adds convenience and helps protect your lights.
Attaching Lights To The Tree
Attaching string lights to a tree creates a warm and inviting atmosphere. It enhances your outdoor space with soft, glowing light. The process requires simple steps to ensure the lights stay secure and look beautiful. Careful attachment protects the tree and keeps the lights shining longer.
Starting Point Selection
Choose a starting point near a power source. This spot makes plugging in easier. Begin at the base or a low branch for stability. Check that the cord reaches without tension. A good start prevents tangled or loose lights later.
Wrapping Techniques
Wrap the lights around branches gently. Keep the spacing even for a balanced look. Move upward in a spiral or zigzag pattern. Avoid wrapping too tightly to protect bark. Make sure bulbs face outward for better light spread.
Securing Lights Without Damage
Use soft ties or clips designed for trees. Avoid nails or staples that can harm bark. Tie lights loosely to allow tree growth. Check fasteners regularly to prevent slipping. This method keeps both the tree and lights safe.
Testing And Adjusting Lights
After wrapping your string lights around the tree, the next step is testing and adjusting them. This step ensures the lights work well and look great. Testing helps find any problems early. Adjusting improves the overall look and safety of the lights.
Powering On And Checking Coverage
Plug in the lights to see if they turn on. Walk around the tree to check all areas. Look for dark spots where lights are missing or not bright. Check the power source and connections for any issues. Make sure the entire tree is evenly lit for the best effect.
Fixing Loose Or Dim Spots
Find any loose bulbs or sections that hang down. Secure loose spots by tightening the string or using clips. Replace bulbs that are dim or not working at all. Adjust the placement to cover empty gaps. Keep lights tight and secure to avoid damage from wind or rain.
Final Touches For Aesthetic Appeal
Step back and look at the tree from different angles. Move lights to improve symmetry and balance. Add extra strands if needed to fill sparse areas. Tuck in wires neatly to hide them from view. A neat and even display makes the tree look stunning and festive.
Maintaining String Lights On Trees
Maintaining string lights on trees keeps them shining bright longer. Proper care prevents damage and safety hazards. It also saves money by avoiding frequent replacements.
Regular checks and simple steps help your lights last through seasons. Protecting lights from weather and storing them right matters. Fixing common problems quickly keeps your display looking great.
Weatherproofing Tips
Choose lights rated for outdoor use. Use waterproof connectors and covers on plugs. Wrap cords with electrical tape to seal gaps. Avoid placing lights on wet branches. Unplug lights during heavy rain or snow. Check bulbs for cracks or damage before installation.
Seasonal Removal And Storage
Turn off lights before removing them. Gently untangle strands to avoid wire damage. Coil lights loosely to prevent kinks. Store in a dry, cool place away from direct sunlight. Use a sturdy container to protect from pests. Label storage boxes for easy access next season.
Troubleshooting Common Issues
Inspect bulbs for burnouts and replace them promptly. Check connections for loose or corroded plugs. Use a voltage tester to find power issues. Replace damaged cords immediately to avoid hazards. Clean sockets with a dry cloth to ensure good contact. Test lights before hanging to save time.
Frequently Asked Questions
How Do I Safely Attach String Lights To A Tree?
Use waterproof zip ties or twist ties to secure lights. Avoid nails or staples to protect the tree’s bark. Wrap lights gently around branches, ensuring they are not too tight to allow growth and prevent damage.
What Type Of String Lights Work Best On Trees?
LED string lights are ideal for trees. They consume less energy, last longer, and emit less heat. Choose outdoor-rated, waterproof lights to withstand weather conditions and ensure safety during use.
How Can I Hide The Power Cords When Lighting A Tree?
Run power cords along the tree trunk or underground using outdoor-rated extension cords. Use cable clips or ties to keep cords neat and secure. Concealing cords helps maintain a clean, professional look and prevents tripping hazards.
How Many String Lights Do I Need For A Tree?
Estimate about 100 lights per 1. 5 feet of branch length for a dense look. Adjust quantity based on tree size and desired brightness. More lights create a vibrant display, while fewer provide a subtle glow.
Conclusion
Attaching string lights to a tree can brighten any outdoor space. Use clips or ties to secure lights safely without damage. Wrap lights evenly to create a balanced look. Check that plugs and cords stay dry and safe. Take your time for neat, lasting results.
Enjoy the warm, glowing atmosphere you create. Simple steps make your tree shine beautifully at night.