Want to transform your outdoor space into a cozy, magical retreat? Hanging string lights outside is one of the easiest and most affordable ways to add warmth and charm to your yard, patio, or balcony.
But if you’re not sure where to start or how to make your lights look perfect and stay safe, you’re in the right place. In this guide, you’ll discover simple steps and smart tips to hang string lights like a pro—making your outdoor area inviting for friends, family, or even a quiet night under the stars.
Ready to light up your space and impress everyone? Let’s get started!
Choosing The Right String Lights
Choosing the right string lights is key for a beautiful outdoor space. The right lights brighten the area and create a cozy mood. They must fit your style and last through weather changes. Consider light types, weatherproof features, and energy use. These factors help pick lights that suit your needs.
Types Of Outdoor String Lights
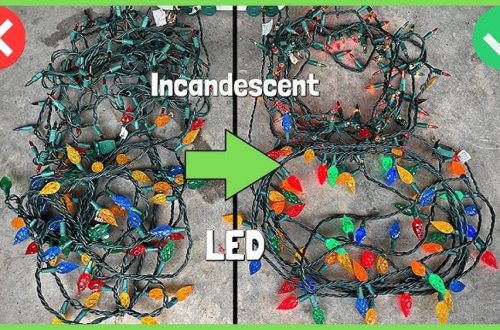
Outdoor string lights come in many styles. Classic globe bulbs offer a warm, soft glow. LED string lights are bright and last longer. Edison bulbs give a vintage, stylish look. Fairy lights are small and delicate, perfect for subtle lighting. Pick a type that matches your outdoor décor.
Weatherproof Features
Lights for outside must handle rain and wind. Check for waterproof ratings on the package. Look for materials that resist rust and damage. Durable cords and sealed bulbs protect against moisture. Weatherproof lights stay safe and work well all year.
Energy Efficiency Options
Energy-saving lights cut power bills and last longer. LED bulbs use less electricity than traditional bulbs. Solar string lights charge by sunlight, no wires needed. Battery-operated lights offer flexibility in placement. Choose energy-efficient options to save money and power.
Planning Your Layout
Planning your layout is the first step to hanging string lights outside. It helps you see the space clearly. You avoid mistakes and save time. A good plan makes the lights look beautiful and balanced.
Think about the area you want to light up. Imagine how the lights will hang and where to put them. This will guide your work and make the setup easier.
Measuring The Area
Start by measuring the width and length of your outdoor space. Use a tape measure for accuracy. Note down the numbers to figure out how many lights you need. Measure high and low points if the area is uneven. This helps you avoid buying too few or too many lights.
Determining Anchor Points
Anchor points hold the lights in place. Look for sturdy spots like walls, trees, or poles. Mark these spots on your plan. Check if you need hooks or nails for support. Strong anchors keep lights safe in wind or rain.
Creating A Design Pattern
Decide on the style of your lights. Straight lines give a clean look. Zigzags add fun and energy. You can try grids or circles for unique effects. Sketch your design on paper to visualize. This helps you see how the lights will fill the space.
Gathering Tools And Materials
Before hanging string lights outside, gather all necessary tools and materials. This step saves time and ensures a smooth setup. Having everything ready helps avoid interruptions and keeps the project safe and efficient.
Essential Tools
Start with basic tools like a ladder and measuring tape. A drill or screwdriver helps with mounting hardware. Wire cutters or scissors are useful to trim excess cord. A pencil or chalk marks spots for hooks or nails.
Mounting Hardware
Select strong hooks, nails, or adhesive clips to hold the lights. Use outdoor-rated hardware to resist weather damage. Make sure the hardware fits the type of surface you will attach lights to. Check weight limits to keep lights secure.
Safety Gear
Wear gloves to protect hands from sharp edges. Safety glasses shield eyes from dust or debris. Non-slip shoes improve balance on ladders. Have a helper nearby for added safety and support.
Preparing The Installation Area
Preparing the installation area is the first step to hang string lights outside. This step ensures safety and a smooth setup. It helps avoid problems during and after installation. Take time to get the area ready. This saves effort and keeps the lights secure.
Clearing Obstacles
Remove any objects that block the path of the lights. Trim tree branches that might get in the way. Clear away garden tools or furniture near the hanging spots. This makes space to work easily. It also prevents damage to the lights and surroundings.
Checking Power Sources
Find an outdoor power outlet close to where you want to hang the lights. Make sure it is safe to use and has a cover to protect from rain. Use an extension cord made for outdoor use if needed. Check the cord and plug for any damage before plugging in.
Ensuring Structural Support
Identify sturdy places to attach the lights. Use walls, fences, or strong tree branches. Avoid weak or loose surfaces that may not hold the lights. Use hooks or clips designed for outdoor use. Good support keeps lights from falling or sagging.
Mounting The String Lights
Mounting string lights outside sets the mood and lights up your space. Proper mounting keeps the lights secure and safe. It also helps the lights last longer and look neat. Choose the right method based on your outdoor area and the type of lights. Here are some easy ways to mount your string lights.
Using Hooks And Clips
Hooks and clips are simple tools to hang string lights. They attach easily to walls, fences, or eaves. Use plastic or metal hooks made for outdoor use. Space the hooks evenly to support the weight of the lights. Clips hold the wires without damaging them. This method keeps lights tidy and easy to remove later.
Securing With Zip Ties
Zip ties are strong and affordable for outdoor mounting. Wrap them around poles, branches, or railings. Tighten carefully to hold the lights firmly. Cut off extra length for a clean look. Zip ties resist weather and stay in place for months. They work well on rough or uneven surfaces.
Avoiding Wire Damage
Protect your string lights from breaks and shorts. Avoid bending wires sharply or pulling them tight. Use gentle loops around hooks or ties. Keep lights away from sharp edges and rough surfaces. Check for frayed wires before hanging. Proper care prevents damage and keeps lights glowing bright.
Connecting And Testing Lights
Connecting and testing string lights outside is a key step. Proper setup ensures safety and bright, even lighting. Take time to check every connection before final installation.
Testing lights early saves effort and avoids surprises after hanging. Follow simple steps to make sure your lights work well and look great.
Safe Electrical Connections
Use outdoor-rated plugs and connectors only. Check each connection for tightness and no exposed wires. Keep plugs dry and off the ground. Use weatherproof covers to protect connections from rain.
Do not overload your outlets. Use a power strip with a built-in circuit breaker if needed. Proper grounding prevents shocks and fire risks.
Using Extension Cords
Choose extension cords labeled for outdoor use. Avoid cheap or indoor-only cords. Select cords thick enough for your lights’ power needs. Keep cords away from walkways to prevent tripping.
Run cords along walls or under mats to keep them safe. Avoid sharp bends or pinching, which can damage the wiring.
Testing For Even Illumination
Plug in your lights before securing them. Look for any dark spots or flickering bulbs. Replace burnt-out bulbs immediately for consistent glow.
Adjust spacing or add more lights to brighten dim areas. Test from different angles to ensure even coverage across the space.
Maintaining Your Outdoor Lights
Outdoor string lights add charm and warmth to your space. Maintaining them keeps them bright and lasting longer. Regular care prevents damage from weather and dirt. Follow these simple steps to keep your lights shining.
Regular Cleaning Tips
Dust and dirt dull the lights. Clean bulbs gently with a soft cloth. Use a mild soap solution for sticky spots. Avoid harsh chemicals that can damage bulbs. Clean sockets carefully to keep good contact. Dry lights thoroughly before turning them on.
Replacing Bulbs
Check bulbs often for any that are burnt out. Replace broken or dim bulbs quickly. Use the same type and size for best fit. Turn off the power before changing bulbs. Handle bulbs gently to avoid damage. Test lights after replacing to ensure they work well.
Storing Lights Off-season
Remove lights carefully to avoid tangling. Coil them loosely around a spool or cardboard. Store in a cool, dry place away from sunlight. Keep away from moisture to prevent rust and mold. Label the storage box for easy finding next season. Proper storage helps lights last many years.
Frequently Asked Questions
How Do I Safely Hang String Lights Outside?
Use waterproof, outdoor-rated string lights and secure them with hooks or clips. Avoid overloading circuits and use ground-fault circuit interrupters (GFCIs) for safety. Ensure connections are protected from rain and moisture to prevent electrical hazards.
What Materials Are Best For Hanging Outdoor String Lights?
Use weather-resistant hooks, zip ties, or heavy-duty clips designed for outdoor use. Avoid nails or staples that can damage wires. Choose materials that withstand wind, rain, and sun exposure to keep lights securely in place.
How Far Apart Should Outdoor String Lights Be Spaced?
Space string lights about 12 to 18 inches apart for even illumination. Adjust spacing based on bulb size and desired brightness. Proper spacing enhances the ambiance and prevents dark spots in your outdoor area.
Can I Hang String Lights On Trees Or Fences?
Yes, you can hang string lights on trees or fences using hooks, zip ties, or wrap-around methods. Ensure the lights don’t damage branches or surfaces. Securely fasten to prevent movement in wind and avoid electrical hazards.
Conclusion
Hanging string lights outside adds charm and warmth to any space. Start with a plan and choose safe spots to hang your lights. Use sturdy hooks or clips for support. Keep cords away from water and sharp edges. Test the lights before securing them tightly.
Enjoy the soft glow that creates a cozy, inviting atmosphere. Simple steps make your outdoor area look beautiful and bright. Now, your space feels welcoming for friends and family. Bright nights are just a few easy steps away.