Are you ready to bring new life to your table lamp or create a custom lighting piece? Learning how to wire a table lamp switch is easier than you think.
With just a few simple steps, you can take control of your lamp’s functionality and add a personal touch to your space. Whether you want to replace a broken switch or build a lamp from scratch, this guide will walk you through the process clearly and safely.
Keep reading, and you’ll have your lamp working perfectly in no time.
Tools And Materials Needed
Wiring a table lamp switch needs the right tools and materials. Having these ready makes the job easier and safer. Prepare everything before starting to avoid interruptions.
Essential Tools
- Screwdriver: A flathead or Phillips for screws
- Wire stripper: To remove the insulation from wires
- Needle-nose pliers: For bending and holding wires
- Voltage tester: To check if wires are live
- Utility knife: To cut cables carefully
Required Materials
- Table lamp switch: The part to control the light
- Electrical wire: Usually 18 or 20 gauge
- Wire connectors: For joining wires securely
- Electrical tape: To insulate and protect connections
- Replacement socket (optional): If the old one is damaged
Safety Gear
- Insulated gloves: Protect from electric shocks
- Safety glasses: Shield eyes from debris
- Work in a dry area: Avoid water near electricity
- Turn off power: Always unplug the lamp first
Preparing The Lamp
Preparing the lamp is the first step to safely wire a table lamp switch. It helps avoid electric shock and makes the process easier. Follow these steps carefully to get started.
Make sure you have a clean workspace and good lighting. Keep your tools close by. Safety is very important.
Unplugging And Disassembling
Always unplug the lamp before you start. This stops any chance of electric shock. Check the cord and plug for damage. Do not continue if you see any wear or fraying.
Next, remove the lampshade. Unscrew the bulb and set it aside. Locate the switch housing, usually near the base or on the cord. Use a screwdriver to open it carefully. Keep the screws safe for later.
Removing The Old Switch
Look at how the old switch is connected. Take a photo if needed. This helps when wiring the new switch. Gently pull the wires from the terminals. Use a screwdriver if the wires are tight.
Remove the old switch from the lamp. Check the wires for damage. Cut and strip the wires if needed to make a clean connection. Now the lamp is ready for the new switch.
Identifying Lamp Wires
Identifying the correct lamp wires is the first step in wiring a table lamp switch. It helps ensure safety and proper function. Knowing which wire is live, neutral, or ground prevents mistakes and electrical hazards. This section explains how to recognize these wires clearly.
Live And Neutral Wires
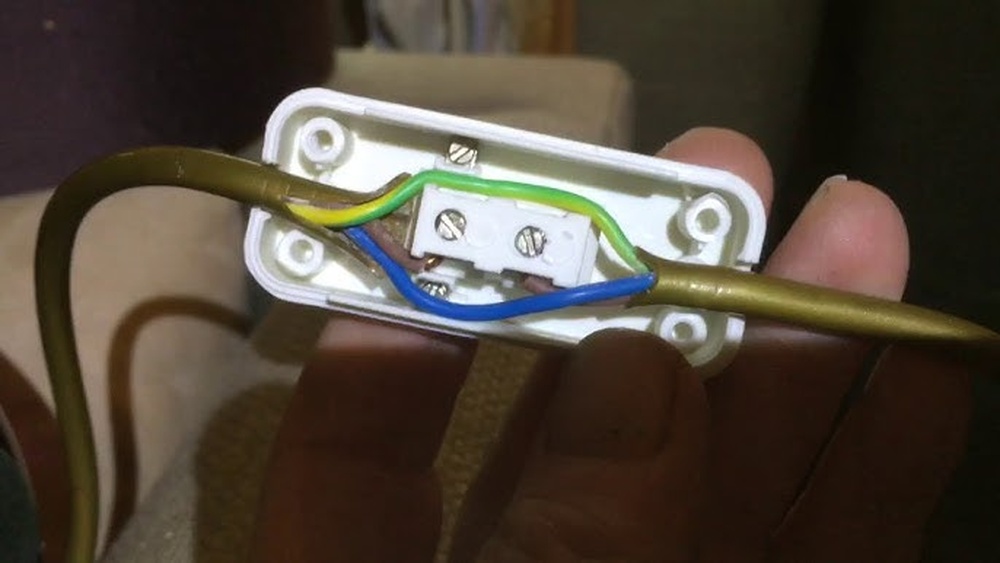
The live wire carries electricity from the power source to the lamp. It usually has a black or brown color. The neutral wire completes the circuit by carrying current back. It often appears white or blue. Identifying these two wires correctly is essential for safe wiring.
Ground Wire Check
The ground wire protects against electrical shocks. It is typically green or bare copper. Some lamps may not have a ground wire. If present, connect it to the lamp’s metal frame or the grounding point. Always confirm the ground wire before wiring the switch.

Credit: www.amazon.com
Wiring The New Switch
Wiring the new switch is a key step in replacing a table lamp switch. This part ensures the lamp turns on and off safely and correctly. Take your time and follow each step carefully. Safety matters, so make sure the lamp is unplugged before starting.
Connecting The Live Wire
Find the live wire in the lamp cord. It usually has a brown or black color. Attach this wire to the terminal marked “L” or “Live” on the new switch. Tighten the screw firmly to hold the wire in place. A loose connection can cause the lamp to flicker or fail.
Securing The Neutral Wire
The neutral wire is often blue or white. It does not connect to the switch but goes directly to the lamp socket. Check that this wire is not loose or damaged. Secure it tightly using wire nuts or terminal screws. A good neutral connection ensures the lamp works safely.
Attaching Ground Wire If Needed
Some lamps have a ground wire, usually green or bare copper. This wire protects against electric shocks. Attach the ground wire to the green screw or ground terminal on the switch. If your lamp has no ground wire, skip this step. Grounding adds extra safety to your lamp setup.
Testing The Switch
Testing the switch is a key step after wiring a table lamp. It ensures the switch works correctly and the lamp lights up safely. This step helps find wiring mistakes before full assembly. Let’s explore how to reassemble the lamp and test the switch properly.
Reassembling The Lamp
Put the lamp parts back together carefully. Make sure wires stay in place and do not touch each other. Tighten screws and secure the switch housing. Check for loose pieces or exposed wires before closing the lamp.
Handle the lamp gently to avoid damaging wires. Double-check connections at the switch. Proper reassembly prevents electrical shorts or faults.
Plugging In And Testing
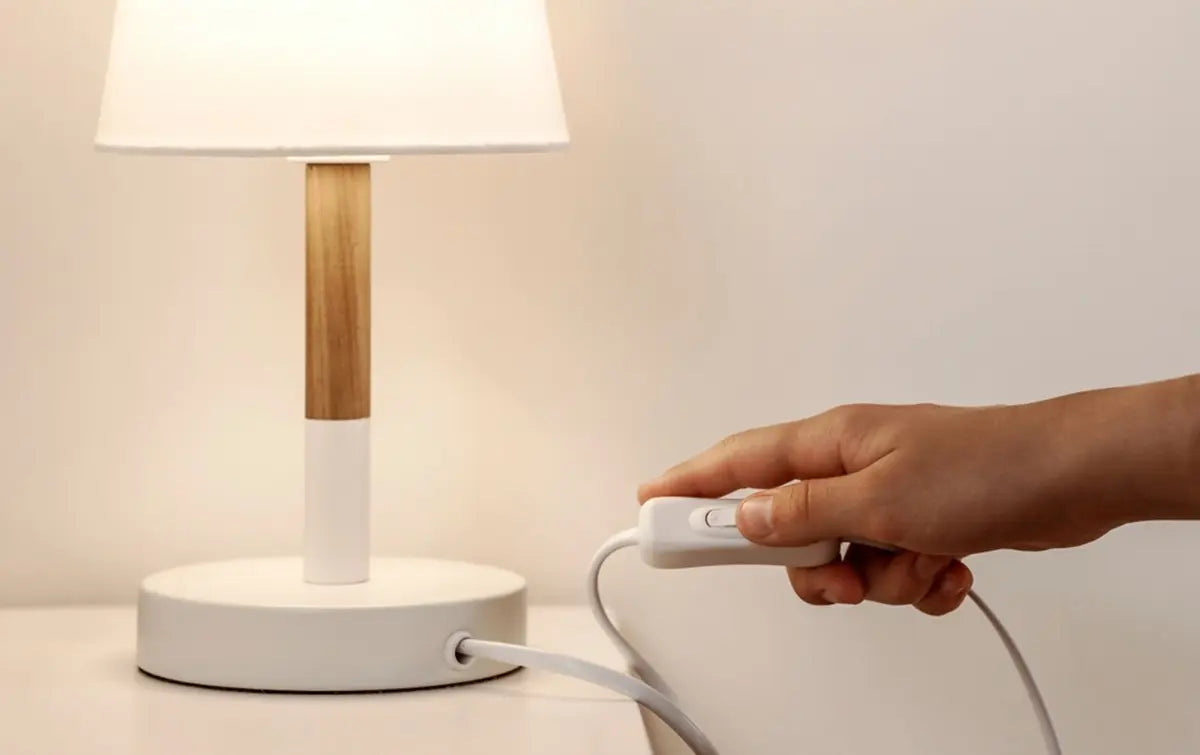
Place the lamp on a flat surface near an outlet. Plug the lamp’s cord into the power source. Turn the switch on and off slowly. Watch if the light bulb turns on and off smoothly.
Listen for unusual sounds or smells. If the lamp does not light up, unplug it immediately. Check the wiring connections again. Repeat the test until the switch works perfectly without issues.
Credit: www.sunmory.com
Troubleshooting Common Issues
Troubleshooting common issues with a table lamp switch helps keep your lamp working safely. Problems can happen during wiring or use. Knowing how to spot and fix these issues saves time and stress.
This section covers three frequent problems. Each one can cause your lamp to stop working or behave oddly. Fixing them usually takes only a few simple steps.
Switch Not Working
Check if the switch feels loose or stuck. A broken switch may need replacement. Test the switch with a multimeter to see if it works. If no electricity passes through, the switch is faulty. Replace it with the same type and rating.
Flickering Light
Flickering means poor contact inside the lamp. The bulb might be loose. Tighten or replace it. Check the wire connections at the switch and socket. Dirty or corroded contacts cause flicker. Clean or replace parts as needed. Use bulbs that match the lamp’s wattage limit.
Loose Connections
Loose wires can stop the lamp from working. Turn off power before checking wires. Make sure all wire nuts are tight. Re-twist any loose wire strands together. Secure wires under terminal screws firmly. Loose connections can cause sparks or shorts. Always double-check your work for safety.
Safety Tips For Lamp Wiring
Wiring a table lamp switch can be simple. Safety is the top priority during this task. Following safety tips protects you from harm and keeps your lamp working well. Use these tips to stay safe and avoid common wiring mistakes.
Avoiding Electrical Shock
Turn off the power before starting any wiring work. Use a voltage tester to confirm no electricity flows. Never touch wires with wet hands or while standing on a wet floor. Keep your work area dry and clean. Wear insulated gloves if possible. These steps reduce the risk of electrical shock.
Proper Wire Handling
Use wire strippers to remove insulation carefully. Avoid damaging the wire inside. Twist wire ends tightly to prevent loose connections. Do not pull or bend wires too hard. Keep wires organized and separate to avoid short circuits. Handle wires gently for a safe and neat setup.
Using Certified Components
Choose switches, cords, and plugs with safety certifications. Look for marks from recognized testing labs. Certified parts meet safety standards and last longer. Avoid cheap or unmarked components. Using certified items lowers fire and shock hazards.

Credit: www.amazon.com
Frequently Asked Questions
How Do I Wire A Table Lamp Switch Safely?
To wire a table lamp switch safely, always unplug the lamp first. Use insulated tools and follow the wiring diagram carefully. Connect the wires securely and avoid loose connections to prevent electrical hazards.
What Tools Are Needed To Wire A Table Lamp Switch?
You need a screwdriver, wire strippers, electrical tape, and a new switch. A voltage tester is helpful to ensure power is off before wiring. These tools make the process safer and easier.
Can I Replace A Table Lamp Switch Myself?
Yes, you can replace a table lamp switch yourself if you follow safety steps. Turn off and unplug the lamp first. Carefully disconnect old wires and connect the new switch using proper wiring methods.
What Type Of Switch Works For Table Lamps?
A single-pole toggle or rotary switch is commonly used for table lamps. These switches control power flow easily and fit most lamp designs. Choose one rated for the lamp’s voltage and current.
Conclusion
Wiring a table lamp switch is simple with clear steps. Safety is important; always turn off the power first. Use the right tools and follow instructions carefully. Check connections to avoid loose wires or shorts. Testing your work ensures the lamp works well.
Taking time and working patiently brings good results. You can enjoy your lamp with confidence and ease. Try wiring again if needed to get better at it. This small skill saves money and adds convenience at home.