Are you ready to transform your space with style and light? Installing hanging pendant lights is a simple way to add charm and brightness to any room.
Whether you want to create a cozy nook or highlight your kitchen island, these lights can make a big impact. In this guide, you’ll discover easy steps to install pendant lights safely and quickly—even if you’re not an expert. Keep reading, and by the end, you’ll have the confidence to light up your home like a pro.
Choosing Pendant Lights
Choosing the right pendant lights is key for a beautiful room. The right light can set the mood and highlight your space. Think about style, size, and how it fits with your room’s look.
Taking time to pick the perfect pendant light makes installation easier. It also ensures your space looks balanced and inviting.
Selecting The Right Style
Choose a style that matches your room’s purpose. Modern styles fit well in kitchens or offices. Rustic or vintage lights work great in cozy areas. Simple designs offer a clean look. Bold shapes create a statement. Pick one that feels right for your space.
Considering Size And Scale
The size of your pendant light matters. Big rooms need larger lights or multiple pendants. Small rooms look best with smaller, simpler lights. Measure your space before buying. Make sure the light does not hang too low or too high.
Matching Your Decor
Match your pendant light with your room’s colors and materials. Metal finishes like brass or black add style. Glass or fabric shades give softness. Choose lights that blend with furniture and walls. This creates a nice, balanced look.
Credit: www.instructables.com
Tools And Materials Needed
Installing hanging pendant lights requires specific tools and materials. Having the right items ready makes the job easier. It also helps ensure safety and a neat finish. Below are the key tools and supplies needed for this task.
Essential Tools
You need basic electrical tools to install pendant lights properly. A screwdriver set is crucial for removing and securing screws. Wire strippers help prepare the electrical wires. A voltage tester checks if the power is off before starting. Pliers assist in twisting wires together. A drill may be necessary to make holes for mounting brackets.
Safety Gear
Safety gear protects you during the installation. Insulated gloves prevent electric shocks. Safety goggles shield your eyes from dust and debris. A sturdy ladder helps you reach high ceilings safely. Wearing closed-toe shoes adds extra protection. Always turn off the power at the circuit breaker before working.
Additional Supplies
You will need extra supplies to complete the installation. Electrical tape secures wire connections. Wire nuts join wires safely. Mounting brackets hold the pendant light in place. A pencil marks drill points on the ceiling. A level ensures the light hangs straight. Keep all parts of the pendant light handy for assembly.
Preparing The Installation Area
Preparing the installation area is the first step to install hanging pendant lights safely. Taking time to get ready helps avoid mistakes and accidents. It also makes the process faster and smoother. This section covers essential tasks to prepare your space before installing the lights.
Turning Off Power
Safety starts with turning off the power. Go to your home’s circuit breaker panel. Switch off the circuit that controls the room where you will install the pendant lights. Use a voltage tester to confirm the power is off. Never work on live wires. This step protects you from electric shocks.
Checking Existing Wiring
Look at the wiring in the ceiling box. Make sure wires are not damaged or frayed. Check if the wires are the right type for your pendant light. If unsure, consult an electrician. Proper wiring ensures the light will work safely and correctly. Clean the area around the wires for easy access.
Measuring And Marking
Measure the distance from the ceiling to where you want the light to hang. Mark the spot on the ceiling where the fixture will go. Use a pencil for clear but removable marks. Double-check measurements to avoid errors. Accurate marking helps the pendant light hang evenly and look good.
Mounting The Fixture
Mounting the fixture is the key step in installing hanging pendant lights. This process holds the light securely to the ceiling. It also connects the electrical wiring for power. Proper mounting ensures safety and a neat look. Follow each step carefully to avoid problems later.
Installing The Mounting Bracket
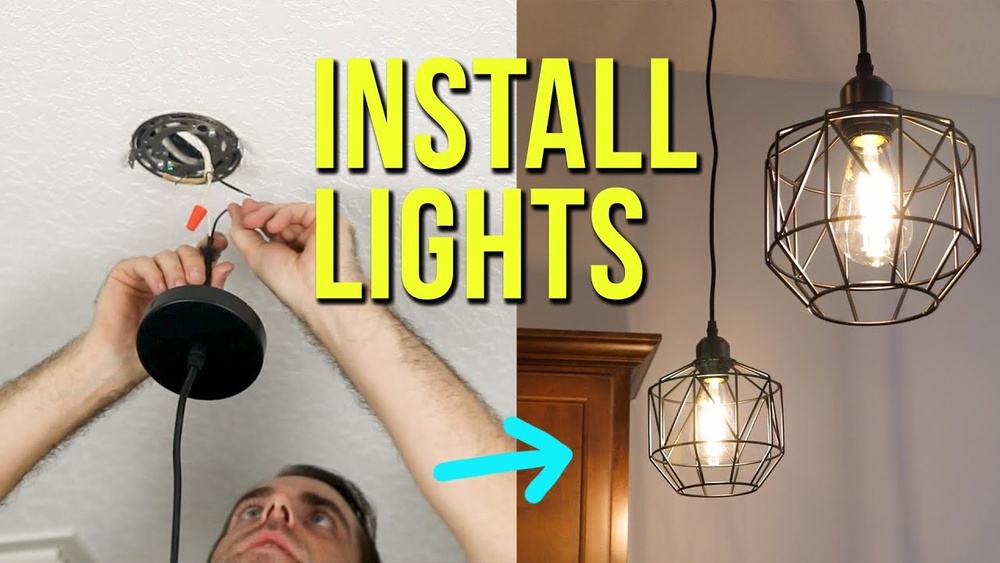
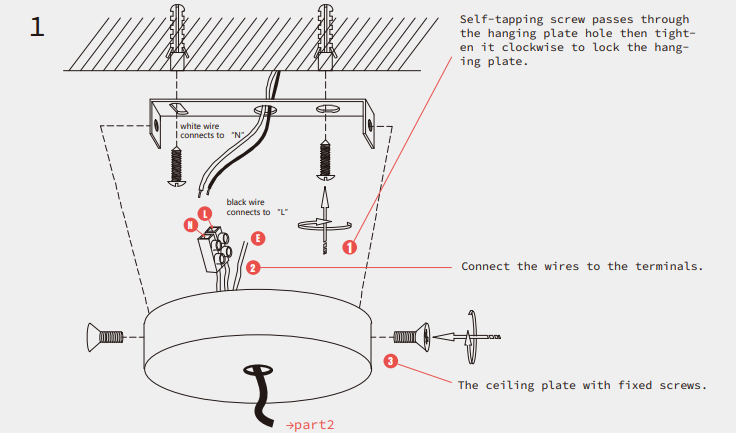
Start by turning off the power at the circuit breaker. Find the electrical box in the ceiling. Align the mounting bracket with the box. Use screws to fasten the bracket tightly. Make sure it is level and secure. This bracket will hold the pendant light firmly.
Connecting The Wiring
Strip about half an inch of insulation from each wire. Match the wires by color: black to black, white to white. Connect the ground wire to the green or copper wire. Use wire nuts to twist the connections together. Wrap electrical tape around the wire nuts for safety. Push the wires carefully into the electrical box.
Securing The Pendant Light
Lift the pendant light and attach it to the mounting bracket. Tighten the screws to hold the fixture in place. Check that the pendant hangs straight and steady. Install the bulb and any decorative covers. Turn the power back on and test the light. Your hanging pendant light is ready to shine.
Adjusting Height And Position
Adjusting the height and position of hanging pendant lights is key to their look and function. Proper adjustment makes your space feel balanced and bright. It also helps avoid glare or shadows. Follow these steps for perfect placement.
Setting The Desired Length
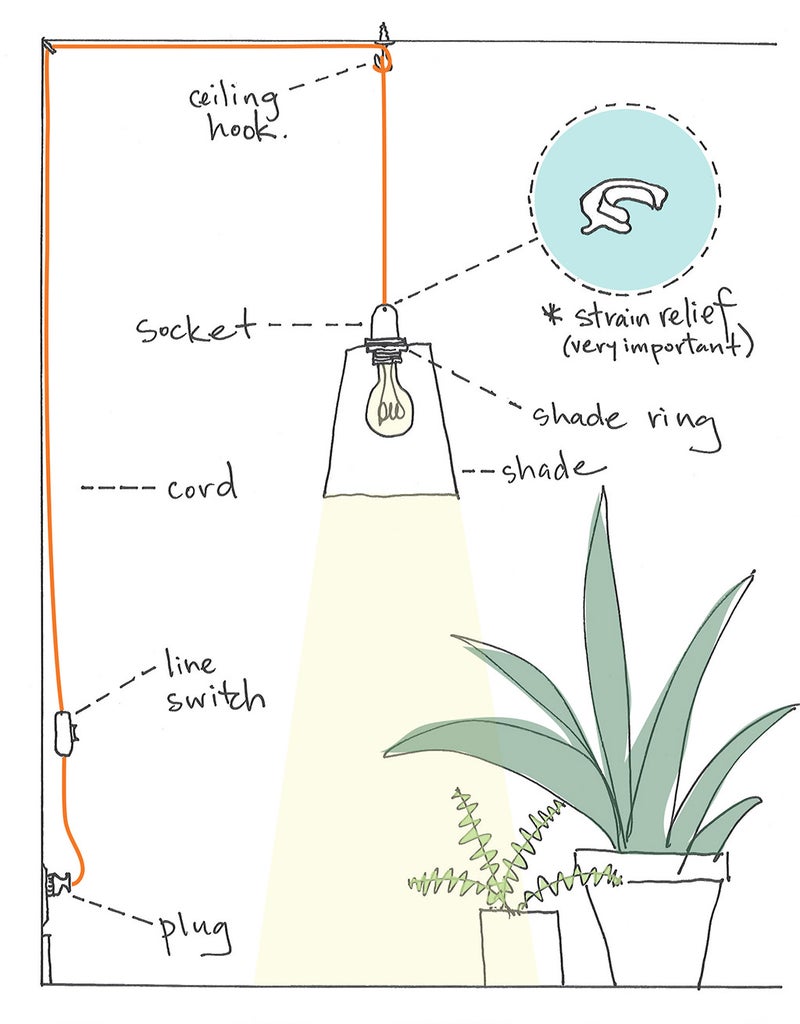
Start by measuring the distance from the ceiling to where you want the light. Most pendants have adjustable cords or rods. Shorten or lengthen them to fit your space. For dining areas, hang lights about 30 to 36 inches above the table. In open rooms, a height of 72 inches from the floor works well.
Aligning Multiple Pendants
When using more than one pendant, keep them evenly spaced. Measure the distance between each fixture carefully. Use a level to check horizontal alignment. Consistent height and spacing create a neat, stylish look. It also spreads light evenly across the room.
Testing Stability
After adjusting, make sure the pendants hang firmly. Gently shake each light to test if it moves. Tighten any loose screws or connectors. Secure wires to avoid swinging or pulling. Stable fixtures stay safe and look better over time.

Credit: www.youtube.com
Final Touches
After installing your hanging pendant lights, the final touches bring everything together. These steps make sure your lights look great and work well. Taking time here avoids problems later and keeps your space safe.
Installing Bulbs
Choose bulbs that fit your fixture’s size and style. Screw each bulb gently into the socket. Avoid forcing bulbs to prevent damage. Use LED bulbs for energy savings and long life. Make sure bulbs are secure but not too tight.
Cleaning The Fixture
Remove dust and fingerprints from the fixture. Use a soft, dry cloth for cleaning glass or metal parts. Avoid harsh chemicals that can harm finishes. Clean the bulbs carefully to keep light bright. Regular cleaning keeps your pendant lights shining.
Powering On And Testing
Turn the power back on at the circuit breaker. Use the light switch to test each pendant light. Check for flickering or dimming issues. Adjust the height or position if needed. Confirm all bulbs light up evenly and brightly.
Troubleshooting Tips
Installing hanging pendant lights can sometimes bring small problems. These issues may stop your lights from working well. Troubleshooting helps fix these problems quickly. This section gives simple tips to solve common pendant light issues. Follow these steps to keep your lights bright and safe.
Fixing Flickering Lights
Flickering lights can be annoying. Check the light bulb first. Make sure it is screwed in tightly. Try a new bulb to see if flickering stops. Loose bulbs often cause flickers. Also, check the switch. A faulty switch may cause flickering. If flickers continue, the wiring might be loose. Turn off the power before checking wires. Tighten any loose wire connections carefully.
Addressing Loose Fixtures
Loose fixtures can be unsafe. Gently tug on the pendant light. If it moves, it needs tightening. Check the mounting bracket. Use a screwdriver to tighten screws. Make sure the fixture is secure against the ceiling. If the fixture still moves, check the electrical box. It should be firmly attached to the ceiling joist. Replace the box if it is damaged or loose.
Dealing With Wiring Issues
Wiring problems can stop your lights from working. Always turn off power before touching wires. Look for damaged or frayed wires. Replace any wires that look worn. Check wire connections in the fixture and switch. Use wire nuts to secure loose wires. If unsure about wiring, call a professional electrician. Correct wiring keeps your lights safe and reliable.
Credit: www.homdiyhardware.com
Frequently Asked Questions
What Tools Are Needed To Install Pendant Lights?
You need a drill, screwdriver, wire stripper, voltage tester, and ladder. Safety gloves and goggles are also recommended for protection during installation.
How Do I Choose The Right Height For Pendant Lights?
Hang pendant lights 28-34 inches above the countertop or table. Adjust height based on ceiling height and room size for optimal lighting.
Can I Install Pendant Lights Without An Electrician?
Yes, if you have basic electrical knowledge and follow safety precautions. Turn off power before installation and double-check wiring connections carefully.
What Types Of Bulbs Work Best For Pendant Lights?
LED bulbs are energy-efficient and long-lasting. Choose warm white or soft white bulbs to create a cozy atmosphere.
Conclusion
Installing hanging pendant lights can brighten any room quickly. Follow each step carefully for safe setup. Choose the right height and style to match your space. Double-check all electrical connections before turning power on. Enjoy the new look and cozy atmosphere created by your lights.
Small effort brings big change to your home’s feel. Keep these tips handy for future lighting projects. Now, your room shines with style and warmth.