Are you looking for a fun and creative way to brighten up your space? Making a clay mini lamp candle is easier than you think, and it’s a perfect project for anyone who loves handmade decor.
Imagine lighting a tiny, charming lamp that you made yourself—how satisfying would that feel? In this guide, you’ll discover simple steps to craft your own clay mini lamp candle, even if you’ve never worked with clay before. Ready to add a warm, personal touch to your home?
Keep reading, and let’s get started!

Credit: www.amazon.com
Materials Needed
Starting your clay mini lamp candle project requires gathering the right materials. Each item plays a key role in making a beautiful and safe candle. This section covers the essential materials to prepare before crafting.
Choosing The Right Clay
Pick a clay type that is easy to shape and durable. Air-dry clay works well for beginners. It hardens without baking, saving time and energy. Polymer clay offers more detail but needs oven baking. Avoid soft clays that may crack or crumble.
Selecting Candle Wax
Choose wax that melts evenly and burns cleanly. Soy wax is popular and eco-friendly. Beeswax has a natural scent and long burn time. Avoid paraffin wax if you want a healthier option. Make sure the wax suits the candle mold size.
Additional Supplies
Gather candle wicks that fit your mini lamp size. Use wick holders to keep wicks upright during pouring. Have a double boiler or melting pot ready for melting wax safely. Keep a small knife or sculpting tools for shaping clay details. Finally, prepare a heat-resistant surface to work on.
Preparing The Clay Base
Preparing the clay base is the first step in making a mini lamp candle. This base holds the candle and shapes the lamp’s look. It must be sturdy and smooth. Working carefully makes the lamp look neat and work well.
Shaping The Mini Lamp
Start with a small ball of clay. Press it lightly on a flat surface. Shape it into a round, shallow bowl. Keep the edges smooth and even. The size should fit your candle snugly. Use your fingers to make gentle curves. Avoid making the walls too thin. A thick base holds better and lasts longer.
Creating A Hollow For The Candle
Press your thumb in the center of the clay bowl. Make a hollow deep enough for the candle to fit. Check the size by placing the candle inside. The hollow should hold the candle firmly. Smooth the inside edges to avoid cracks. This hollow keeps the candle safe and upright.
Making The Candle
Making the candle is the heart of creating your clay mini lamp candle. This step involves melting wax, adding scent, and coloring it. Each part is important to get a beautiful, fragrant candle that fits your clay lamp perfectly.
Melting The Wax Safely
Use a double boiler to melt the wax. This method keeps the wax from burning. Fill the bottom pot with water and heat it gently. Place the wax in the top pot. Stir the wax as it melts. Never leave the melting wax unattended. Keep a thermometer handy to check the temperature. The wax should melt between 160°F and 180°F. Remove from heat once fully melted.
Adding Fragrance And Color
Once the wax is melted, add fragrance oil. Use about 1 ounce of fragrance per pound of wax. Stir gently to mix the scent evenly. Add candle dye chips or liquid dye next. Start with a small amount for light color. Mix well to spread the color. Test a small drop on white paper for shade. Adjust the amount if needed. Pour the wax into the clay lamp mold while warm. Let it cool and harden completely.
Assembling The Mini Lamp Candle
Assembling the mini lamp candle is a simple and fun step. It brings your clay base and wax together. This process creates a charming, cozy candle for your space. Follow each step carefully to ensure your candle looks great and works well.
Pouring Wax Into The Clay Base
First, melt the wax until it becomes liquid. Use a double boiler for even melting. Pour the warm wax slowly into the clay base. Fill it up to the top but not over the edge. Let the wax cool and harden completely before moving on. This helps the candle keep its shape and stay secure.
Inserting The Wick
Choose the right wick size for your candle. Place the wick in the center of the clay base. Hold it steady while the wax sets. You can use a small stick to keep the wick straight. Make sure the wick sticks out a bit above the wax surface. This allows for easy lighting and a steady flame.
Finishing Touches
Finishing touches make your clay mini lamp candle look complete and neat. These final steps improve both its appearance and durability. Careful attention here gives your candle a smooth and polished feel. It also prepares the clay for painting and ensures it lasts longer.
Smoothing And Painting The Clay
Start by gently sanding the clay surface with fine-grit sandpaper. This removes bumps and rough edges. Smooth clay feels nice and looks professional. Use a soft cloth to wipe away dust after sanding.
Choose acrylic paint for coloring your mini lamp candle. It dries quickly and sticks well to clay. Apply thin, even coats with a small brush. Let each layer dry before adding another. Painting in light layers prevents streaks and runs.
Curing And Drying Time
After painting, let your candle dry completely. Place it in a warm, dry spot. Avoid direct sunlight to prevent cracking or fading. Drying times vary by clay type and thickness.
For air-dry clay, expect at least 24 hours of curing. Oven-bake clay needs baking according to package instructions. Proper curing strengthens the clay and fixes the paint. Patience here ensures your mini lamp candle stays beautiful longer.
Safety Tips
Safety is very important when making a clay mini lamp candle. Hot wax and open flames can cause burns or fires. Follow these safety tips to enjoy your craft without risks.
Handling Hot Wax
Always use heat-resistant gloves when working with hot wax. Pour wax slowly to avoid splashes. Keep children and pets away from your workspace. Use a double boiler to melt wax evenly. Never leave melting wax unattended. Let the wax cool slightly before pouring into the clay mold.
Fire Safety Precautions
Place your mini lamp candle on a flat, stable surface. Keep flammable items far from the candle flame. Never leave a burning candle alone. Use a candle holder that fits your mini lamp well. Have a fire extinguisher or water nearby for emergencies. Blow out the candle before leaving the room or going to sleep.
Creative Variations
Creative variations make your clay mini lamp candle unique and fun. You can change colors and add decorations. These small changes give your candle a personal touch. Experimenting with different ideas brings new styles and looks to your project.
Using Different Clay Colors
Choose clay colors that match your style or mood. Mix bright shades for a lively candle. Use soft colors for a calm, cozy feel. Try blending two or more colors to create patterns. Color choices can make your candle fit any room or season.
Adding Decorative Elements
Decorate your mini lamp candle with small items like beads or glitter. Press tiny shapes or textures into the clay surface. Paint details with acrylic colors after baking the clay. Use natural items like dried flowers for a rustic look. Decorations add charm and make each candle one of a kind.
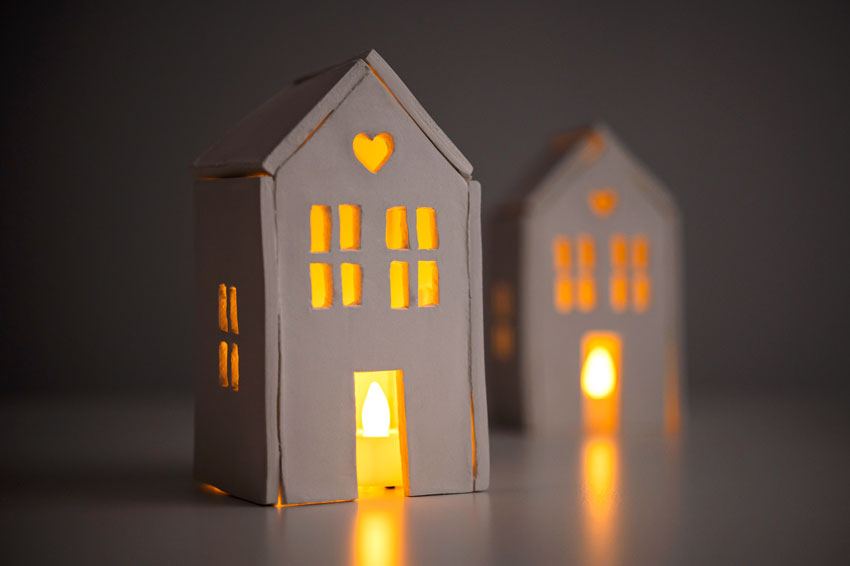
Credit: onelittleproject.com

Credit: www.cchobby.com
Frequently Asked Questions
How Do You Start Making A Clay Mini Lamp Candle?
Begin by conditioning the clay until soft. Shape the base, create a cavity for the candle, and smooth the surface carefully.
What Materials Are Needed For A Clay Mini Lamp Candle?
You need air-dry clay, a small candle or tealight, sculpting tools, paint for decoration, and a sealant for durability.
How Long Does It Take To Make A Clay Mini Lamp Candle?
It typically takes 1 to 2 hours to shape and decorate. Drying time varies, usually 24 hours or more.
Can I Use Any Type Of Clay For The Mini Lamp?
Air-dry clay is best for beginners. Oven-bake clay works too but requires baking for hardening.
Conclusion
Making a clay mini lamp candle is simple and fun. You can create a cozy light for any room. Use basic materials and follow easy steps. This project helps you enjoy crafting and decorating. Try different colors and shapes to make it yours.
Small lamps add charm and warmth to spaces. Enjoy your handmade candle and share with friends. Keep practicing to improve your skills. Crafting brings joy and a sense of calm. Give it a try today!