Have you ever wanted to enjoy the warm glow and lovely scent of a candle without worrying about an open flame? A candle warmer lamp is the perfect solution.
It melts your candle gently, releasing fragrance safely and evenly. In this guide, you’ll discover simple steps to make your own candle warmer lamp at home. Imagine creating a cozy atmosphere while keeping your space safe—sounds great, right? Keep reading, and you’ll learn how to bring that comfort into your home easily and affordably.
Materials Needed
Gathering the right materials is the first step to make a candle warmer lamp. Having all supplies ready helps the process go smooth. This section lists the must-have items and some optional decorations. These materials are easy to find and affordable.
Essential Supplies
- A small lamp base or stand
- Heat-resistant plate or dish
- Light bulb (preferably LED or low-wattage)
- Electrical cord with switch
- Wire stripper and electrical tape
- Screwdriver
- Glue gun or strong adhesive
Optional Decorative Items
- Colored glass beads or stones
- Paint for the lamp base
- Decorative fabric or lace
- Small artificial flowers
- Stencils for patterns
- Glitter or stickers
Choosing The Right Candle
Choosing the right candle is key for your candle warmer lamp. The candle must melt evenly and smell pleasant. Some candles work better than others for warming. Knowing the types of wax and scents helps pick the best candle.
Wax Types
Different waxes melt differently on a candle warmer lamp. Soy wax is popular. It melts slowly and smells clean. Beeswax burns long and smells natural. Paraffin wax is common but may release more chemicals. Choose wax that melts evenly and suits your style.
Scented Vs Unscented
Scented candles add fragrance to your room as they warm. They create a cozy mood. Unscented candles only offer soft light and warmth. Pick scented candles if you want aroma. Pick unscented for a simple glow without smells. Both work well with candle warmers.
Selecting A Lamp Base
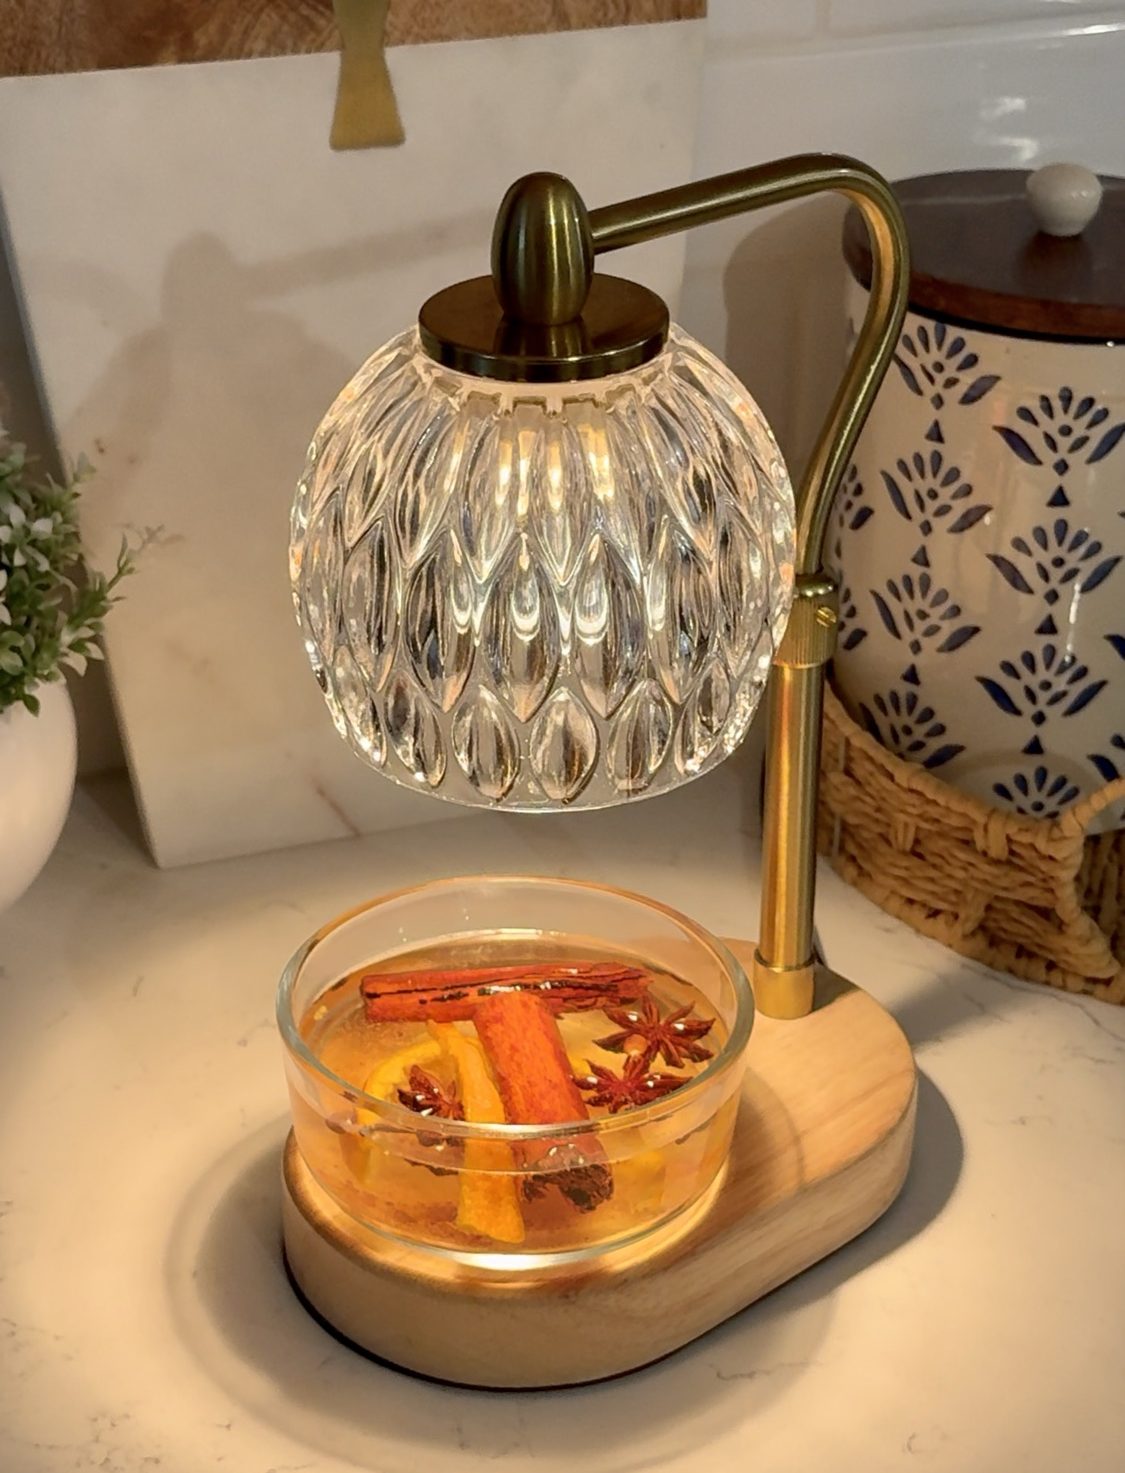
Selecting the right lamp base is key to making a candle warmer lamp. It holds the lamp parts and supports the candle dish. The base must be strong and stable to avoid accidents. Choose a lamp base that fits your style and works well with the heating element. This step sets the foundation for your candle warmer lamp.
Suitable Lamp Styles
Pick a lamp style that matches your home decor. Simple and sturdy bases work best. Ceramic, metal, or wood bases provide good support. Avoid flimsy or tall bases that can tip over easily. A low, wide base keeps the lamp steady. Choose a style that looks good and holds the parts securely.
Safety Considerations
Safety is the top priority when selecting a lamp base. Make sure the base stays cool during use. Avoid materials that melt or catch fire. Check if the base has a strong electrical cord. The base should keep the heat away from surfaces. Use a lamp base with good heat resistance to prevent accidents. Choose a stable base to stop the lamp from falling.
Credit: natashassouthernflavor.com
Assembly Steps
Building a candle warmer lamp is simple with clear steps. Follow each part carefully to ensure safety and function. This guide helps you assemble your lamp without trouble.
Preparing The Lamp
Start by choosing a sturdy lamp base. Clean the surface to remove dust and dirt. Check that the lamp socket fits your bulb size. Gather all tools and materials before moving on.
Attaching The Candle Holder
Select a heat-safe candle holder. Attach it securely to the lamp base using screws or strong adhesive. Make sure it is centered above the bulb area. The holder must not touch the bulb directly.
Wiring And Electrical Setup
Unplug the lamp before working on wiring. Connect the power cord to the socket carefully. Use electrical tape to cover exposed wires. Test the wiring with a small bulb first. Ensure everything is safe before use.
Testing The Warmer Lamp
Testing the candle warmer lamp is an important step. It ensures the lamp works safely and heats evenly. This step helps find any issues early. You can enjoy your candle without problems. Follow simple checks and adjustments to get the best results.
Initial Power On
Plug in the candle warmer lamp carefully. Turn the power switch on. Watch for the lamp’s light or heating element glow. It should start warming within a few seconds. If nothing happens, check the power source. Ensure the bulb or heating plate is installed correctly. Never touch the lamp right after powering on. It can get hot quickly. Let it run for about five minutes to test the basic function.
Adjusting The Heat Settings
Most candle warmer lamps have heat settings. These control how hot the lamp gets. Start with the lowest setting. Feel the warmth near the candle holder without touching the lamp. Increase the heat slowly to avoid overheating. Watch the candle wax melt smoothly. Stop if you see smoke or smell burning. Adjust until the wax melts evenly without burning. Proper heat preserves the candle’s scent and safety.

Credit: www.reddit.com
Creative Customization
Creative customization lets you make your candle warmer lamp truly yours. It adds style and personality. You can turn a simple lamp into a unique home decor piece. This section explores easy ways to personalize your lamp with paint and personal touches.
Painting And Decorating
Painting your lamp gives it a fresh look. Choose colors that match your room or mood. Use acrylic paint for bright, lasting colors. Patterns like stripes, dots, or swirls add fun details. Try stencils for neat shapes and designs.
Decorate with stickers or washi tape for extra charm. Seal the paint with a clear coat to protect it. Let each layer dry before adding another. A decorated lamp draws attention and feels special.
Adding Personal Touches
Personal touches make your lamp unique and meaningful. Attach small charms or beads with glue. Wrap the lamp base with twine or ribbon for a rustic look. Use fabric scraps to cover parts of the lamp for softness.
Write quotes or words with a fine-tip marker. These add inspiration and warmth to your space. Small details show your creativity and care. Your candle warmer lamp becomes more than just a light source.
Safety Tips
Safety is the top priority when making a candle warmer lamp. Proper care helps prevent accidents and keeps your home safe. Follow these tips to avoid risks and enjoy your candle warmer without worry.
Preventing Overheating
Overheating can cause damage or fire. Use a low-watt bulb to control the heat. Do not leave the lamp on for long periods. Turn off the lamp when not in use. Keep the lamp away from flammable materials like curtains or paper. Check the lamp regularly for signs of heat damage.
Proper Usage Guidelines
Place the candle warmer on a flat, stable surface. Avoid moving the lamp while it is hot. Use only wax melts or candles designed for warmers. Do not cover the lamp or block airflow. Keep children and pets away from the warmer. Always follow the manufacturer’s instructions for your specific lamp model.

Credit: www.amazon.com
Troubleshooting Common Issues
Troubleshooting common issues with a candle warmer lamp helps keep it working well. Problems may occur during use. Fixing them quickly saves time and effort. Understanding simple solutions improves your experience.
Lamp Not Heating
Check if the lamp is plugged in properly. Sometimes, the power cord is loose or not connected. Test the outlet with another device to confirm power. If the lamp still does not heat, the bulb might be burnt out. Replace the bulb with the correct wattage. Avoid using bulbs with wrong power as it may damage the lamp. Make sure the lamp switch is turned on. If the problem continues, inspect the lamp’s wiring for damage. Do not use the lamp if wires look worn or broken. Contact a professional for repairs to avoid risk.
Uneven Wax Melting
Uneven wax melting can happen if the wax is old or low quality. Use fresh, high-quality wax for best results. Ensure the wax container sits flat on the warmer surface. A tilted container causes uneven heat distribution. Clean the warmer plate before use to remove old wax residue. Thick or large wax pieces take longer to melt evenly. Break wax into smaller chunks for faster melting. Avoid overfilling the container to prevent spills. Position the lamp in a draft-free area. Air movement can cool parts of the wax unevenly.
Benefits Of Candle Warmer Lamps
Candle warmer lamps offer a safe and simple way to enjoy candle scents without lighting a flame. They gently melt wax using heat, releasing fragrance into the air. These lamps bring many benefits to your home environment.
Using a candle warmer lamp improves safety and health. It reduces fire risks by removing open flames. You avoid burns and smoke that candles can produce. The heat is steady, which helps spread the scent evenly.
Besides safety, candle warmer lamps create a warm and cozy atmosphere. The soft light adds charm to any room. The steady glow helps relax your mind after a long day. It also helps fill your space with pleasant aromas without smoke or soot.
Health And Safety Advantages
Candle warmer lamps do not produce smoke or soot. This keeps indoor air cleaner and safer to breathe. They lower the chance of accidental fires. No flames mean no burns or hot wax spills. These lamps are perfect for homes with children or pets.
Enhancing Ambiance
These lamps add a soft, inviting glow to rooms. They create a calm and peaceful mood. The gentle heat helps spread fragrances slowly. This makes your space smell nice for longer periods. Candle warmer lamps work well in living rooms or bedrooms.
Frequently Asked Questions
What Materials Do I Need To Make A Candle Warmer Lamp?
You need a lamp base, a heat-resistant plate, a bulb, and electrical components. Optional items include decorative covers and adhesives for assembly. Always choose materials that can withstand heat safely for effective candle warming.
How Does A Candle Warmer Lamp Work?
A candle warmer lamp uses a low-watt bulb to gently heat the candle wax. This melts the wax evenly without an open flame, releasing fragrance safely and extending candle life while reducing fire hazards.
Can I Use Any Bulb For Candle Warmer Lamps?
No, use a low-watt incandescent or LED bulb designed for warmth. High-watt bulbs can overheat, damaging the candle or causing safety risks. Check bulb specifications to match your lamp’s heat requirements.
Is It Safe To Leave A Candle Warmer Lamp On Overnight?
It is generally safer than open flames but avoid leaving it on unattended for long hours. Turn off the lamp before sleeping to prevent overheating and ensure safety.
Conclusion
Making a candle warmer lamp is simple and fun. You only need a few tools and materials. This project helps you enjoy candle scents safely. No flames, no smoke, just gentle heat. It also saves your candles for longer use.
Try creating one yourself to add warmth to your space. Small steps bring big comfort. Enjoy the cozy light and fragrance every day. A perfect way to relax and brighten your room. Give it a try and see how easy it can be!